Creating Christmas Note Cards With Press Plates
Hello crafters! Today I have some card designs to share with you featuring two awesome press plate sets from Spellbinders “Home For The Holiday” collection. I love making Christmas note cards, and I hope this post inspires you to get your holidays production going!
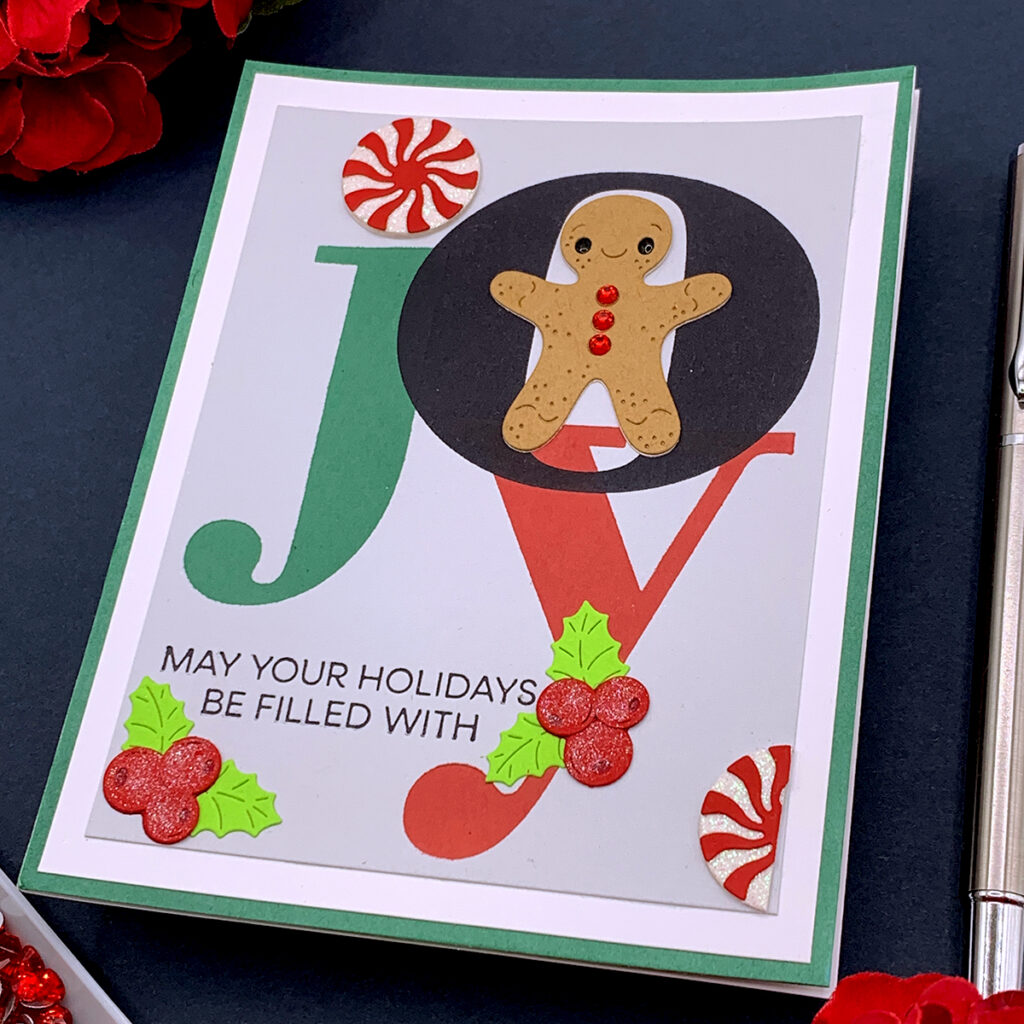
Creating With Color Mix Joy Pres Plate

- Letterpress a panel with Spellbinders “Color Mix Joy Registration” press plates. Use Spellbinders A2 cotton card panels in the colors “Porcelain” and/or “Pebble”. Use any color of ink you like. I used Ranger Archival ink pads in the colors Betterpress Black, Library Green and Vermillion for the red and green note cards and Vibrant Fuschia and Pink Peony for the pink note cards.
- Trim the letterpressed panels to 3 ¾” wide x 5 ¾” long, and adhere it to a white panel that measures 4 ¼” wide x 5 ½” tall . Before doing so, make sure to go over the edges of the white panel with any ink pad color, to make it match the colors of the letterpressed “Joy”.
- You can use the letterpressed panel as it is or add die cut elements to make it more fun, or to hide any ink stains like I did, if that happens to you too! You can cut out gingerbread cookies, peppermints and berries with metal plates included in the Spellbinders “Christmas Wonder” die set.
- Decorate the gingerbread cookies with red flat back rhinestone and go over the berries with a shimmer pen for some sparkle!
- Pair the note card with a kraft color envelope, and decorated the flap with a die cut bow created with metal plates included in the Spellbinders “Christmas Wreath Add-on” die set.
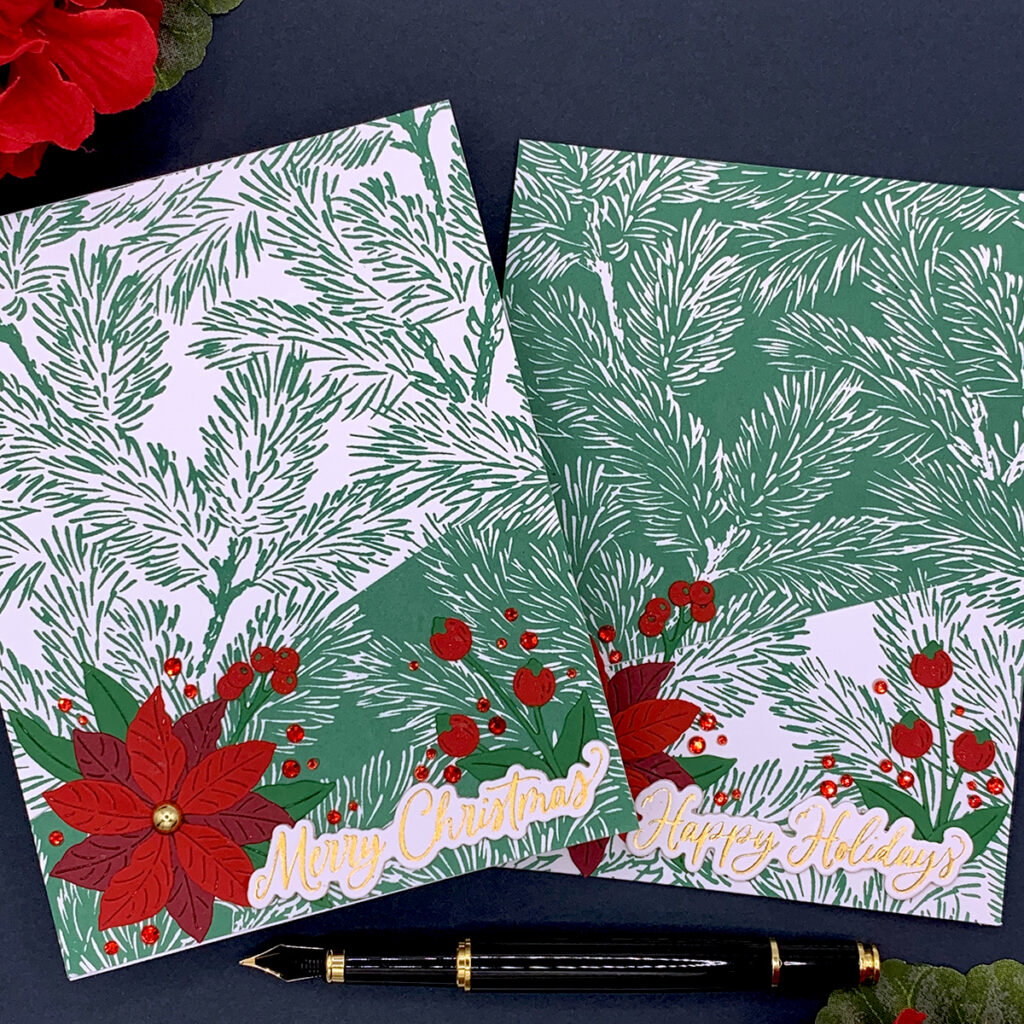
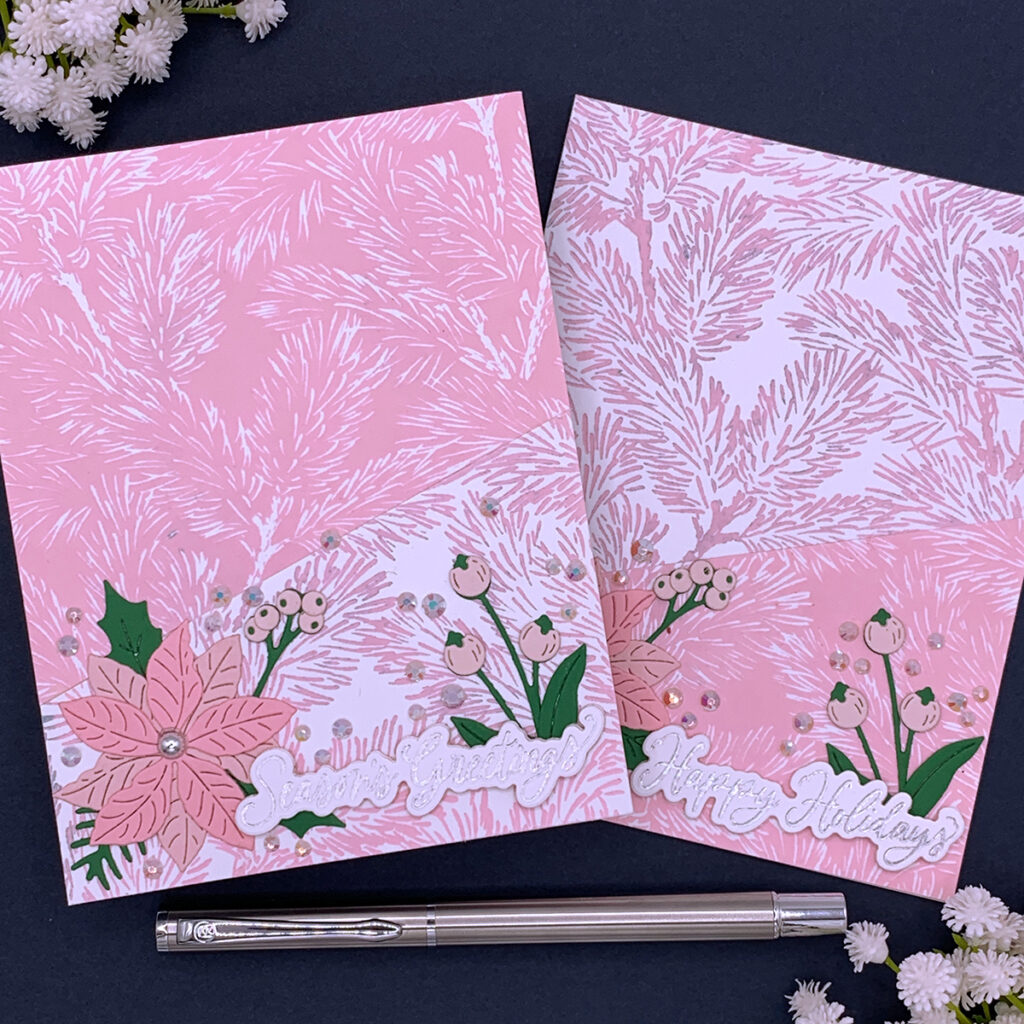
Creating With Night & Day Pines Press Plates
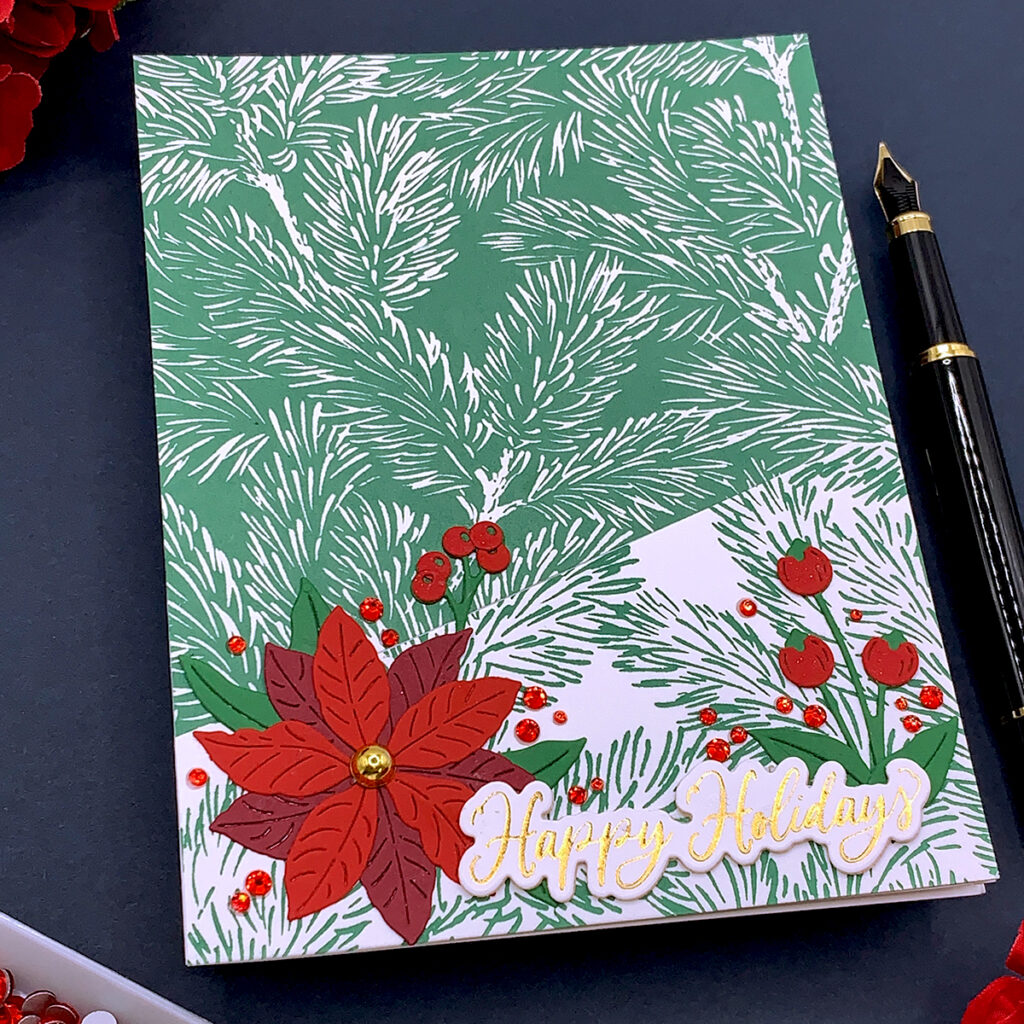

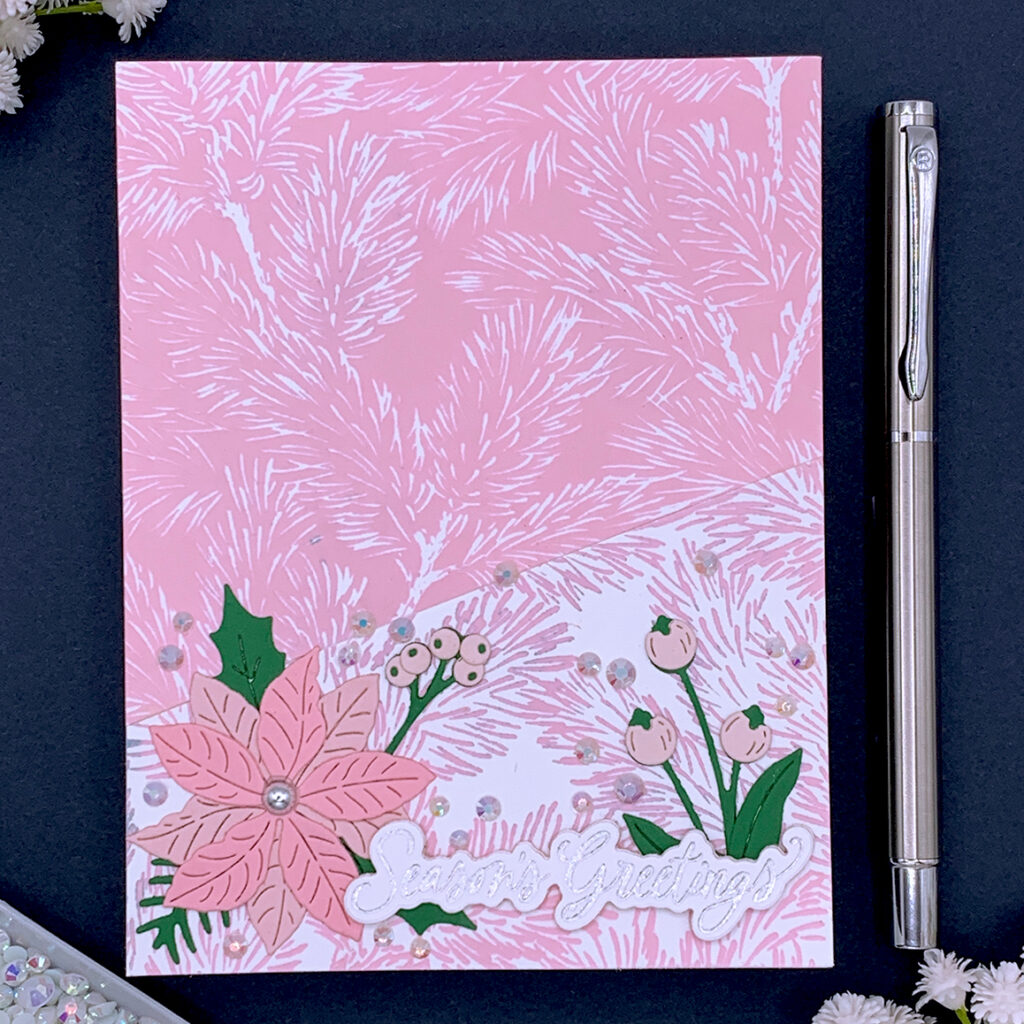
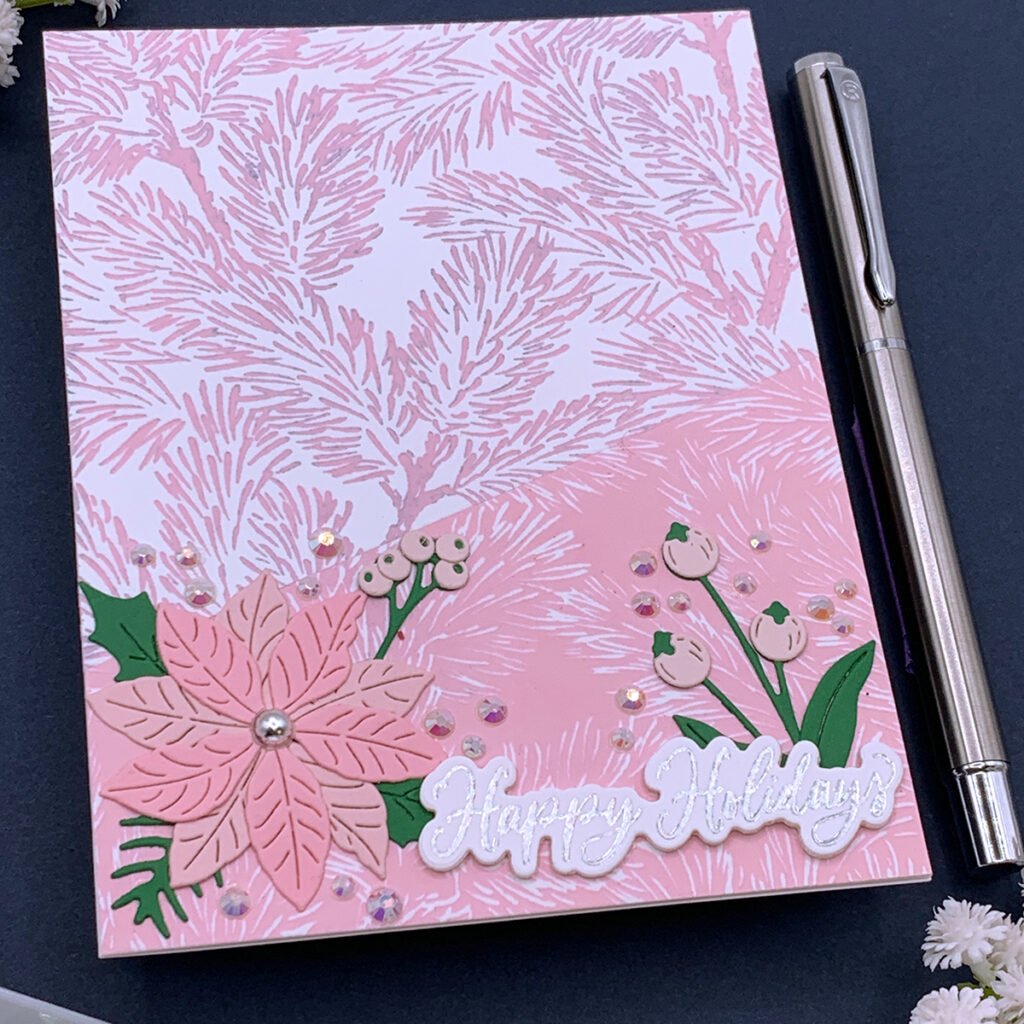
- Letterpress two Spellbinders A2 cotton card panels in the color “Porcelain” . Use the two plates included in the Spellbinders “Night & Day Pines” press plate set.
- Line up both panels and cut them in half, at once, on a diagonal so you can cut out both panels in the same spot. This will allow you to have a continuous pattern when you adhere two different panels together.
- Adhere the 4 letterpressed pieces to the front of two A2 size note cards. Mix and match the different pieces so you can have both results in one note card (night and day effect).
- Hot foil and die cut the sentiment with the Spellbinders “Sending Joy Sentiments” press plate and die set. I used golden foil for the white and green note cards and silver holographic foil for the pink and white note cards.
- Cut out poinsettias and christmas berries with metal plates included in the Spellbinders “Skating Into The Holidays” die set.
- Embellish each note card with flat back gems.
- Pair the note cards with kraft color envelopes, and decorated each flap with a die cut bow created with metal plates included in the Spellbinders “Build A Wreath” die set.
I hope you felt inspired and some of this information was helpful to you! If you create something inspired by this post, make sure to tag me on instagram! Thank you for visiting and happy crafting!
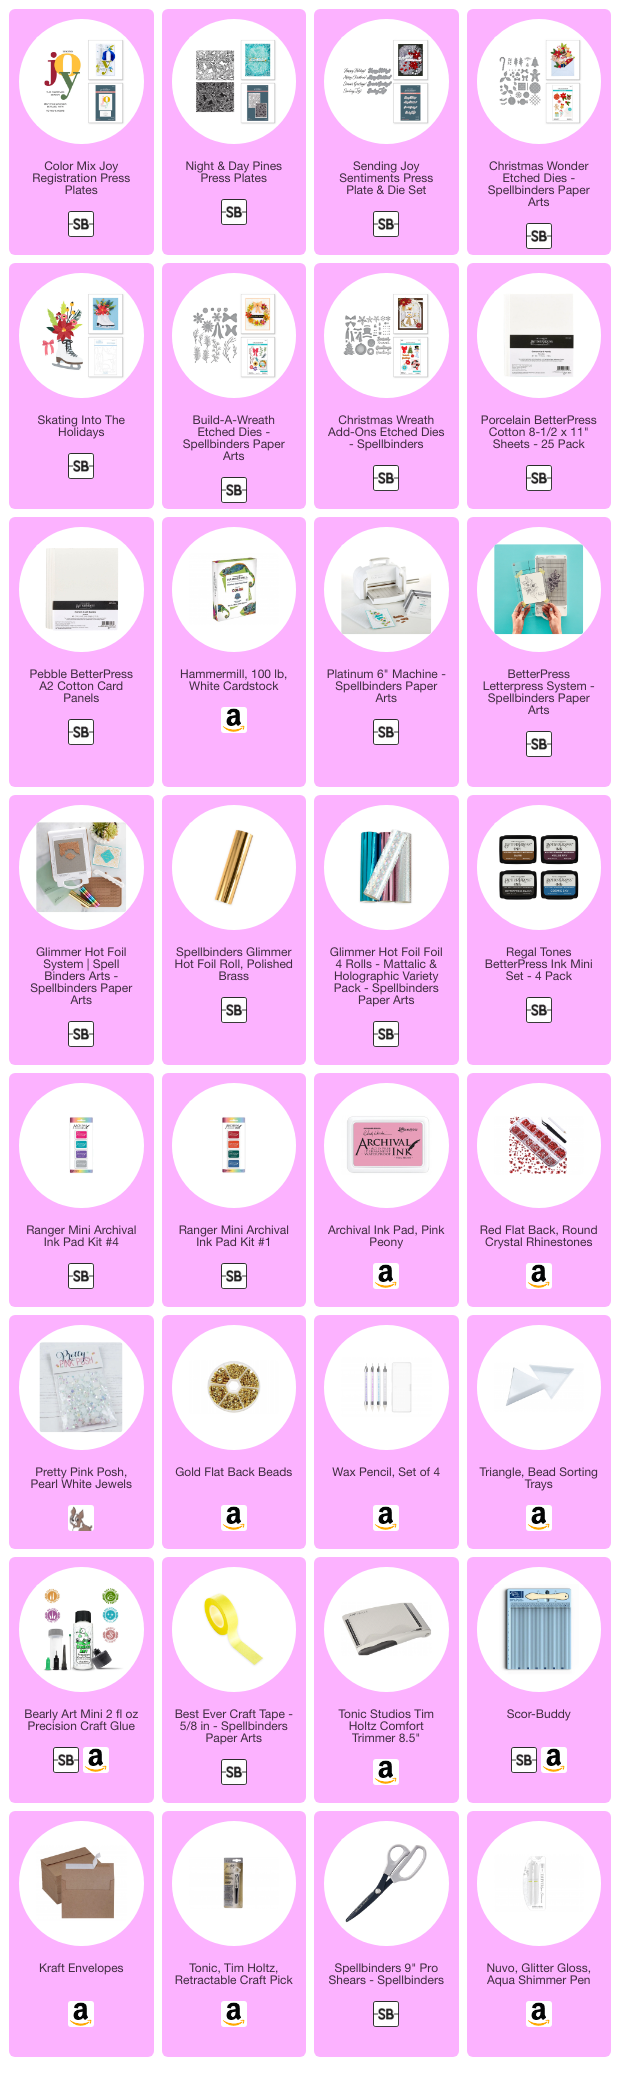
SUPPLIES
I have listed below all of the products that I used to make today’s note cards. Compensated affiliate links may be used at no cost to you, and I only use and recommend products that I love! As always, thank you for your support!
-
-
8 months
Tagged Spellbinders October 2025 Clubs