See-Through Note Cards!
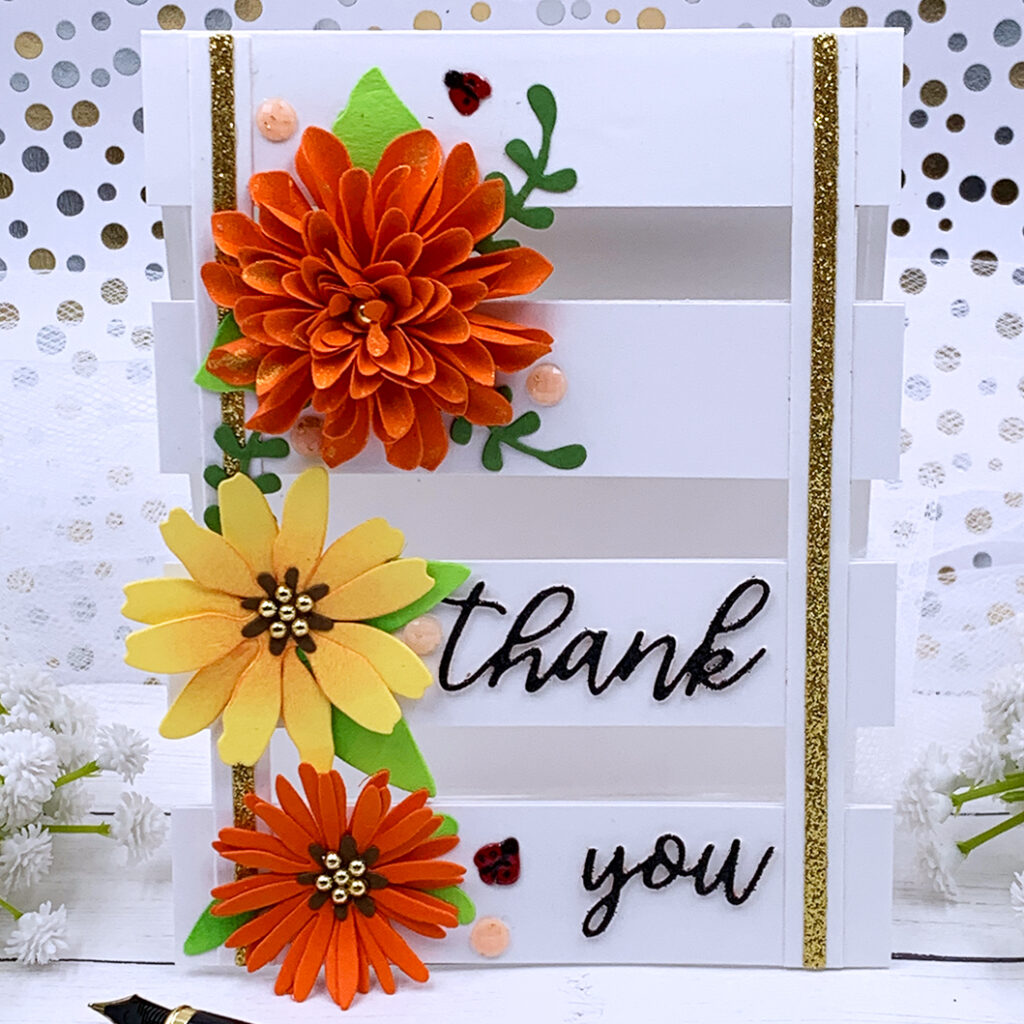

Hello crafters! Today I’m sharing note card ideas featuring a see through- front panel with beautiful blooms! These note cards are A2 size top folding; however, because these die cut blooms have a lot of dimension we will need to place this type of note card inside a box instead of an envelope!
I began by creating these beautiful blooms using three die sets from Spellbinders, The Birds & Bees Garden Collection: Aster, Black Eyed Susan, and Pom Pom Dahlia and Ladybugs. I used colored cardstock to cut the blooms and leaves, then I added some shading to each die cut with a blending brush and ink pads in the same color, but slightly darker.
To curl each petal of the pom pom dahlia flowers I used Ranger retractable craft pick! You can actually use any object with a fine long tip such as a pair of tweezers! All we need to do is place this long pointy object right in the center of a petal, then using your fingers you will need to roll the right side of the petal to the left, over the fine tip tool. Then roll the left side of the petal to the right creating these tubes that we can later adjust and make it as wide or as narrow as we prefer! There are numbers engraved on each pom pom dahlia metal plate to indicate how many pieces we will need to cut out, and I did this rolling technique on each layer!
To adhere these die cuts I used the Bearly Art Glue, and to make the die cut ladybugs glossy, I applied Ranger Glossy Accents on top. For embellishments I used the Spellbinders Gold Flecked Gemstones, I love this one! For the sentiment I used the Spellbinders “Serenade Sentiments” die set. I cut out each word three times for dimension using white cardstock scraps, then I top it with a black glitter cardstock die cut!
For the leaves I used the metal plates included in each set along with a die cut branch from an older set by Spellbinders! Since these blooms are absolutely gorgeous, I wanted to create a really cool panel for them, which led me to actually creating a note card with a see-through front panel!
To create the card base I began by trimming 4 ½” off of the front of an A2 size top folding note card (5 ½” x 4 ¼”). Then, I cut this 4 ½” piece into 4 strips of 1” that I will use later. After that I adhered a ¼” wide strip to the right and left side of the 1” flap left on my card base. I trimmed these vertical strips to 5 ½”’ long and they will serve as a base for my 1” pieces. I adhered three 1” strips on top of the two vertical ones. To make this front panel sturdy I stacked another layer of the vertical and horizontal strips before adding the die cut flowers and sentiments. I also added an ⅛” wide vertical glitter cardstock strips for some sparkle!
Since the dahlia pom pom flowers have a lot of dimension and this note card doesn’t fit a regular A2 envelope, I decided to create an A2 size box using an 8” by 10 ⅞” piece of cardstock, and you can click here for instructions on how to create this box!
I love how these note cards turned out and I hope you felt inspired! At the end of this post there is a list of all supplies used to make these cards. Thank you for visiting today and happy crafting!
SUPPLIES
I have listed below all of the products that I used to make today’s note cards (if they are still available). Compensated affiliate links may be used at no cost to you, and I only use and recommend products that I love! As always, thank you for your support!