New Ways To Use Cardstock Strips!


Hello crafty friends! Today I have lots of card designs to share with you that I created using cardstock strips! As most card makers I have a lot of cardstock scraps, and once in a while I like to cut them into strips and create panels that I can use on my note cards.
I love having cardstock strips handy since I’m always using it to either create panels for my note cards or adding them to the flap of my envelopes to make the envelopes match the note cards that will go inside. This is a great way of using your leftover pieces of cardstock and not letting anything go to waste!


I have shared a post in the past with card examples created with cardstock strips in many different widths (you can click here to check it out); however, for today’s note cards we will only use strips that are ¾” wide.

To cut my strips I like to use the Simon Says stamp “Strips 1” and “Strips 2” die sets. You can simply use a paper trimmer to cut out your cardstock strips, that will definitely be faster, and you will still achieve great results! Nonetheless, by using metal plates to cut out the cardstock strips we get a more finished look as it rounds the edges of the strips of cardstock. The difference is very subtle but I think it is worth taking the extra time to cut out the cardstock using a metal die!
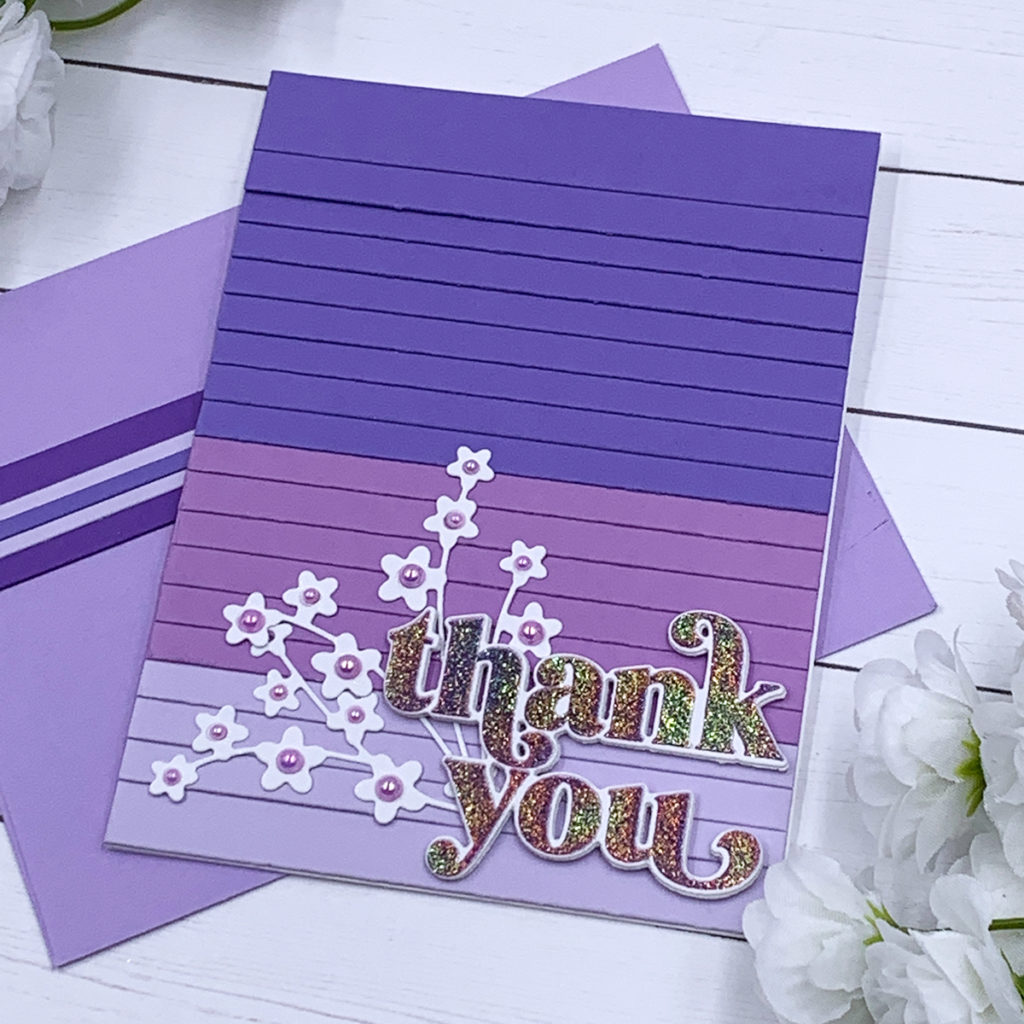
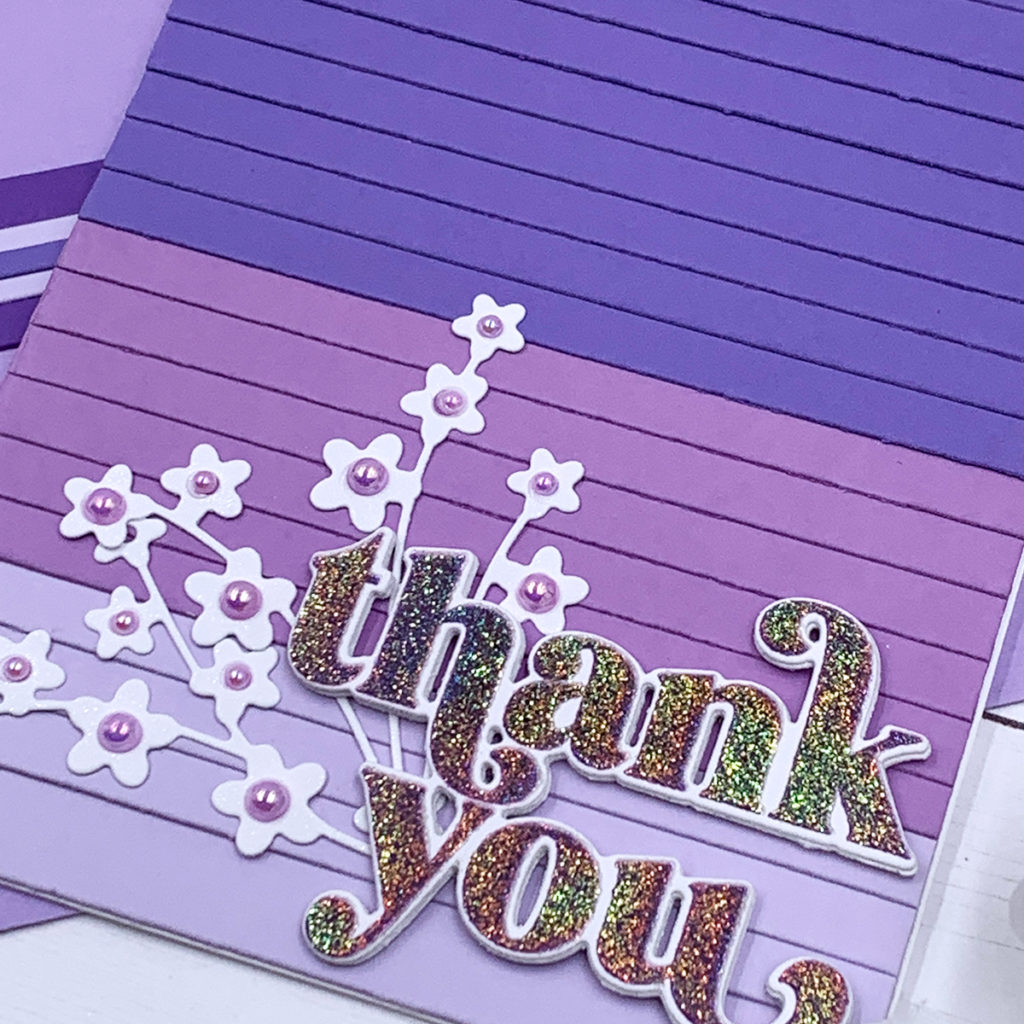
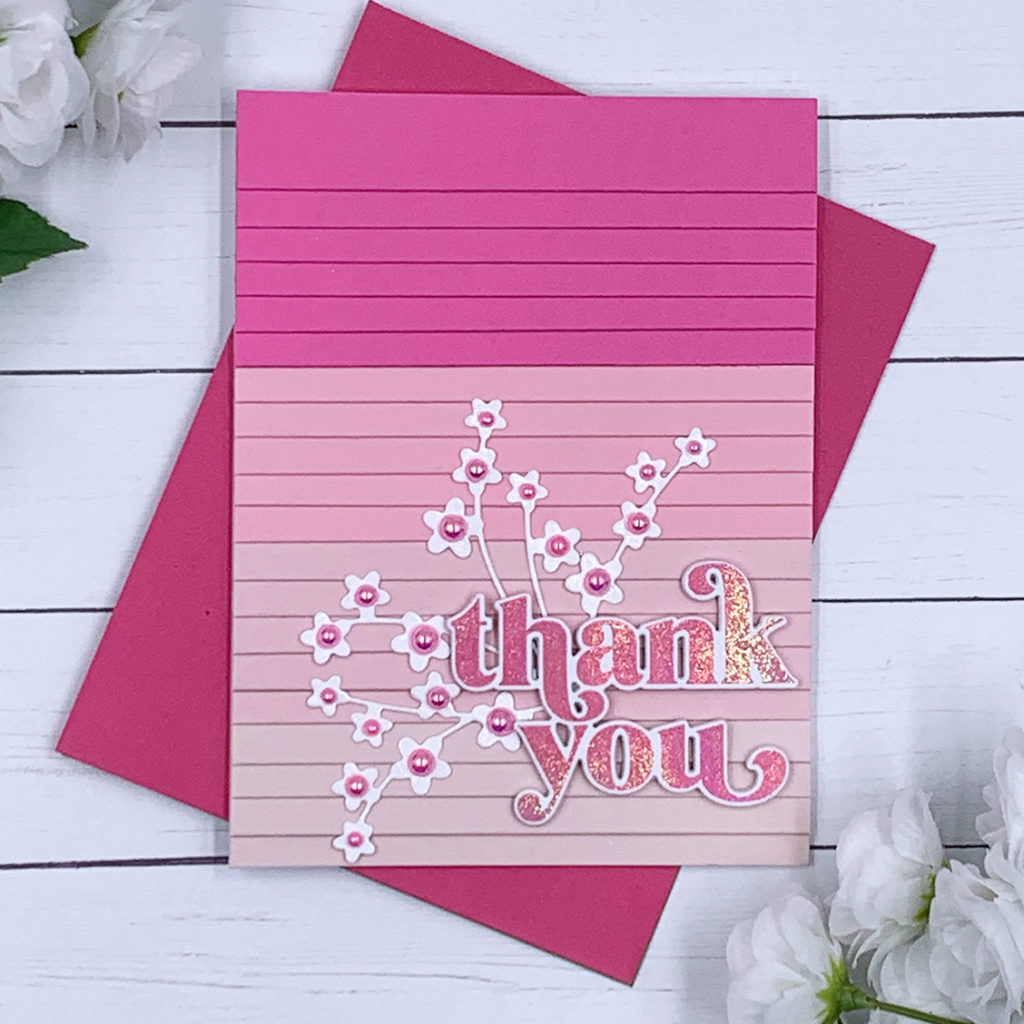
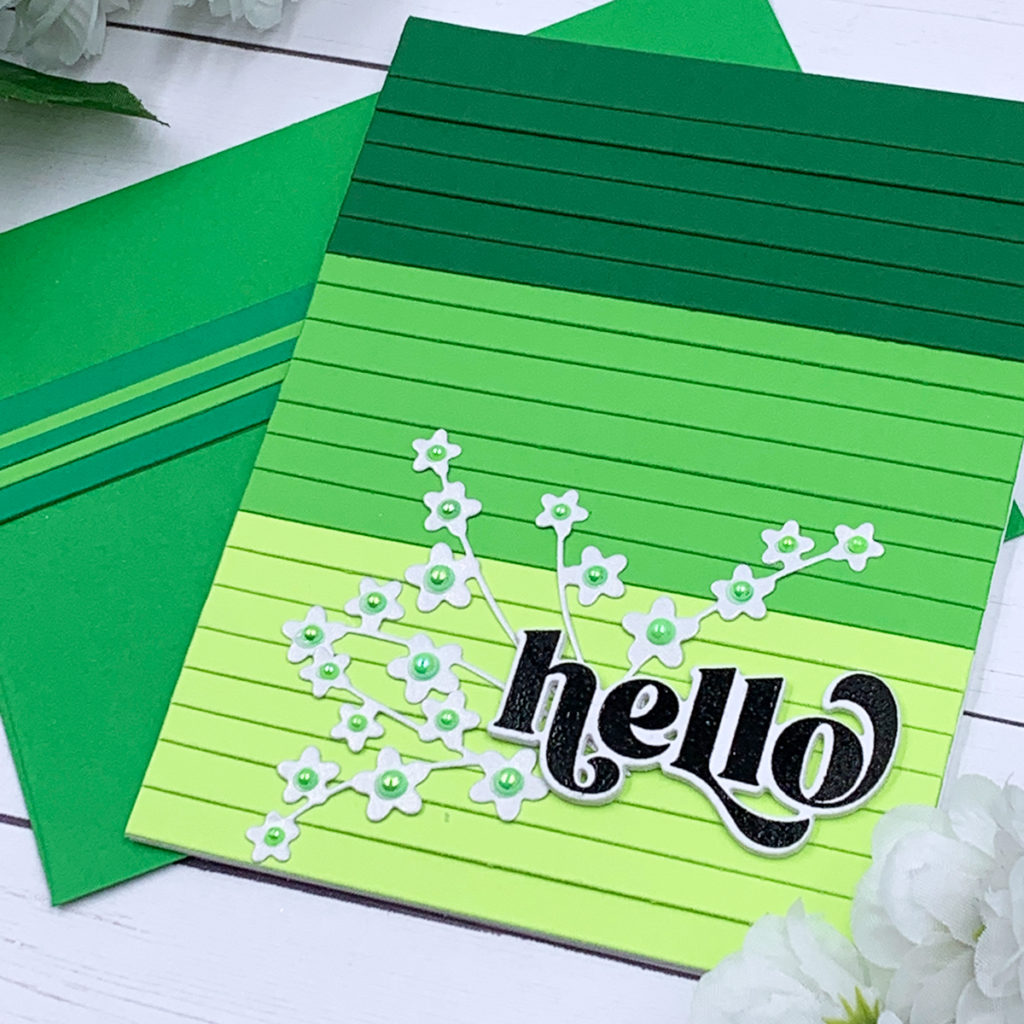
To create this letter board look I overlapped the cardstockstrips a little and I only applied liquid adhesive to one edge of each strip. I adhered these strips to 4 ¼” x 5 ½” pieces of graph paper. By using graph paper it allowed me to perfectly align my cardstock strips! I feel that for this design the heavier the cardstock the better so it gives a bigger shadow effect as we overlap the strips, and most of my scraps were from 110 lb cardstock.
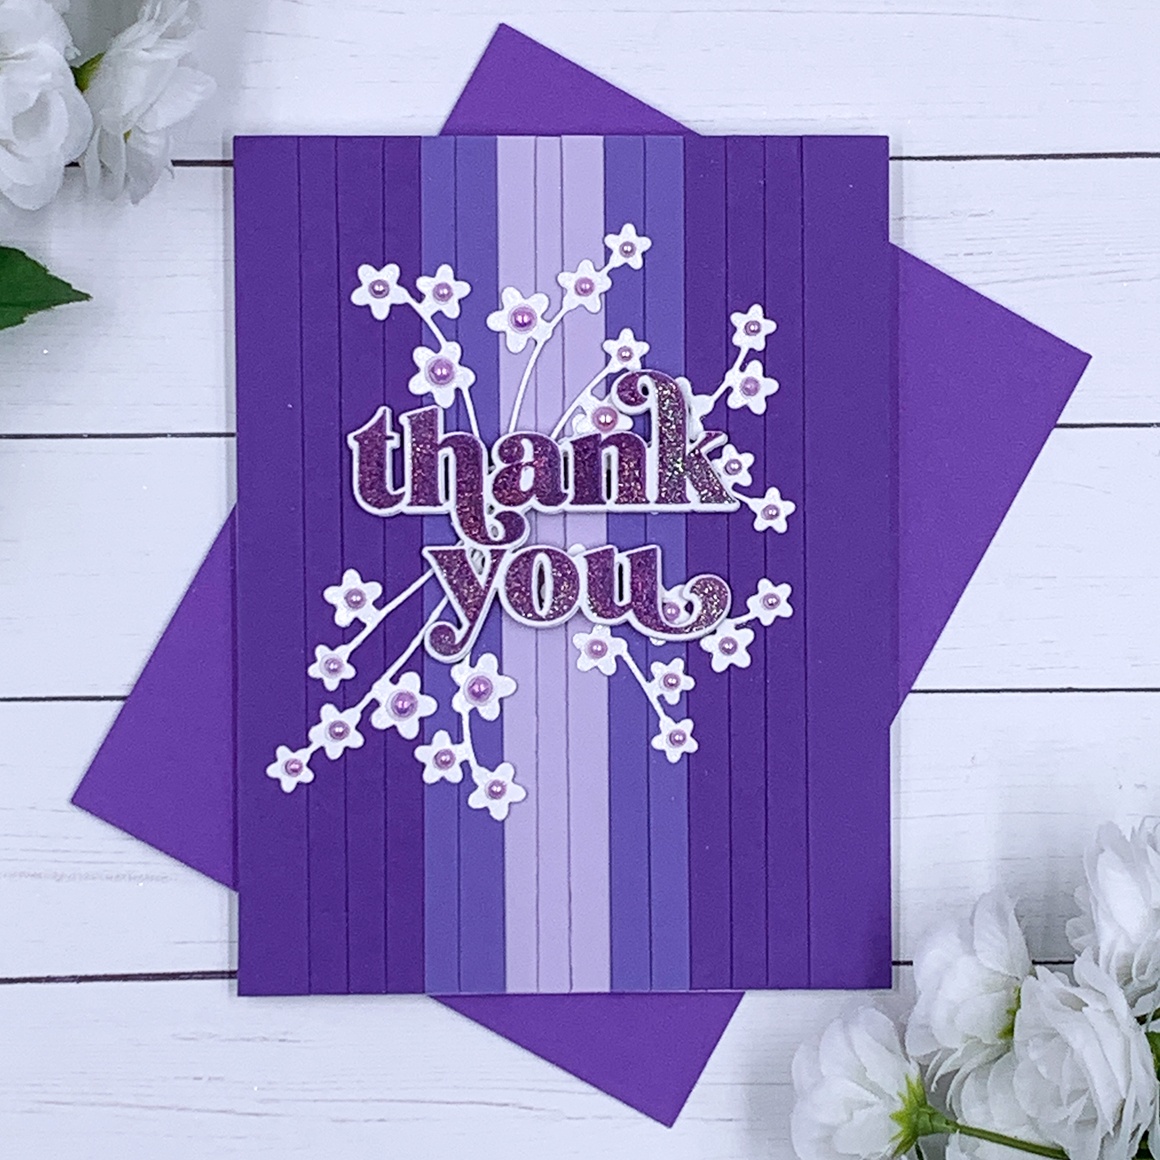
After I created a few letter board panels, I decided to change the orientation of the cardstock strips to create different looks! The purple note card below is one of my favorites! I started by adding a vertical strip in the center and then I overlapped the cardstock strips from the right towards the center and then from the left towards the center of this panel! Such a fun design and I will definitely be creating more note cards like this one!
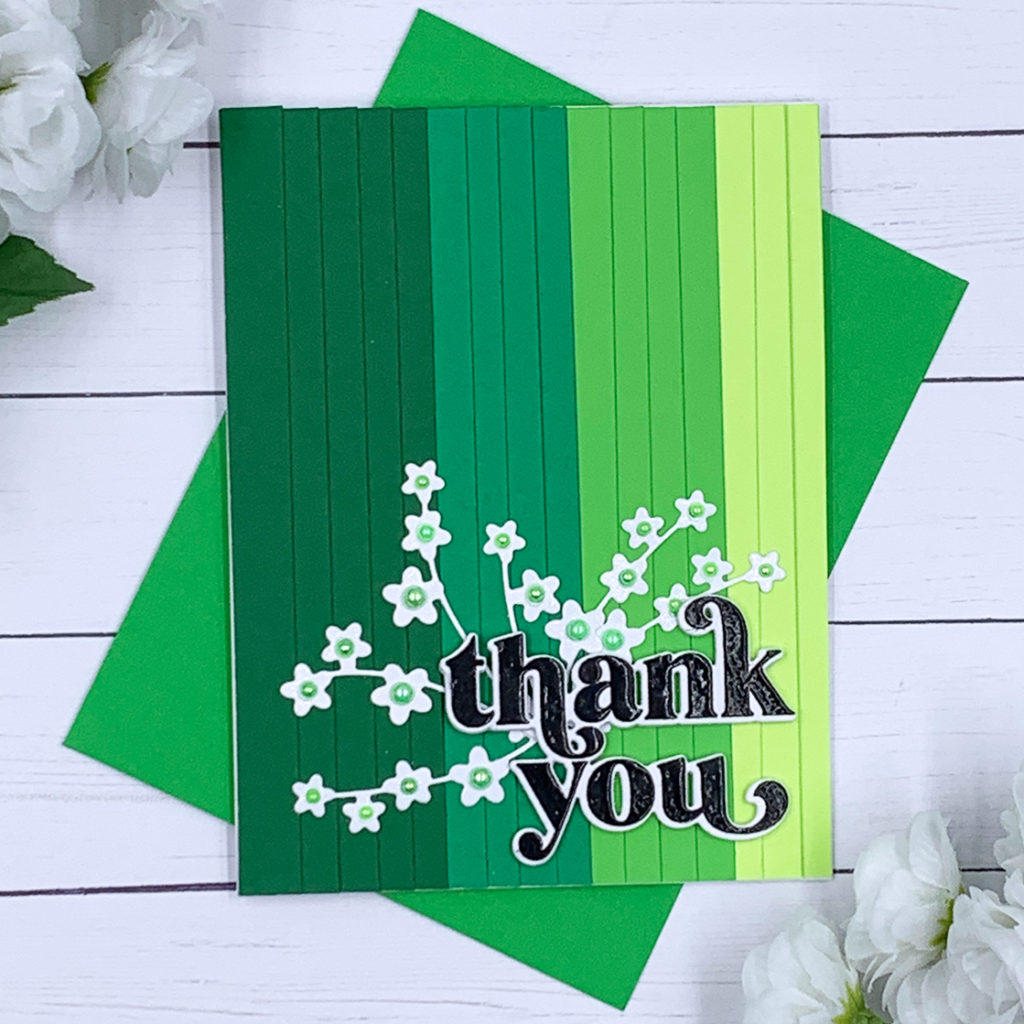
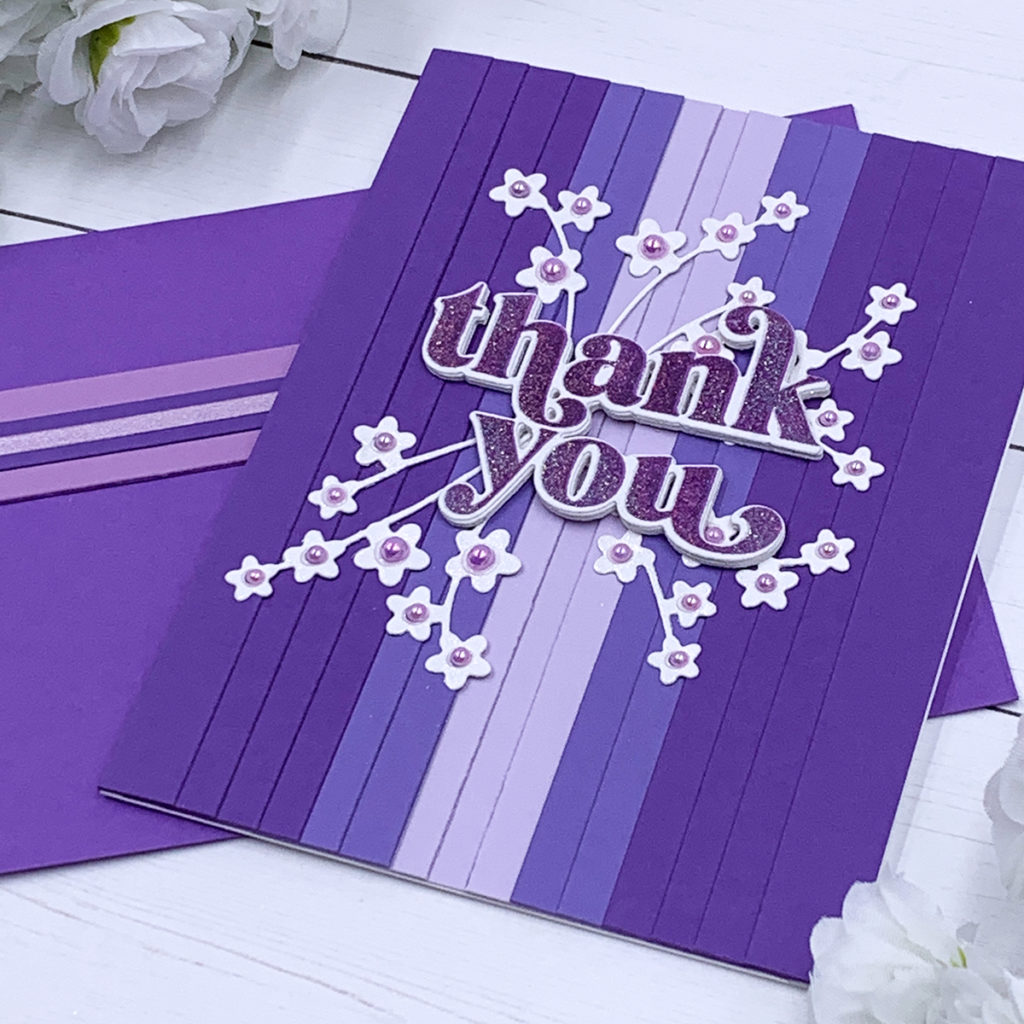

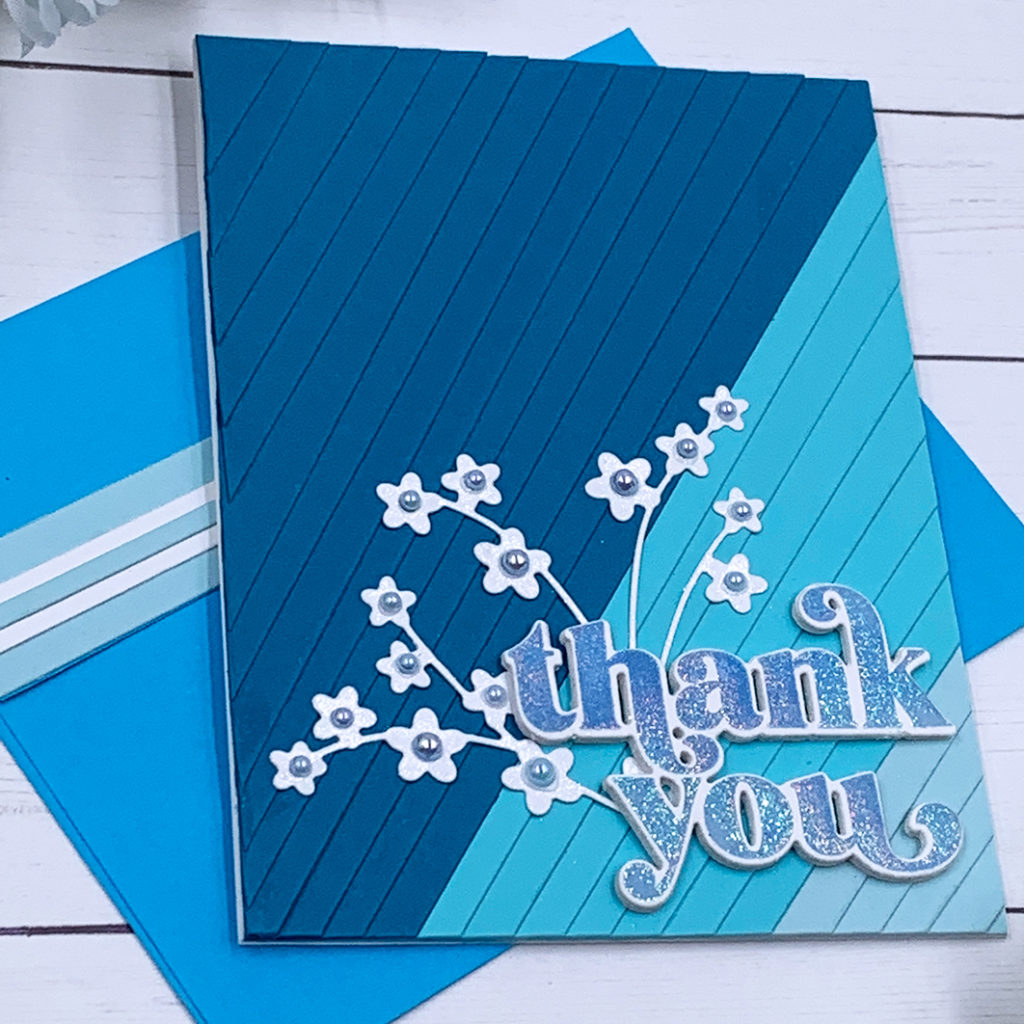
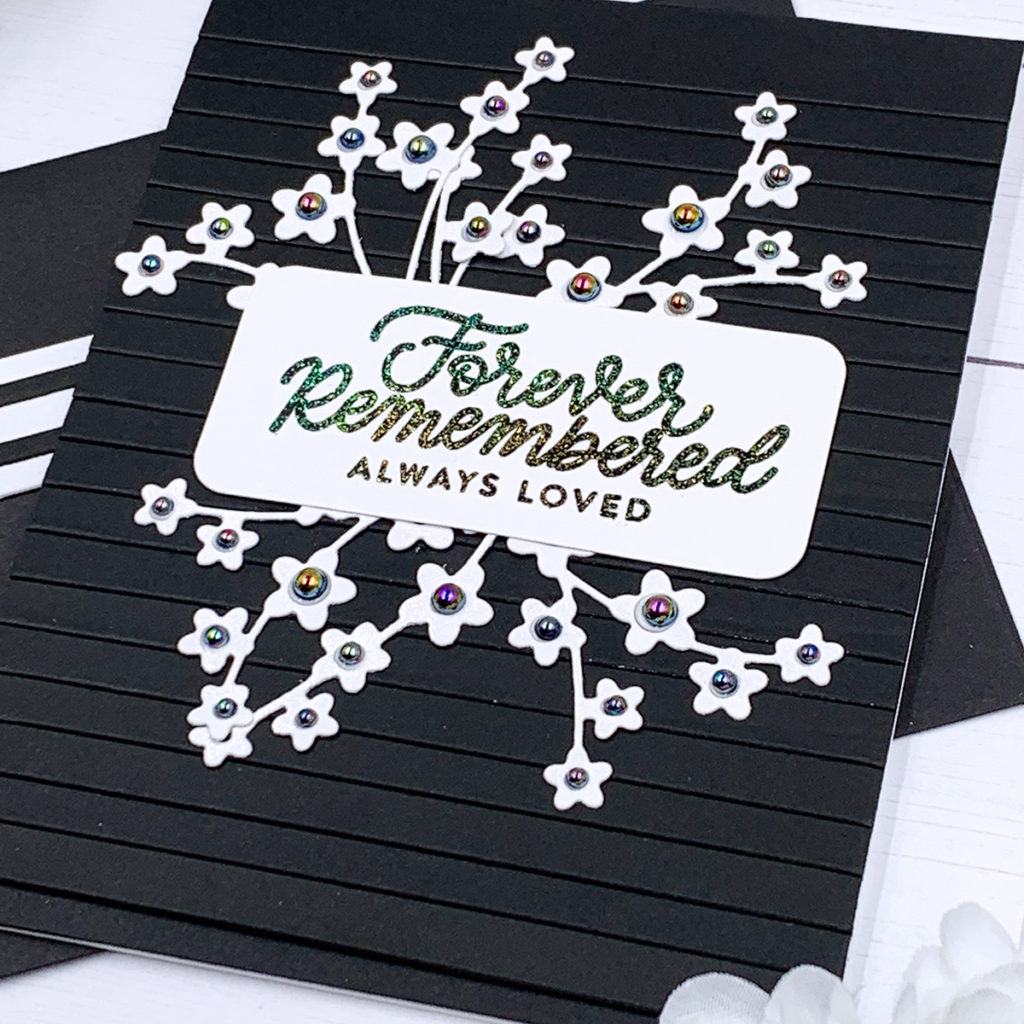
For the sentiment on most of these notecards I add stacked die cuts using a stamp and die set by The Greetery Stamps (I’m crazy about this one!). However, for this black sympathy note card, I used a stamp set By Simon Says Stamp. To cut out the cherry blossom I use a die set by Memory Box, and as a finishing touch I added flat back beads to the center of these flowers! And of course I created matching envelopes by simply adding cardstock strips to the flap of each white envelope!

Thank you so much for visiting my blog today and I hope you felt inspired! At the end of this post there is a list of all supplies used to make these cards. Have a wonderful day and happy crafting!
SUPPLIES
I have listed below all of the products that I used to make today’s note cards (if they are still available). Compensated affiliate links may be used at no cost to you. All products were personally purchased, and I only recommend products that I love! As always, thank you for your support!
Comments
Thx