Hydrangea Note Cards
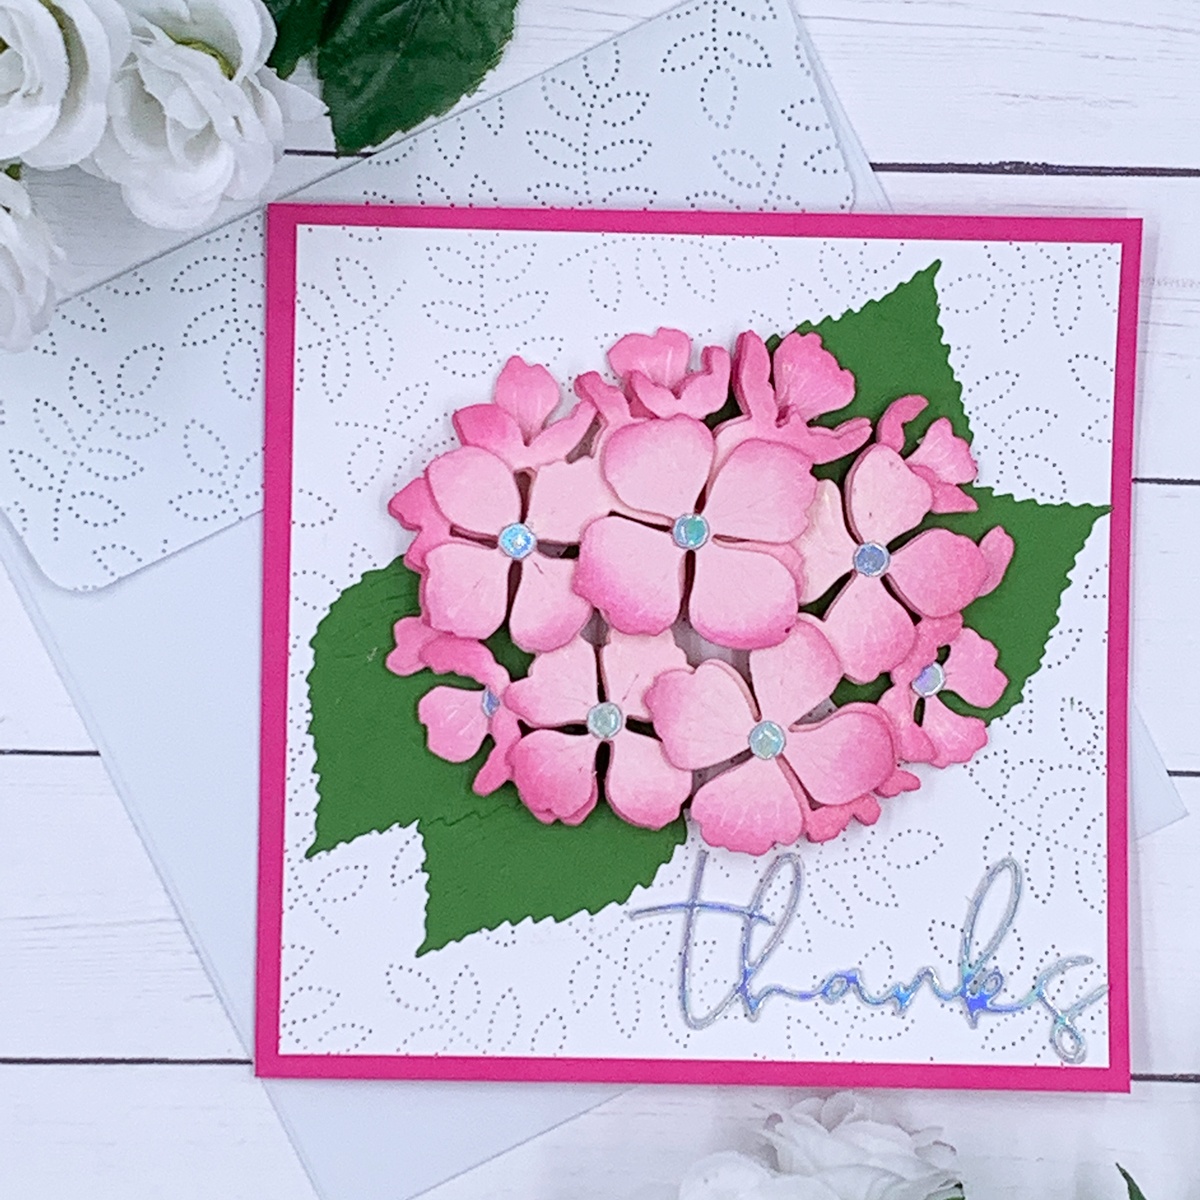

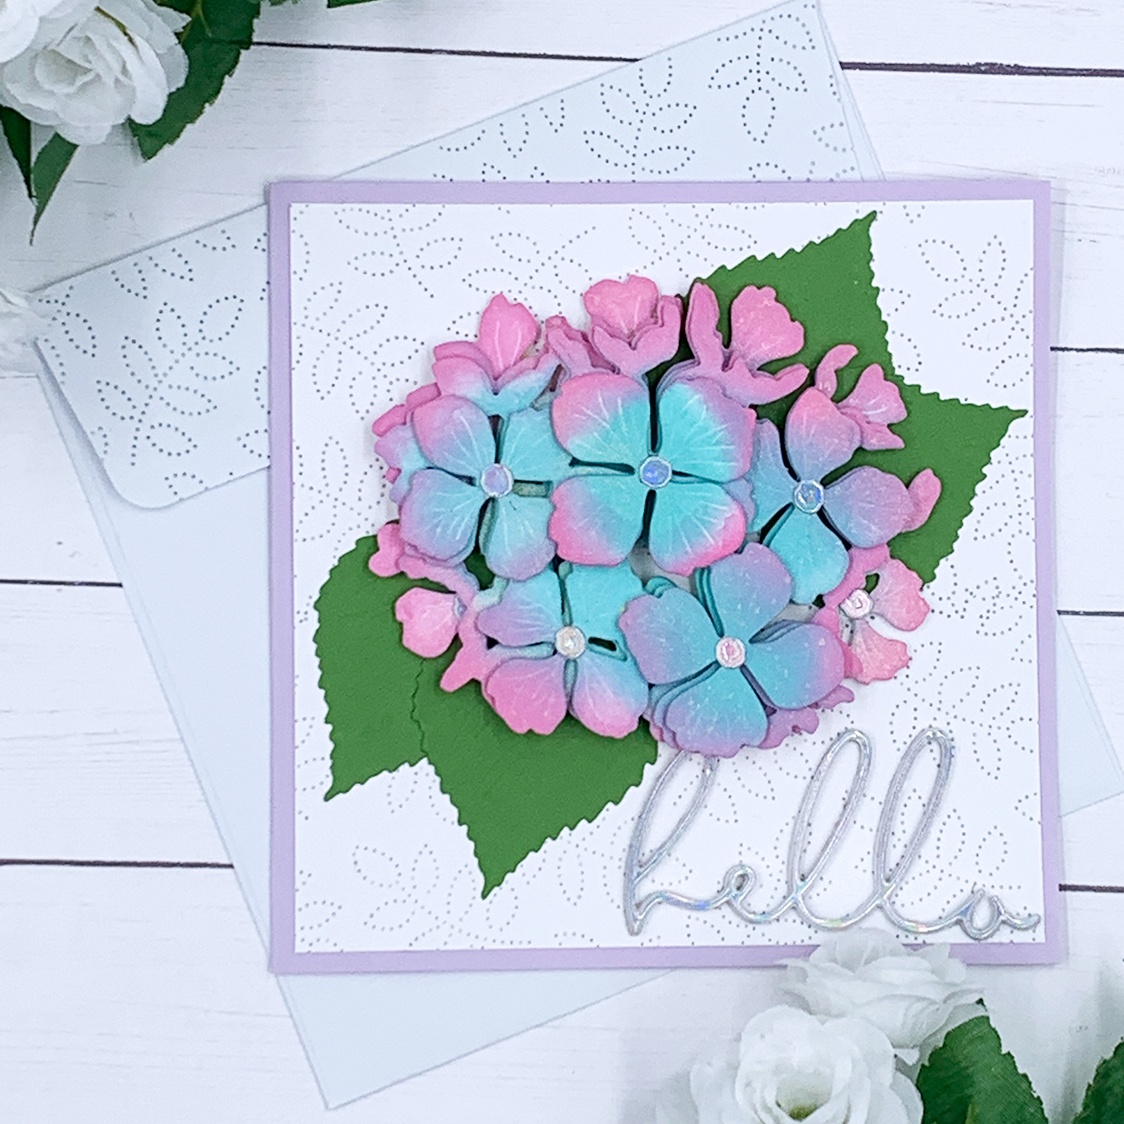
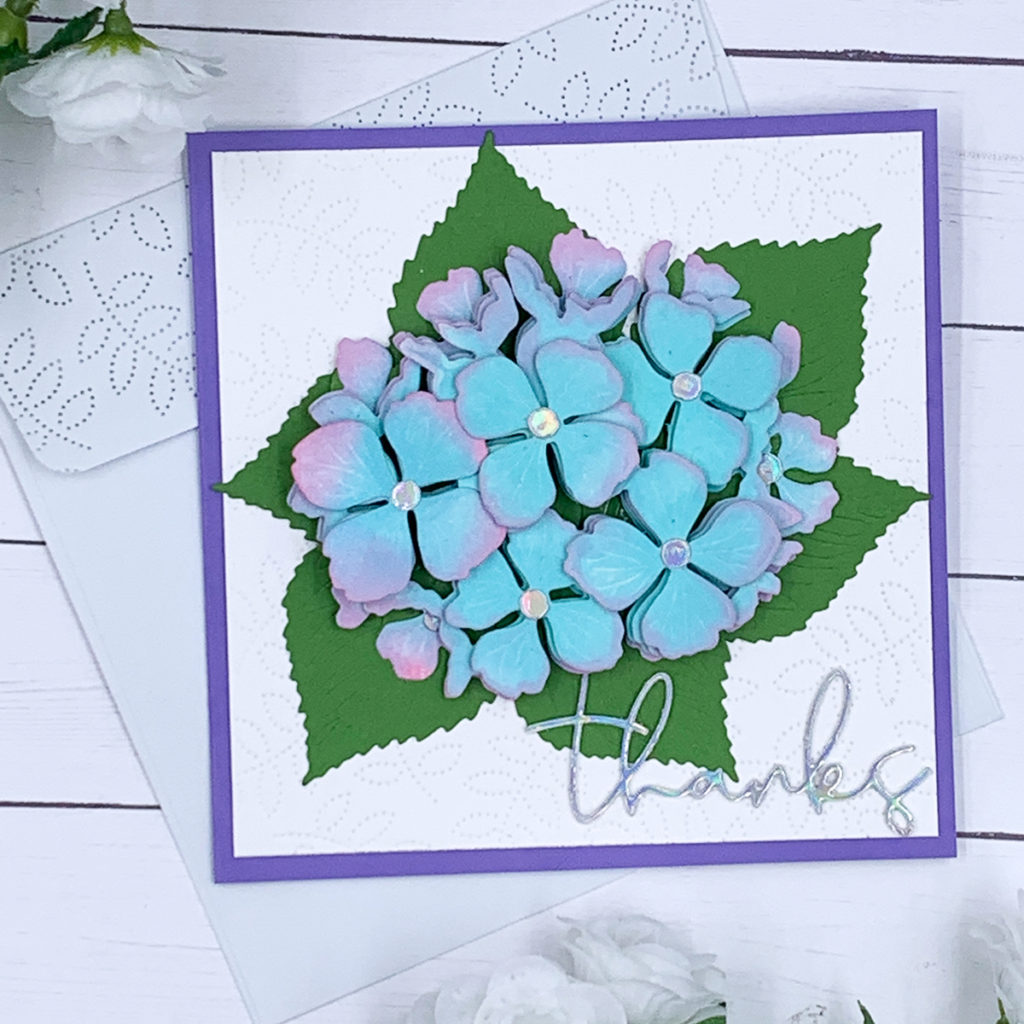
Hi everyone! Today I’m sharing square shaped note cards with a die cut hydrangea at the front panel. These note cards measure 5” x 5”. Since the cardstock that I chose for the base is not heavy weight, I added a heavy weight white panel to the front and another on inside these note cards to make them heavy weight .
Making flimsy note cards is definitely not a good idea! However, if you do not have heavy weight cardstock in the color that you want for the base of your note cards, I find that by adding white panels to the inside of the notecards (where you can write a message) or even to the front is a great trick for making your medium weight cardstock work as the base for your cards!

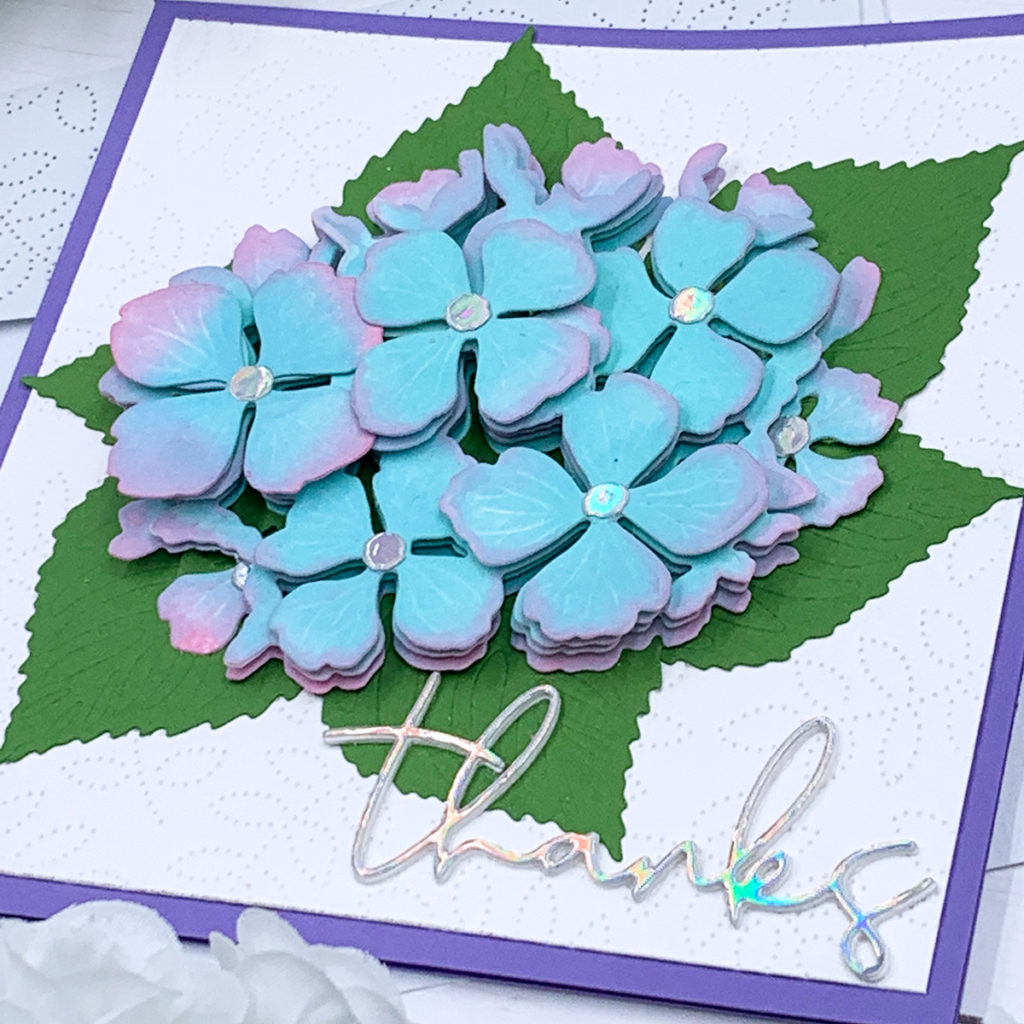
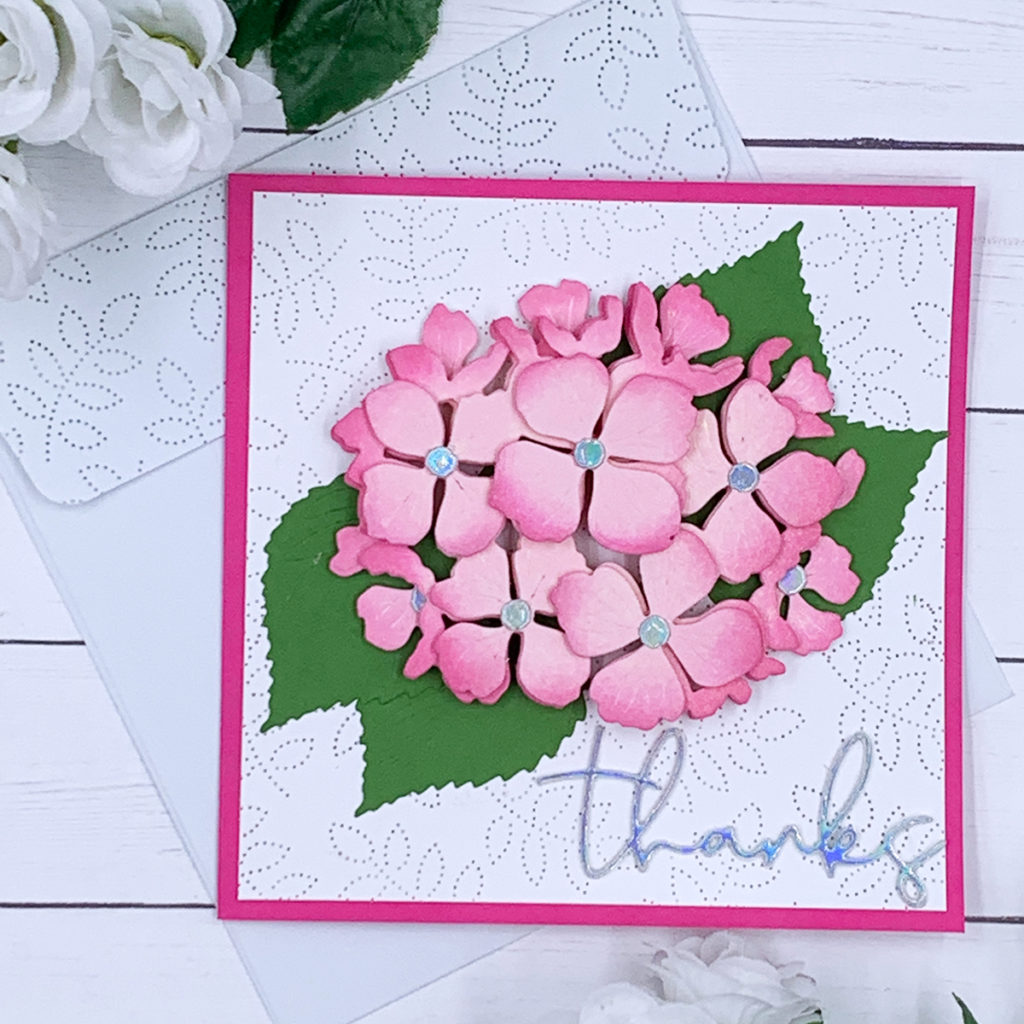
To die cut these beautiful hydrangeas, I used the Honey Bee Stamps “Lovely Layers: Hydrangea” die set. And, to cut the sentiments, I also used another set by Honey Bee Stamps, named “Slimline Sentiments: Eyelet”. I stacked 4 die cuts for each sentiment to make them stand out.

I die cut the hydrangeas out of heavyweight white cardstock, and I added color to these flowers by using Ranger Distress Oxide inks. Following are the Distress Oxide ink combinations for each hydrangea:
1- Kitsch Flamingo + Salvaged Patina (Lilac base note card)
2- Spun Sugar + Picked Raspberry (pink base note card)
3-Kitsch Flamingo + Squeezed Lemonade (yellow base note card)
4- Salvaged Patina + Picked Raspberry (purple base note card)
For this yellow thank you note card in Portuguese, I use the Spellbinders “Simply Perfect Alphabet” die set to make the word “Obrigada”.
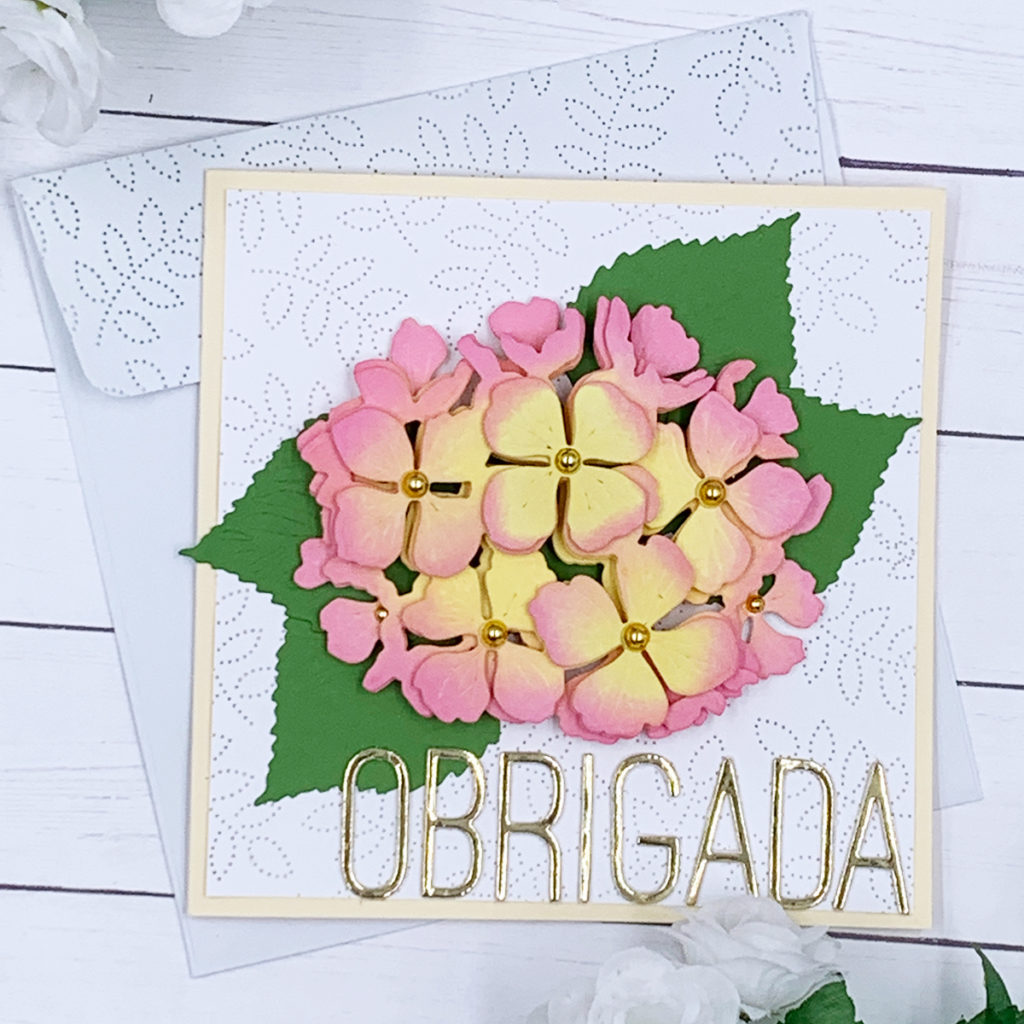
For dimension, I added adhesive foam tape to the back of each layer of the hydrangeas!
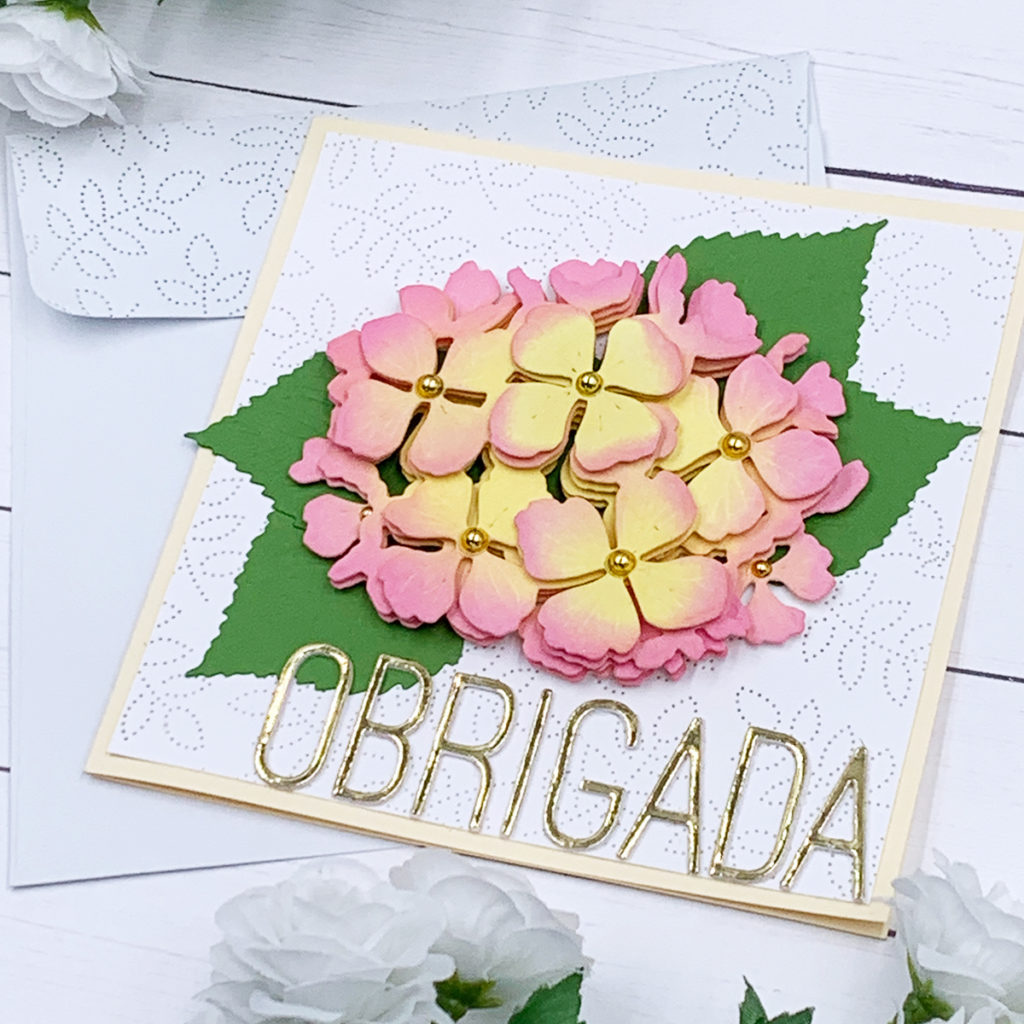
To add some subtle interest to the white panels, I used a piercing plate by Honey Bee Stamps as well! It is the “Spring Leaves A2 Pierced Cover Plate”. I love this one! And, since it does not cut the cardstock at all (it only leaves piercing patterns) I also used it on the flap of each envelope to make them match!

To make the hydrangeas shiny I sprayed gold shimmer on all of the layers of the layers of each flower. Unfortunately the gold shimmer was not captured in these pictures, but you can click here to watch a video where I show the process for creating these notecards, and get a closer look at each one of them! At the end of this post there is a list of all supplies used today. Thank you so much for visiting my blog and happy crafting!
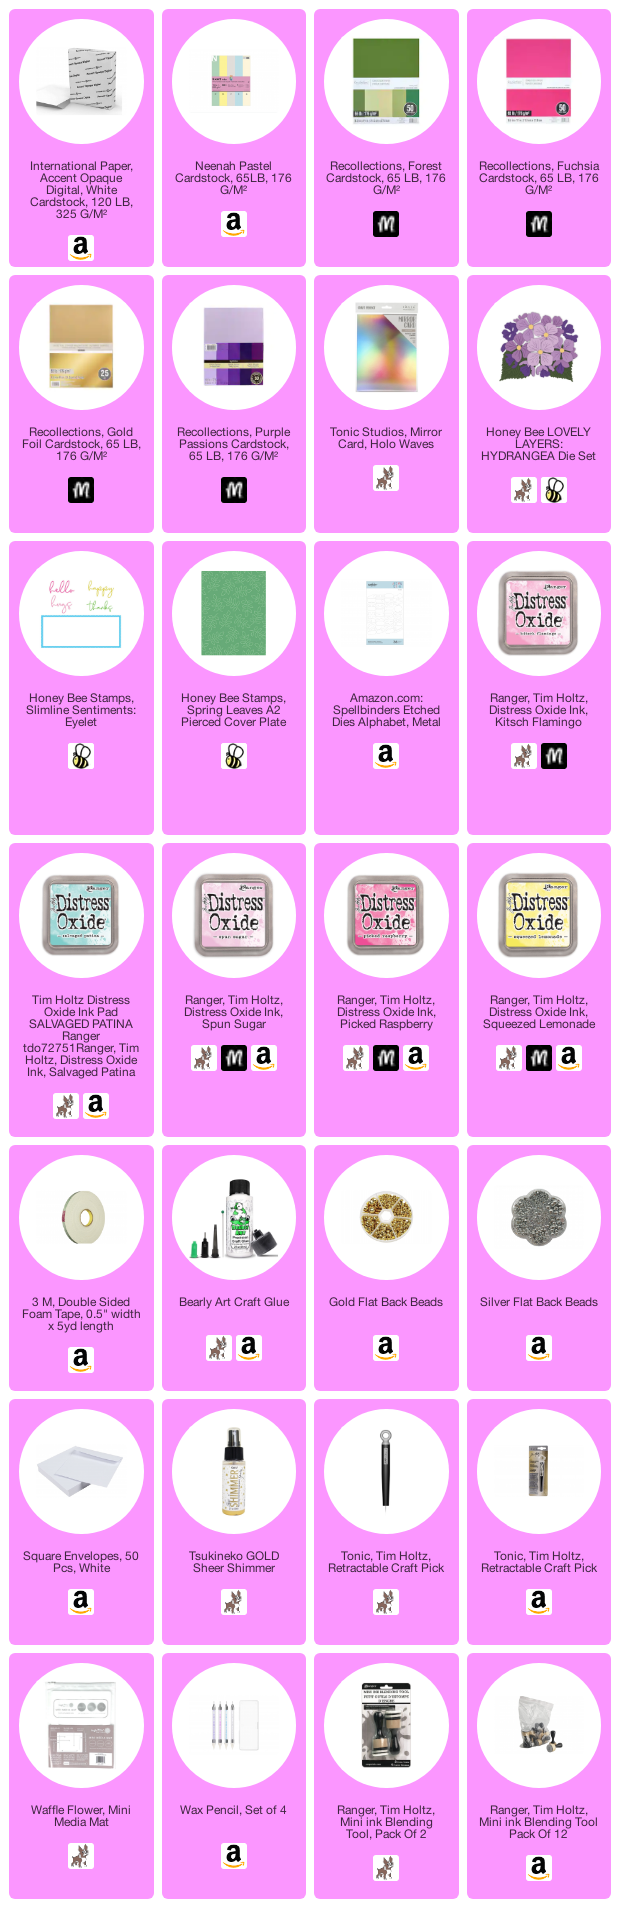
SUPPLIES
I have listed below all of the products that I used to make today’s note cards (if they are still available). Compensated affiliate links may be used at no cost to you. All products were personally purchased, and I only recommend products that I love! As always, thank you for your support!
-
-
3 weeks
Tagged Spelbinders January 2026 Clubs