Easy Background Panels!
Autumn Card Designs!


Hello crafters! Today I have lots of card examples to share with you, featuring some really fun products from Spellbinders’ recent release, called “Autumn Serenade! Some of these note cards have a portrait and others a landscape orientation; however all of them measure 5 ½” x 4 ¼” and fit a regular A2 size envelope!
I was able to quickly create beautiful background panels for these notecards by either using patterned paper, foiled vellum or a watercolor resist paper. I love how easy and fun it was creating with these products, and the end result is just gorgeous!
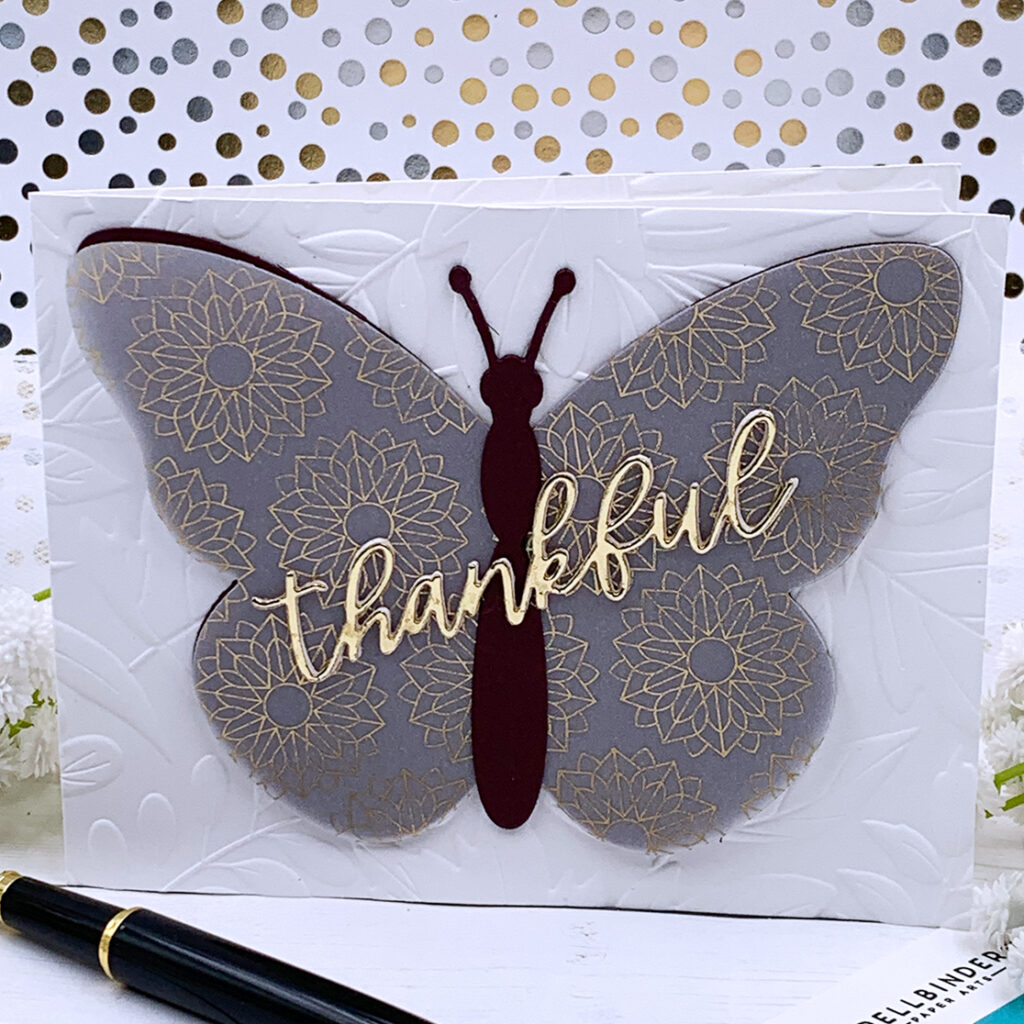
For this set of butterflies note cards I used a mahogany colored cardstock along with foiled vellum to create these butterflies. For the sentiment, I die cut it out of golden cardstock using metal plates included in the Spellbinders “Serenade Sentiments” die set. To add some texture to the white front panel I used the Spellbinders “Autumn Serenade” 3D embossing folder.

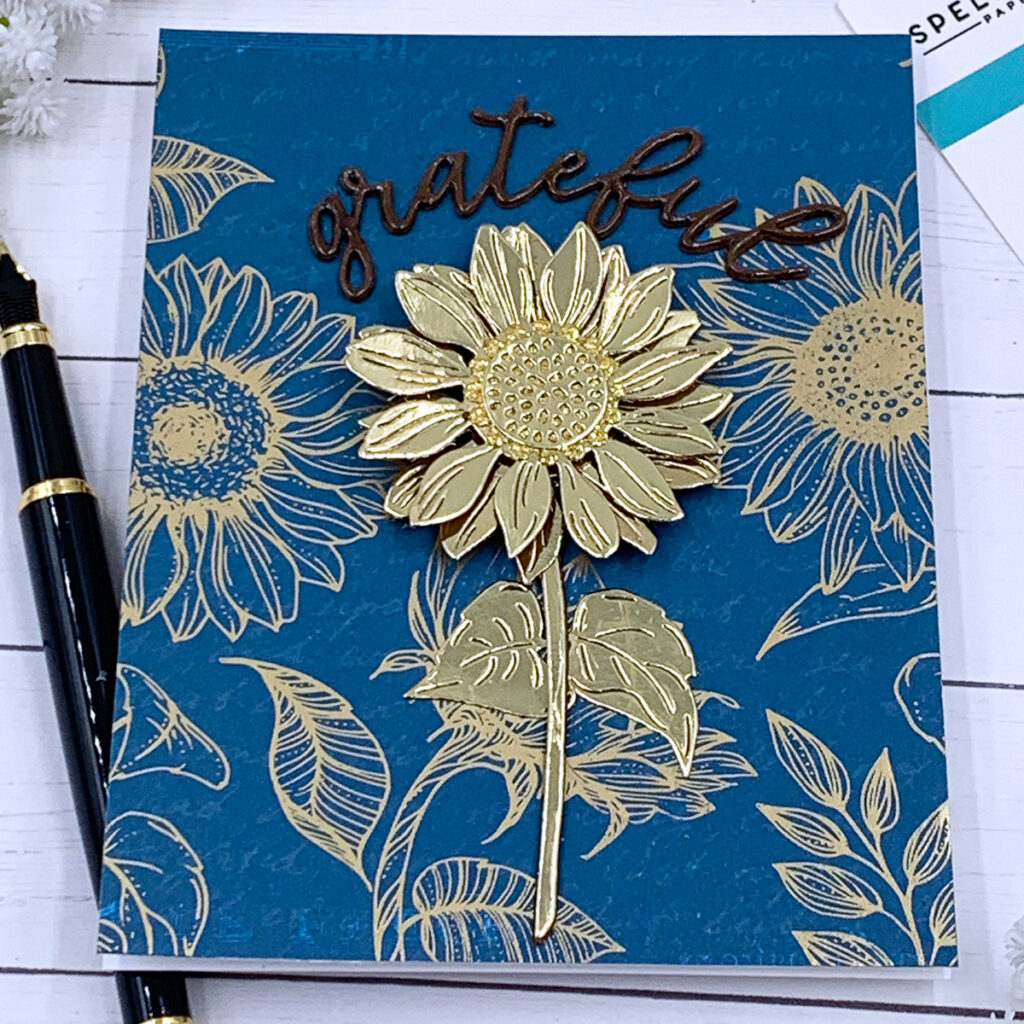
To create the sunflower for this next note card, I used the Spellbinders “Sunflower Serenade” die set. I cut it out of a golden cardstock, and I used foam squares to adhere this flower to the note card. To cut out the sentiment “Grateful” I used a metal plate included in the Spellbinders “Serenade Sentiments” die set. Since this is a thin and delicate die cut word, I was able to curve it a little bit before adhering it to my front panel. This beautiful gold and blue patterned paper that I used for the background is from the Spellbinders “Serenade of Autumn” 6 x 6 paper pad.
Moving on, for the background of this next note card I used a page from Spellbinders “Water Color Resist” 6 x 6 paper pad. I ink blended this panel using Ranger distress oxide ink in the colors “Pine Needles” and “Black Soot”. For the sentiment, this time I hot foiled a sentiment and cut it into a strip. Using the Spellbinders “Autumn Sealed Sprigs” die set I was able to create a flower bouquet that I placed right in the center of this panel!
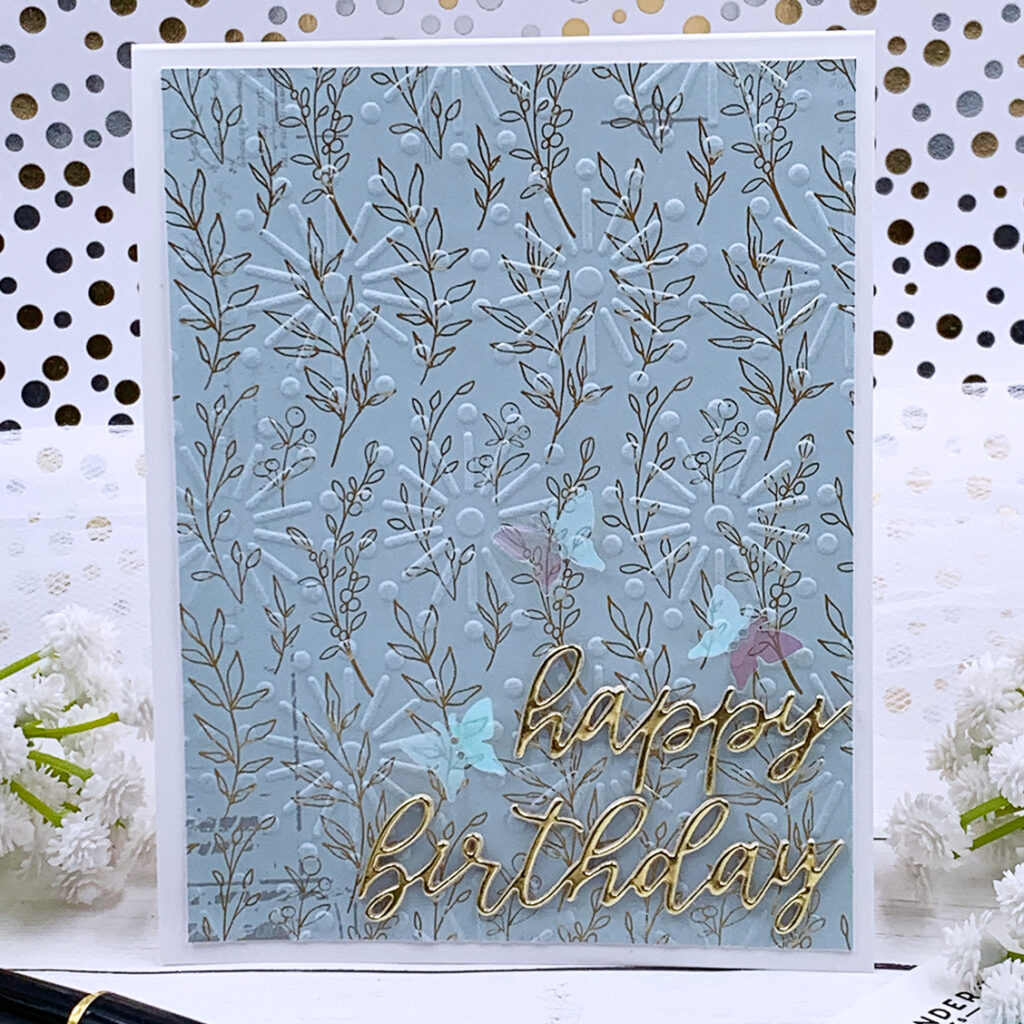
To create this next note card I used a light blue with golden accents patterned paper included in the Spellbinders “Serenade of Autumn” 6 x 6 paper pad. To add some texture to this panel, I ran it through my die cut machine with the Spellbinders “Faux Stitch” embossing folder (not available anymore!) I cut the sentiment “Happy Birthday” out of a golden cardstock using metal plates included in the Spellbinders “Serenade Sentiments” die set.
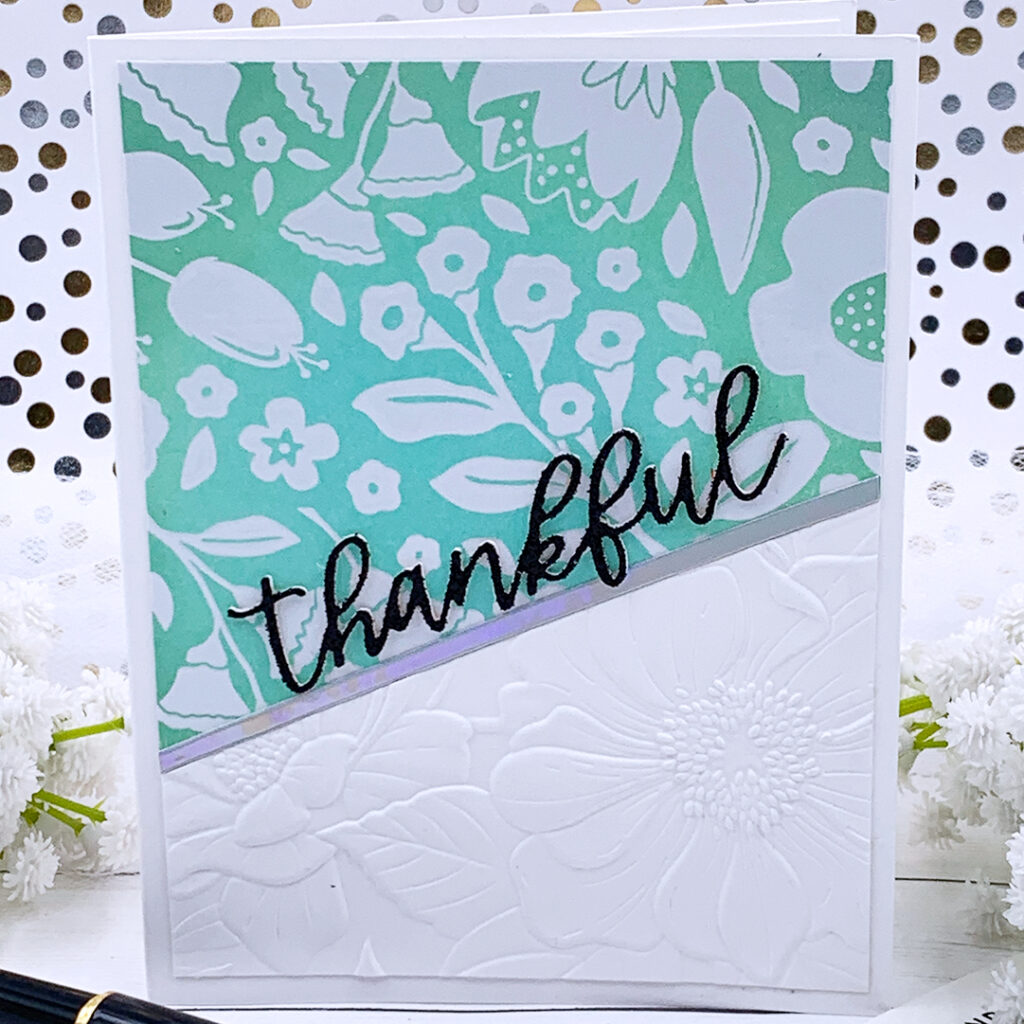
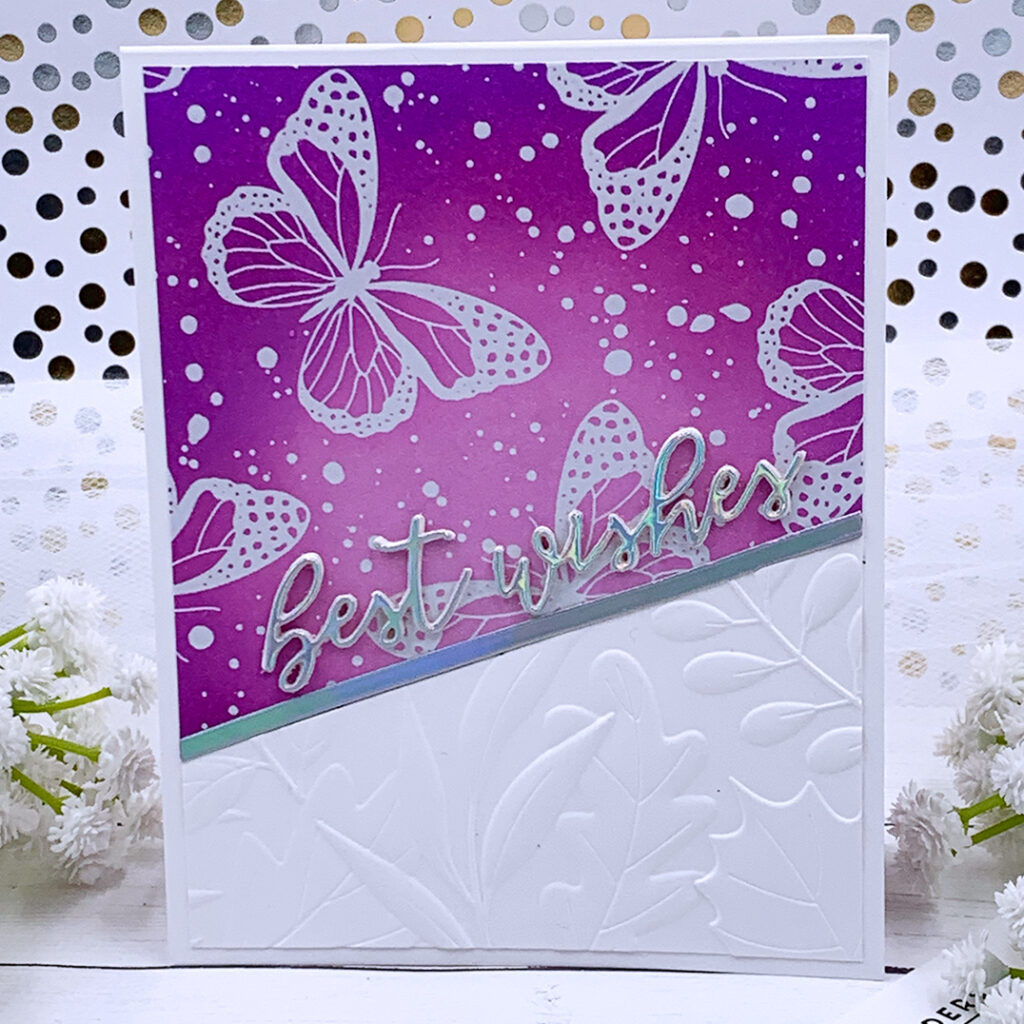
For these next two note cards I used pages included in the “Water Color Resist” 6 x 6 paper pad. I cut it on a diagonal and adhered a dry embossed panel at the bottom. I added a thin holographic cardstock strip between these two pieces, then I added a die cut sentiment on a diagonal as well. For the purple butterflies note card, I used Ranger distress oxide ink pads in the colors “Seedless Preserves”, “Wilted Violet” and “Milled Lavender”. To add some texture to the bottom half of this panel, I used the Spellbinders “Autumn Serenade” 3D embossing folder. To ink blend the watercolor resits panel for the “thankful” note card, I used Ranger distress oxide ink pads in the colors “Salvaged Patina”, “Cracked Pistachio” and “Evergreen Bough”. To add some texture to the bottom half of this panel, I used the Spellbinders “Floral Archway” 3D embossing folder.
To create the “Best Wishes” note card I used a patterned paper included in the “Serenade of Autumn” 6 x 6 paper pad. To add some texture to this patterned paper I used the Spellbinders “Floral Archway” 3D embossing folder. Using metal plates included in the “Serenade Sentiments” die set I cut the sentiment “Best Wishes” out of an orange glitter cardstock!
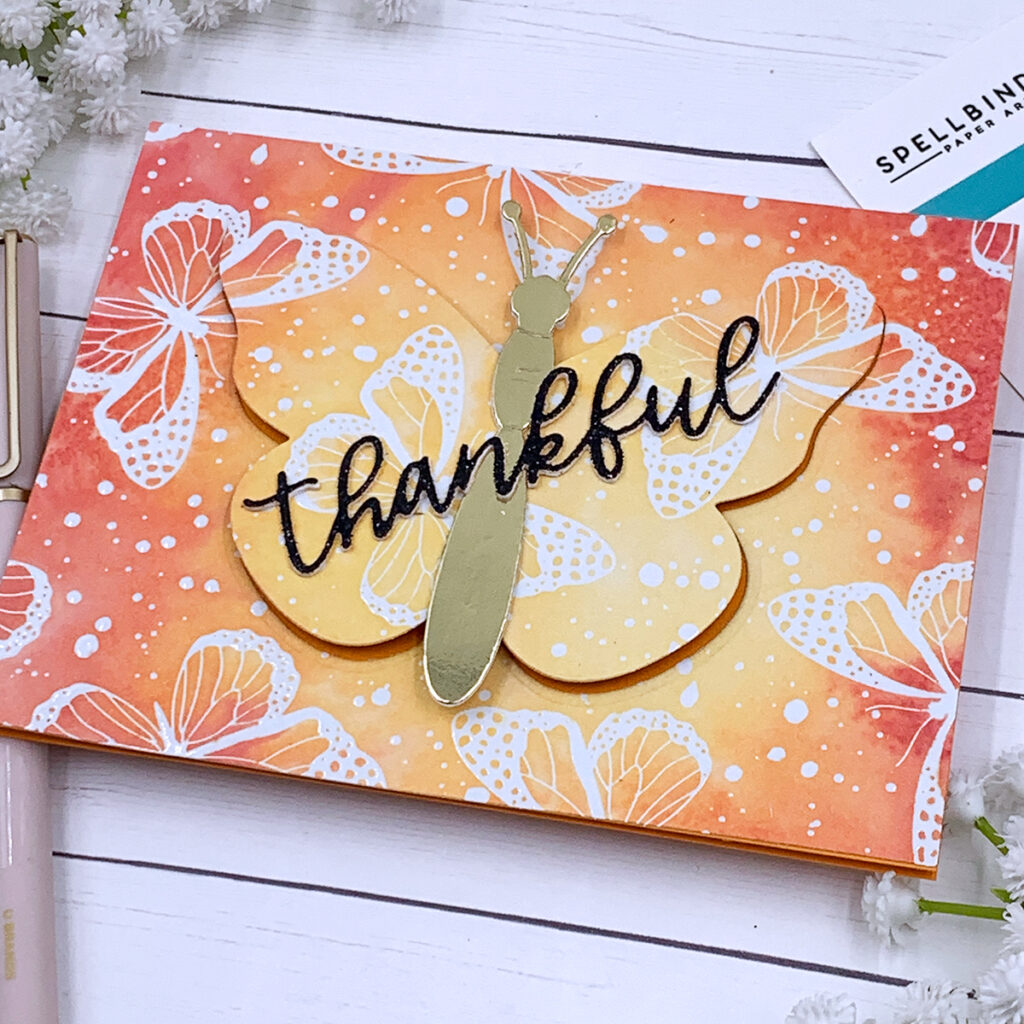
Last but not least, to create the front panel of this last note card I used a water color resist paper and distress oxide ink pads in the colors “Fire Brick”, “Squeezed Lemonade” and “Carved Pumpkin”. Once I finished ink blending this panel I sprayed golden shimmer all over and let it dry for a while. After that I trimmed this panel to 4 ¼” x 5 ½” and cut a large butterfly out of this panel before adhering it to an orange card base. I adhered the die cut butterfly back in the negative space using foam adhesive so it has some dimension and part of the orange cardstock underneath it shows. I used golden cardstock to cut out the body of this large butterfly and black glitter cardstock for the sentiment “Thankful”.
At the end of this post there is a list of all supplies used to make these cards. For more information, make sure to watch this video! I appreciate you visiting today and I hope you have an amazing day! Take care and happy crafting!
SUPPLIES
I have listed below all of the products that I used to make today’s note cards (if they are still available). Compensated affiliate links may be used at no cost to you, and I only use and recommend products that I love! As always, thank you for your support!