Easter Bunnies Note Cards
Hello crafters! Today I am sharing some really adorable note cards that are just perfect for Easter! I really enjoyed creating today’s note cards and I hope you give it a try! You can find a complete supply list at the end of this post.
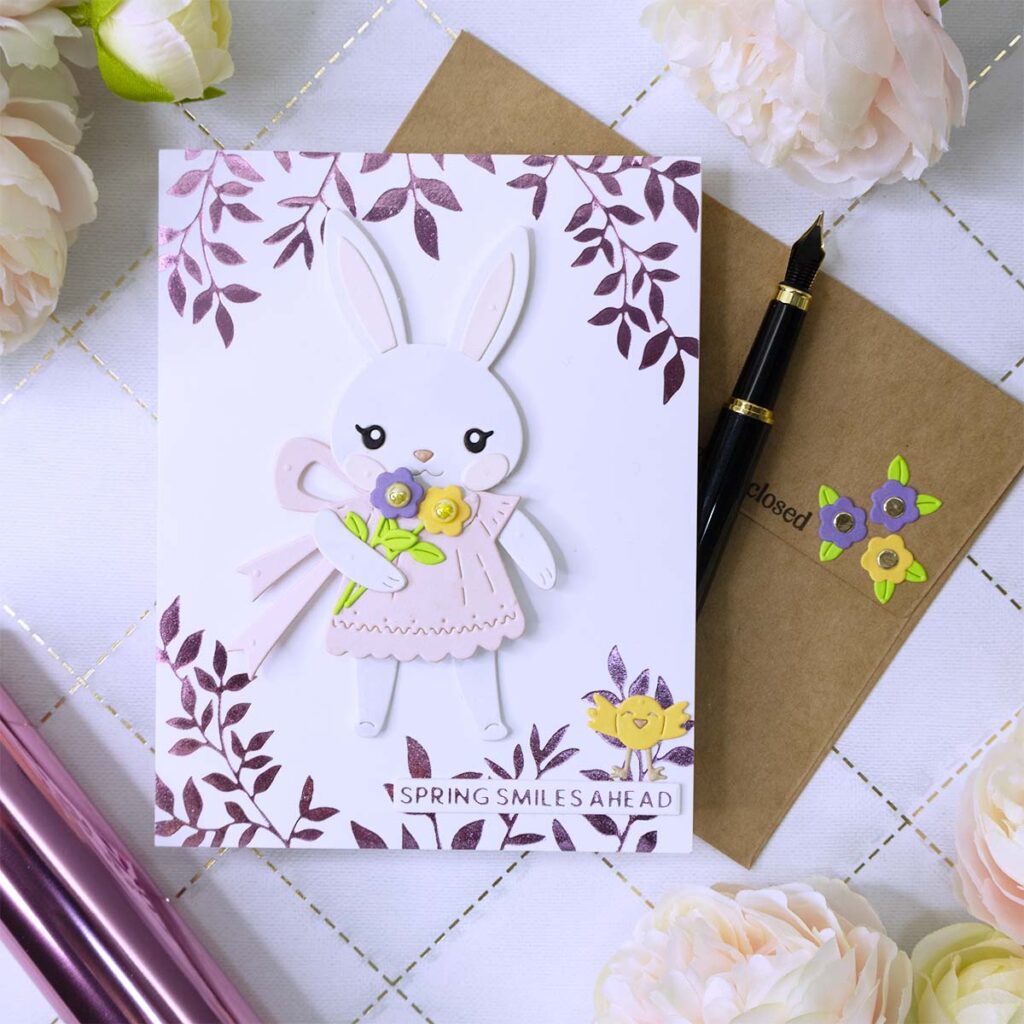
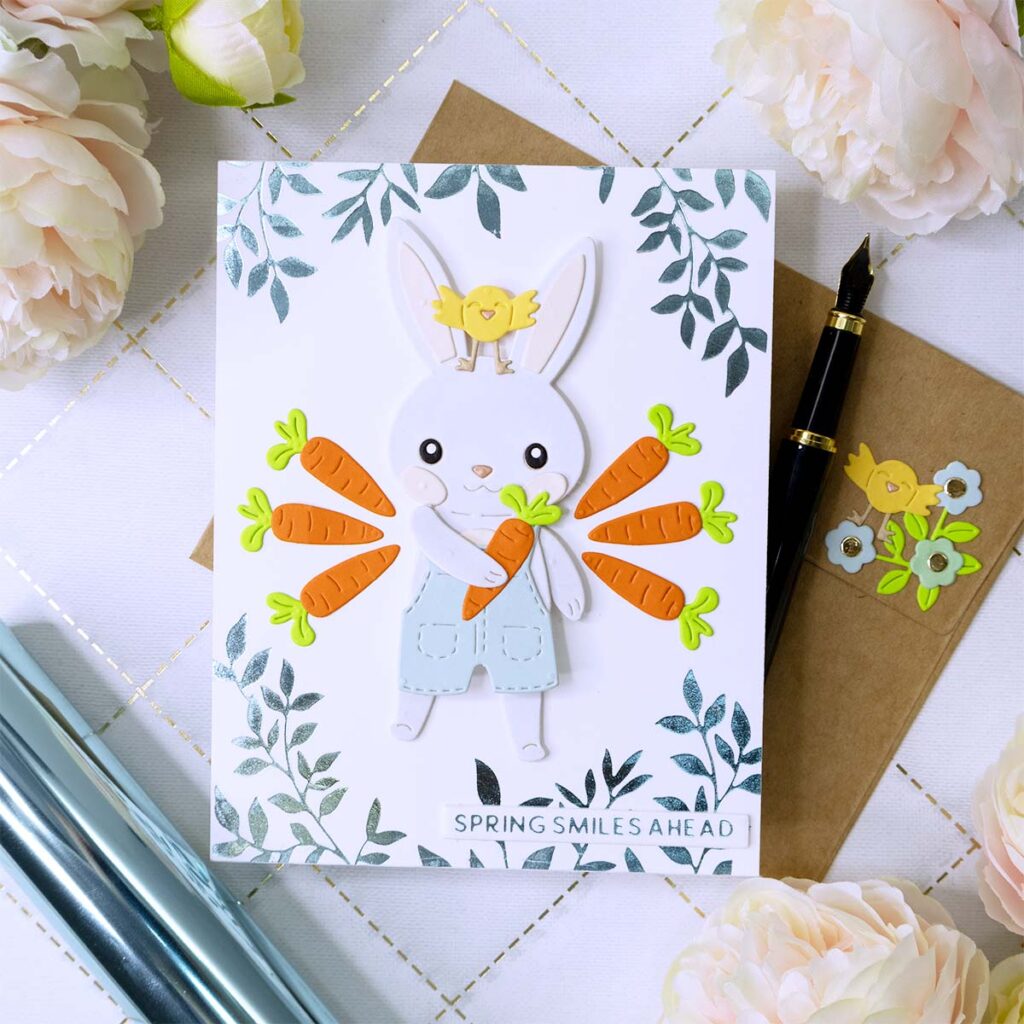
Spring Smiles Ahead
- Die cut the bunnies’ pieces using metal plates included in the Spellbinders “Dancin Hoppy Bunnies Everywhere” die set.
- Hot foil a 5 ¼” tall x 4” wide white panel using a hot foil plate included in the Spellbinders “Spring Canopy” hot foil plates set. I used Spellbinders foil in the colors “Pink” and “Skybright”.
- Use strong liquid adhesive to glue the bunnies pieces together and foam squares to adhere the die cut bunnies to the note card. In the center of the lower body piece adhere a round foam dot for the swing mechanism to work (the lower body of the bunnies move from side to side!).
- Adhere the foiled panel with a bunny in the center to the front of a A2 size white note card.
- Hot foil the sentiment “Spring Smiles Ahead” using a hot foil plate included in the Spellbinders “Spring Canopy” hot foil plates set. Then cut it into a sentiment strip and glue it to the front panel.
- Add yellow beads in the center of the flowers!
- Use the leftover die cut elements to decorate the front panel as well as the flap of the envelope to make it match the note card!
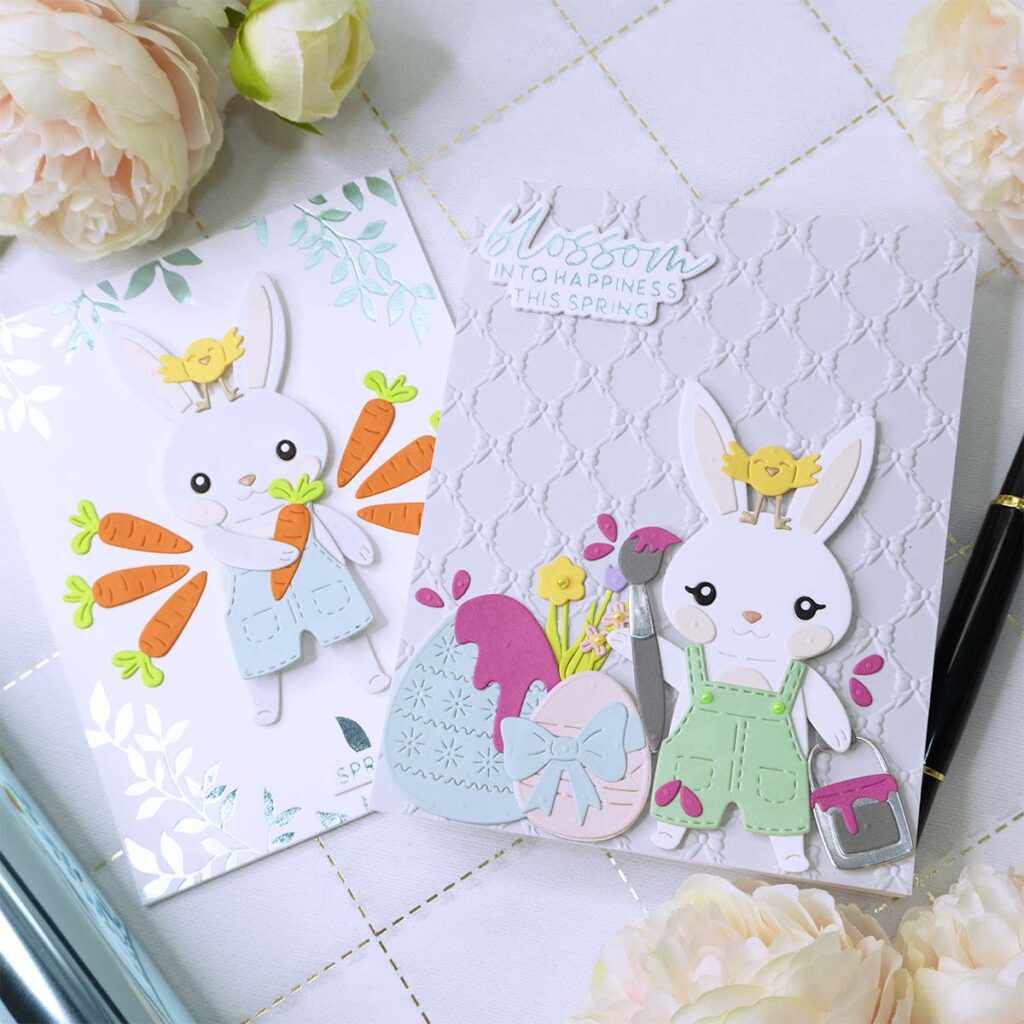
Blossom Into Happiness This Spring

- Die cut the bunnies’ pieces using metal plates included in the Spellbinders “Dancin Hoppy Bunnies Everywhere” die set.
- Dry emboss a 5 ½” x 4 ¼” panel using Spellbinders “Petite Bow” 3D embossing folder and adhere it to the front of a white A2 size note card.
- Use strong liquid adhesive to glue the die cut pieces to the note card. Add foam adhesive in the back of the die cut bunnies to add some dimension.
- Hot foil the sentiment “Blossom Into Happiness This Spring” using a hot foil plate included in the Spellbinders “Spring Canopy” hot foil plates set. I used Spellbinders foil in the color “Skybright”.
- Add yellow flat back beads in the center of each die cut flower.
I hope you felt inspired and some of this information was helpful to you! If you create something inspired by this post, make sure to tag me on instagram! Thank you for visiting and happy crafting!
SUPPLIES
I have listed below all of the products that I used to make today’s note cards. Compensated affiliate links may be used at no cost to you, and I only use and recommend products that I love! As always, thank you for your support!

-
-
1 year
Tagged Spellbinders February 2025 Clubs, Spellbinders February 2025 Stencil club, Spellbinders February 2025 Stitching Die Club