Creating With Layering Stencils!
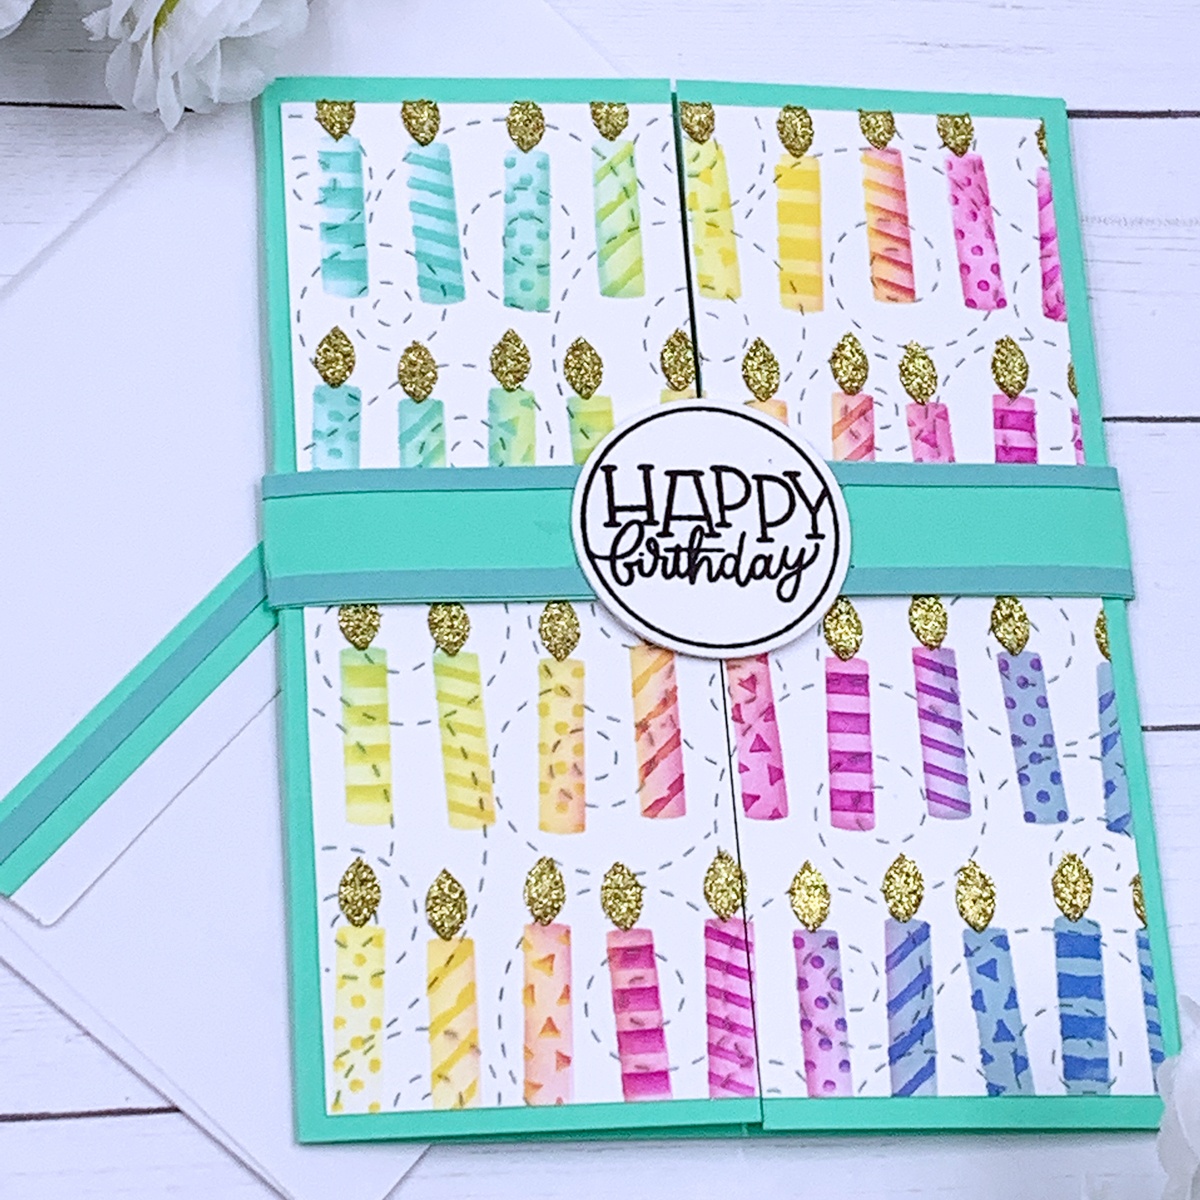
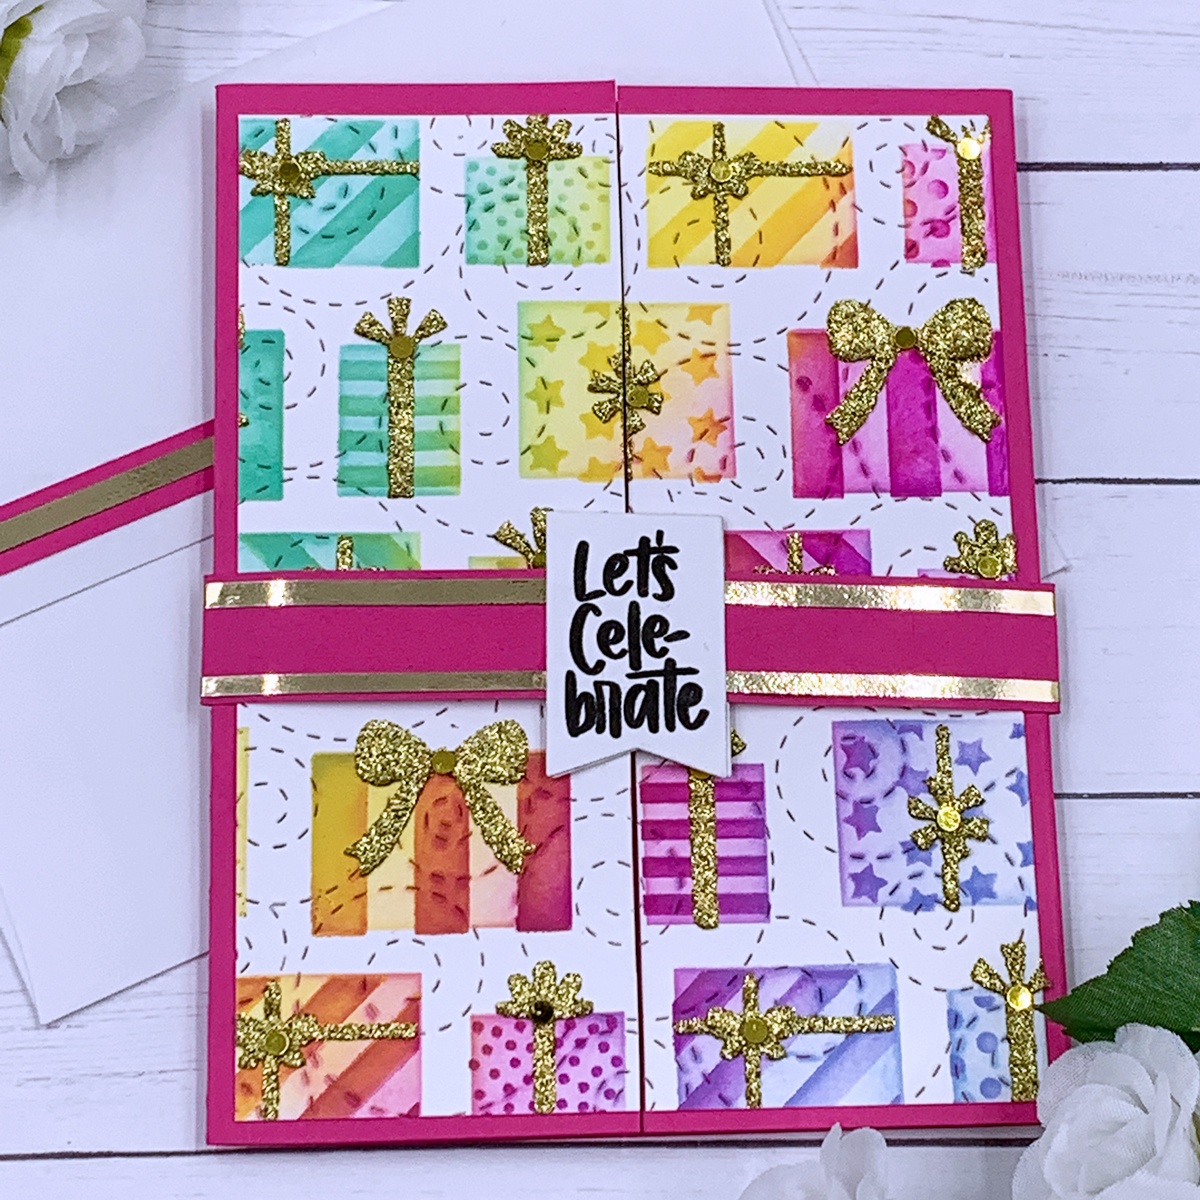

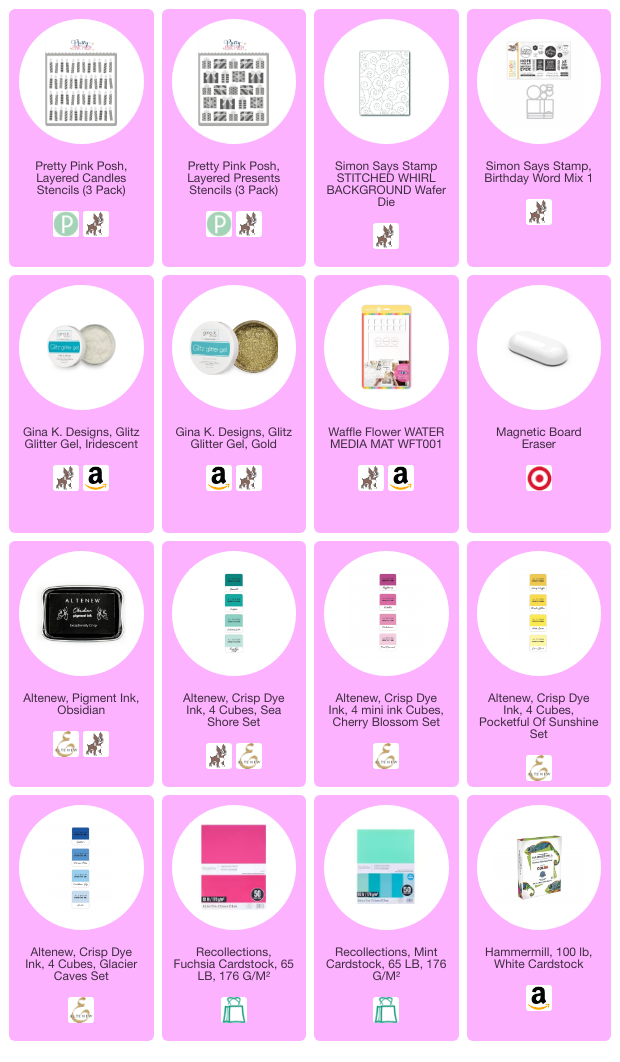
Hello crafters! In today’s post I have some split gatefold birthday note cards to share with you! To create really fun panels for these cards, I first added some interest to each 4 ¼” x 5 ½” piece of cardstock by running it through my die cut machine with the Simon Says Stamp, Stitched Whirl background die.
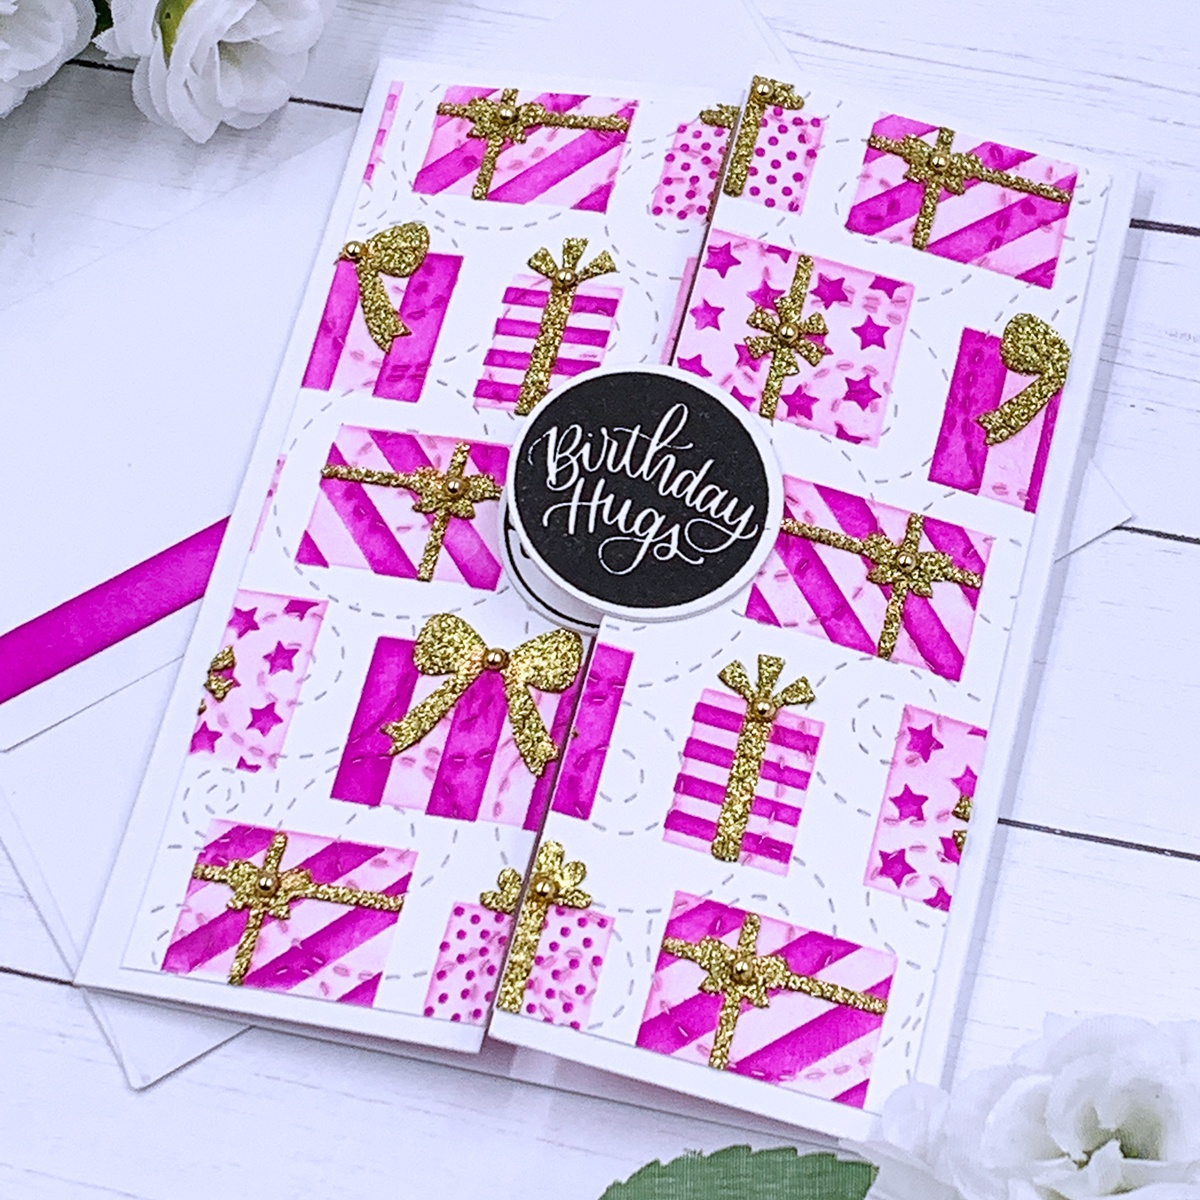
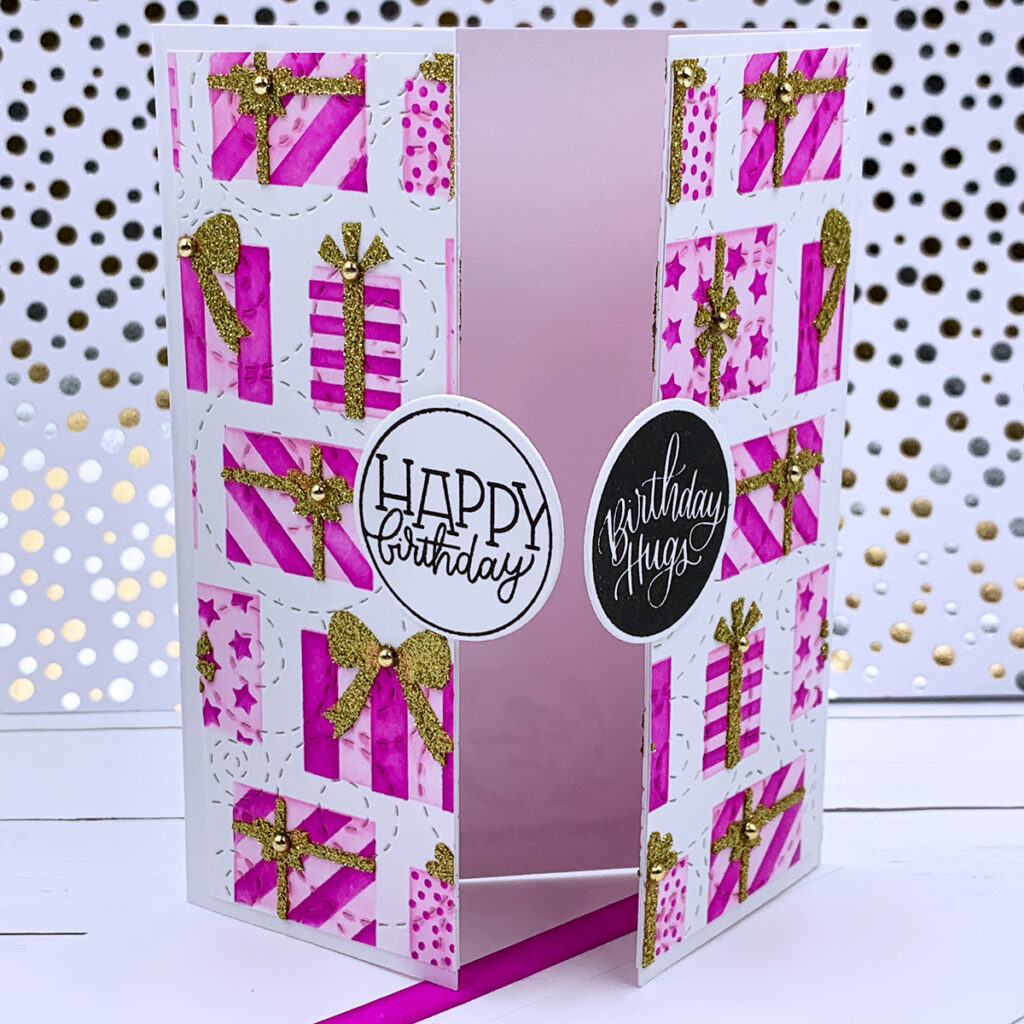
Then I proceeded to stencil each panel with the Pretty Pink Posh “Layered Presents”, and “Layered Candles” stencil sets! These layering stencil sets are so much fun and easy to use! I used Altenew crisp die inks and glitter gel pastes.
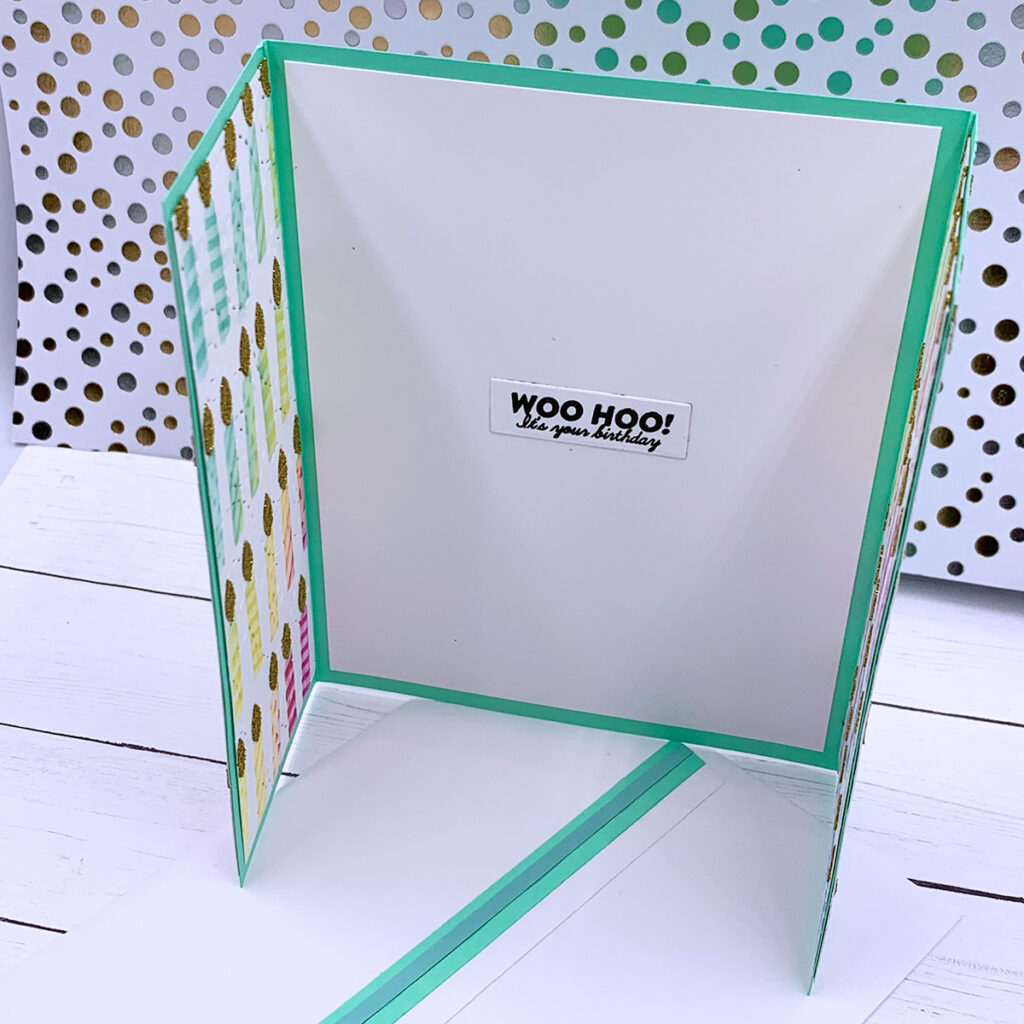
I created 2 of the same panel because I wanted to add it not only to the front of the note card, but also to the inside! I believe it makes all the difference when we decorate the inside of our notecards as well as the envelopes, to make them match!

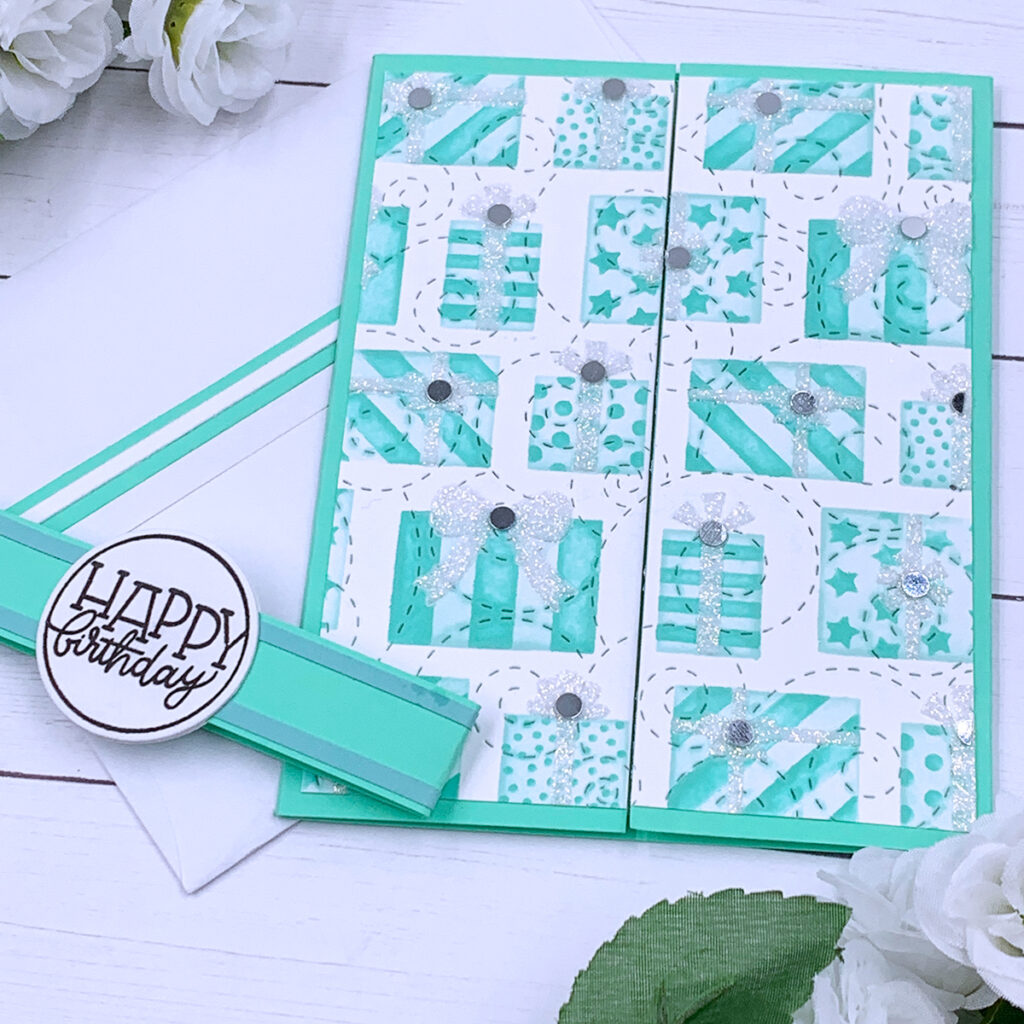
Once the gel paste was completely dry, I trimmed each panel to 4” x 5 ¼” and cut it in half since I will be adding these to spit gatefold card bases. To create two split gate fold note cards at once, I scored a piece of 8 ½” x 11” cardstock at 2 ⅛” from each side, then cut it in half! Each split gatefold card measures 4 ¼” x 5 ½” and will fit A2 size envelopes.
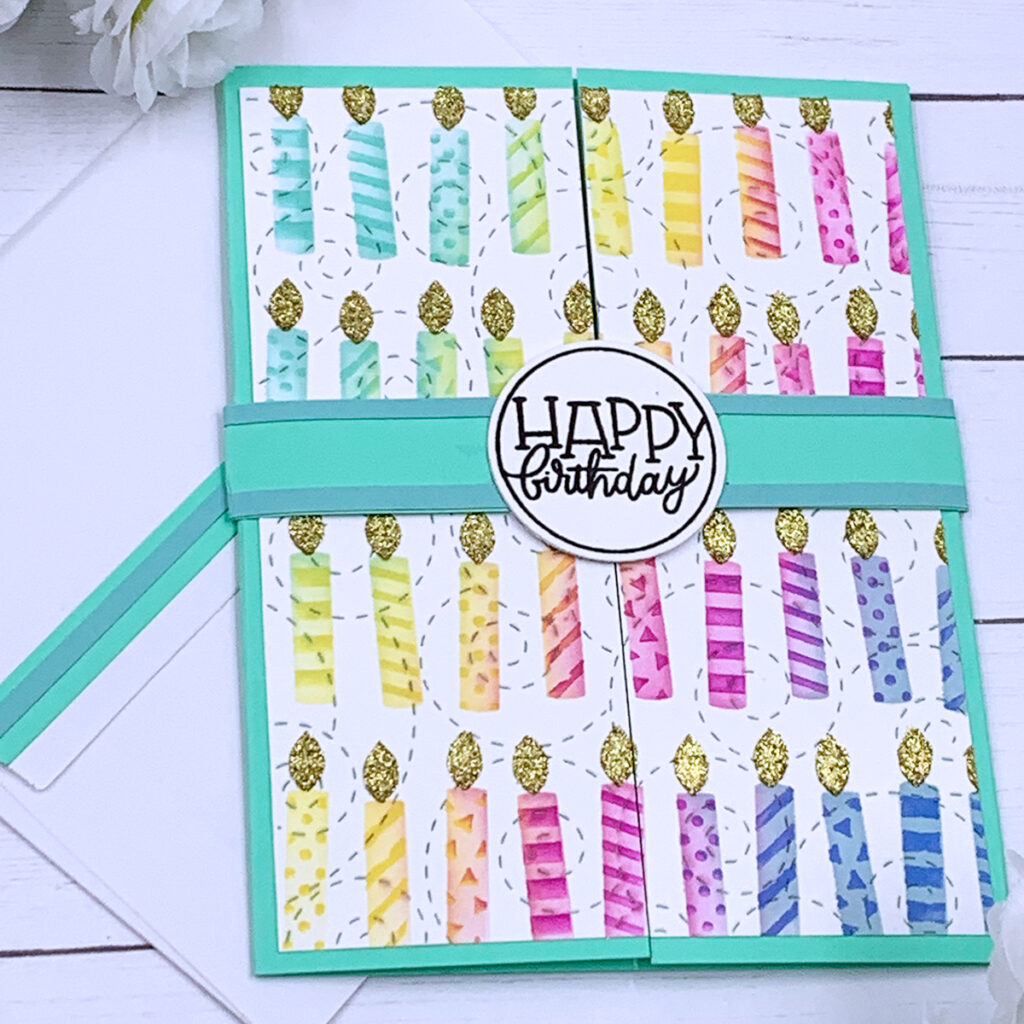
For the sentiment, I used the Simon Says Stamp, “Birthday Word Mix 1”. I stamped it with Altenew Obsidian pigment ink, which is a very rich black ink, and one of my favorites! I used the coordinating die set to cut out the sentiments, and I adhered it to the center of the belly bands that I created out of cardstock. These belly bands are about 1” wide and I simply wrapped it around the note cards to figure out the correct length and trimmed off the excess.

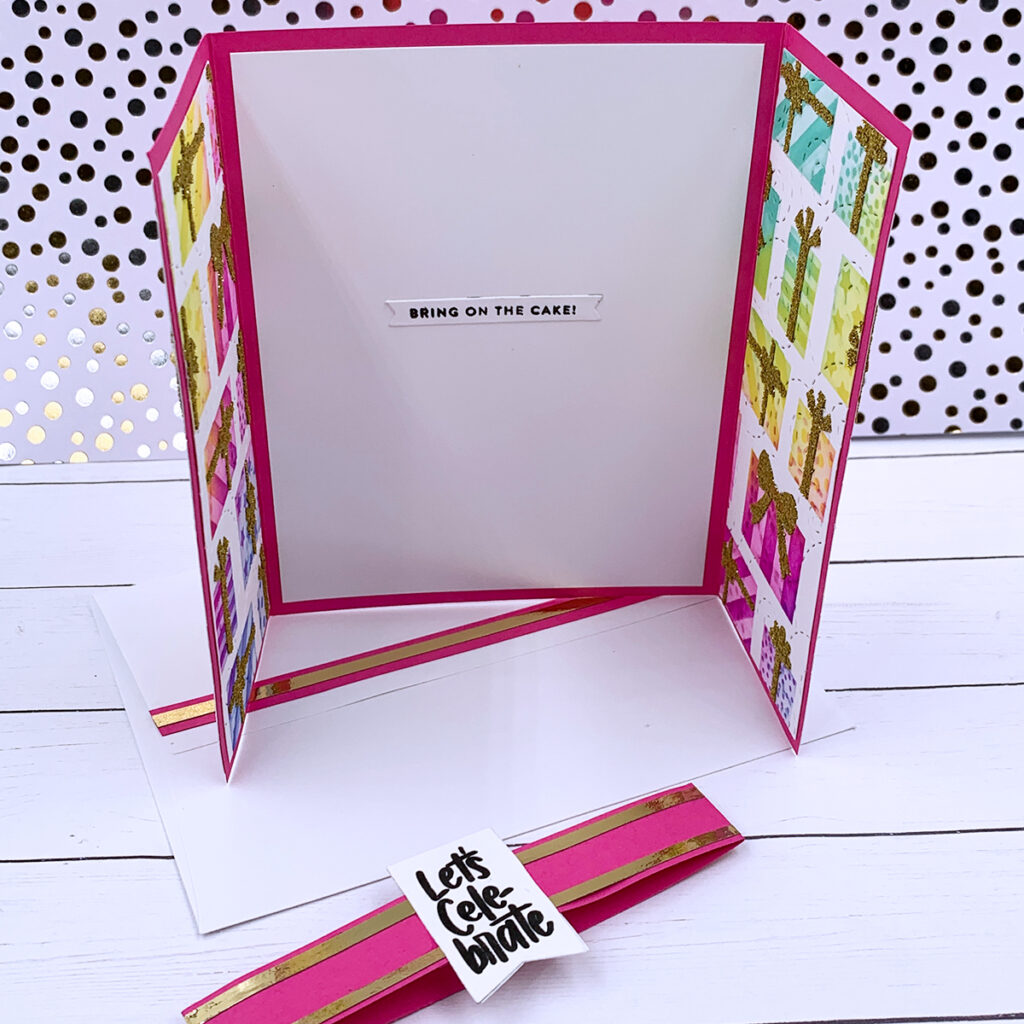
To add some interest (and extra shine!) I added either sequins or flat back beads to the front panel. Also I added a small die cut sentiment inside these note cards!
At the end of this post there is a list of all supplies used to make these note cards. You can click here for more information! Thank you so much for visiting today and have a wonderful day!
SUPPLIES
I have listed below all of the products that I used to make today’s note cards (if they are still available). Compensated affiliate links may be used at no cost to you. All products were personally purchased, and I only recommend products that I love! As always, thank you for your support!
-
-
2 weeks
Tagged Aged To Perfection Collection, birthday cards