Card Making With A Layering Die Set
Hi everyone! I would like to share with you today some cards that I made, using the Viola Plate Layer Set, byt Birch Press Designs. This set comes with three plates (layer A, B, and C), and there are many ways you can use them.
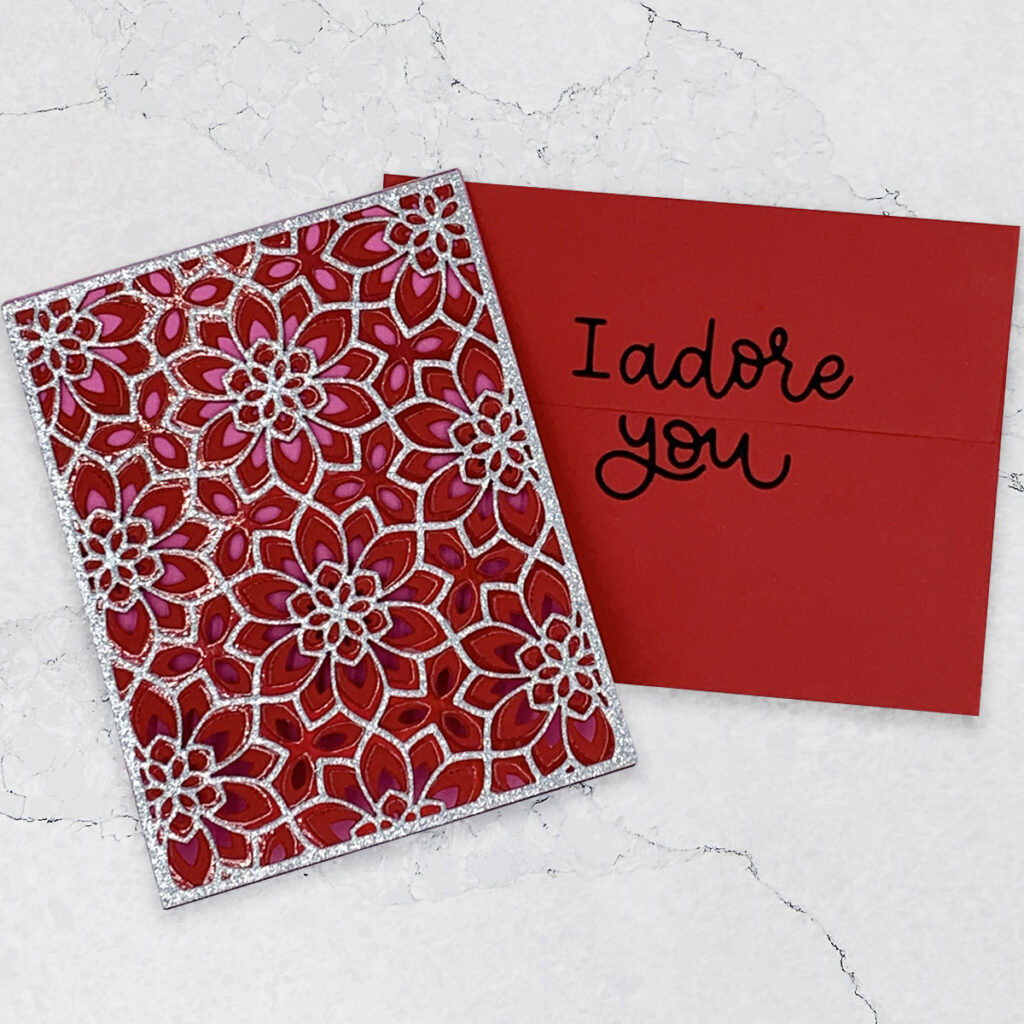
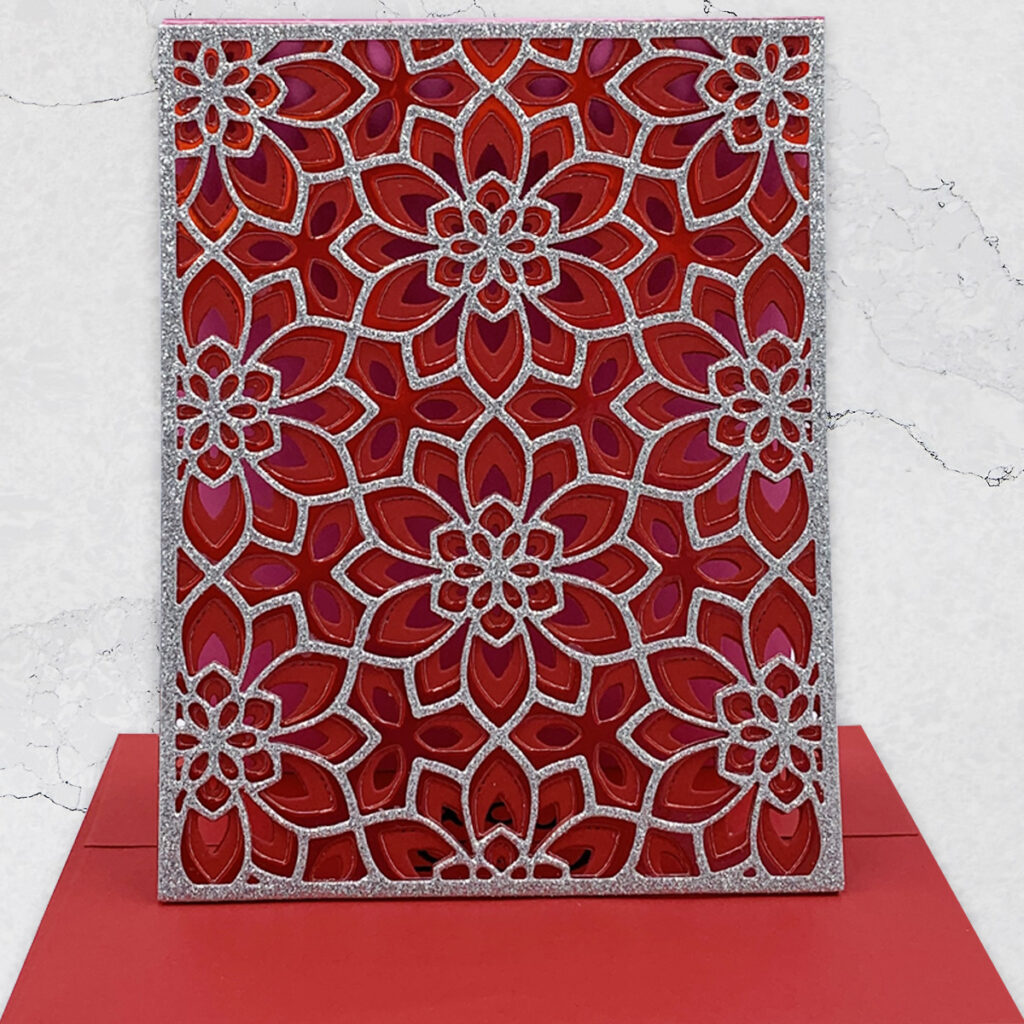
For this red, “I adore you” card, I stacked all of the three layers on an A2 size card base. I used pink, red/mirror and silver/glitter cardstock. I absolutely love this one! I decided not to add anything to this beautiful panel. Instead of adding a sentiment to the front of the card, as I usually do, I adhered a die cut sentiment to the matching envelope.
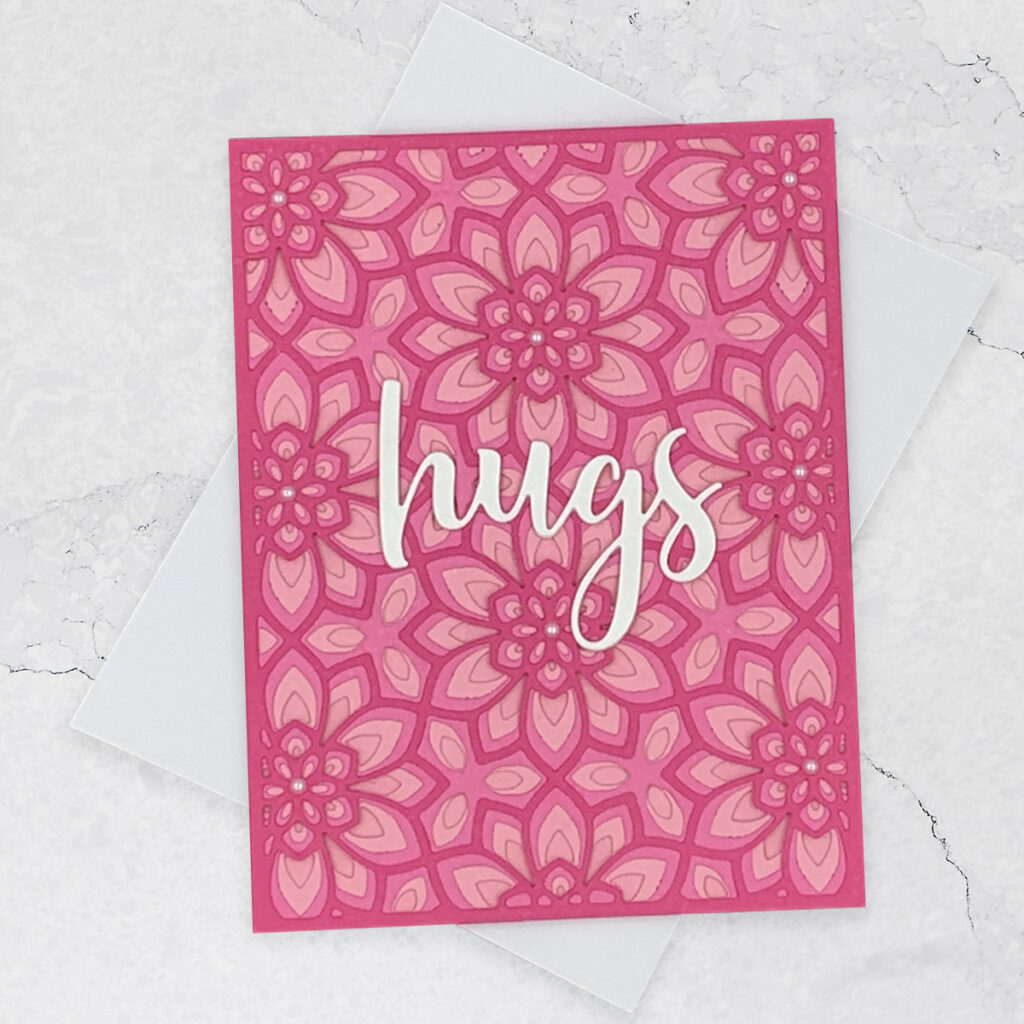
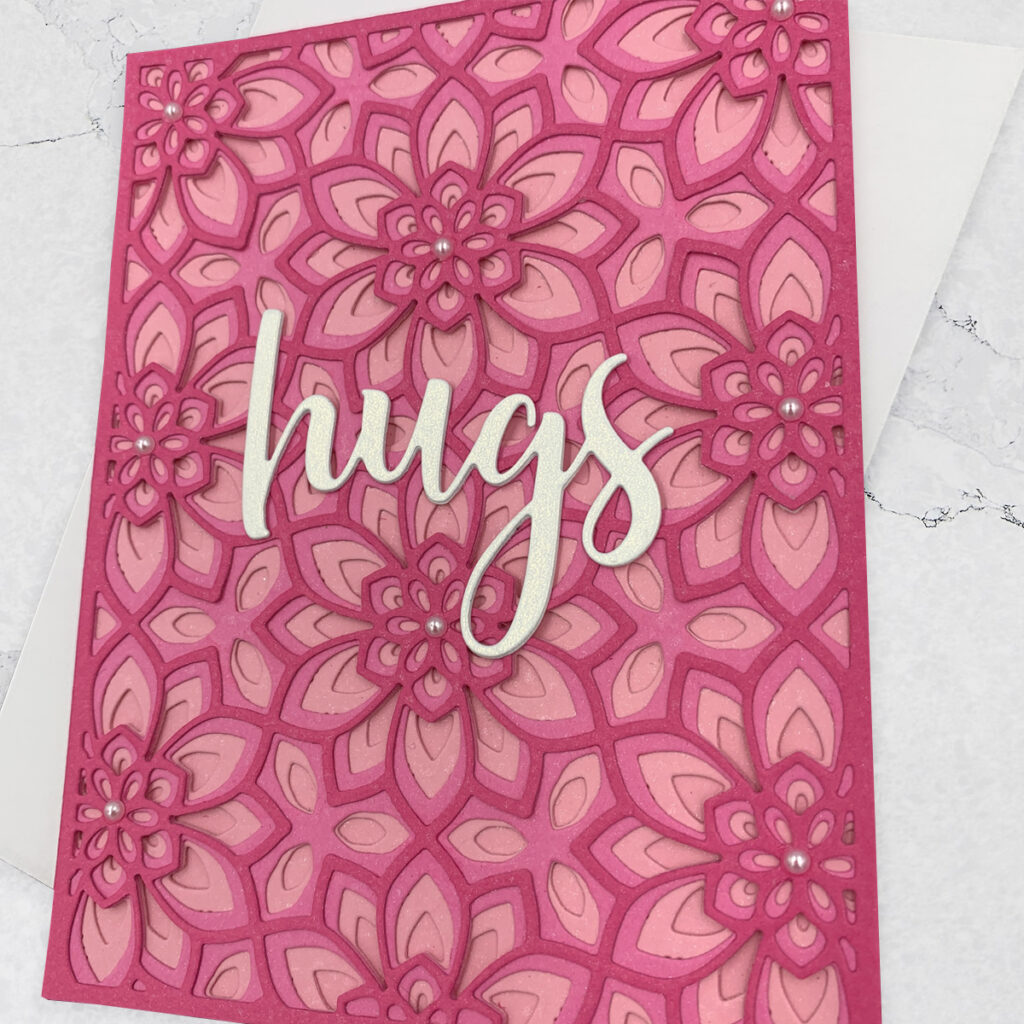
For the pink “Hugs” card, I also stacked all of the three layers on an A2 size card base. I used three different shades of pink cardstock by Recollections. To add a little bit of interest, I added some white pearl beads to the center of the flowers.
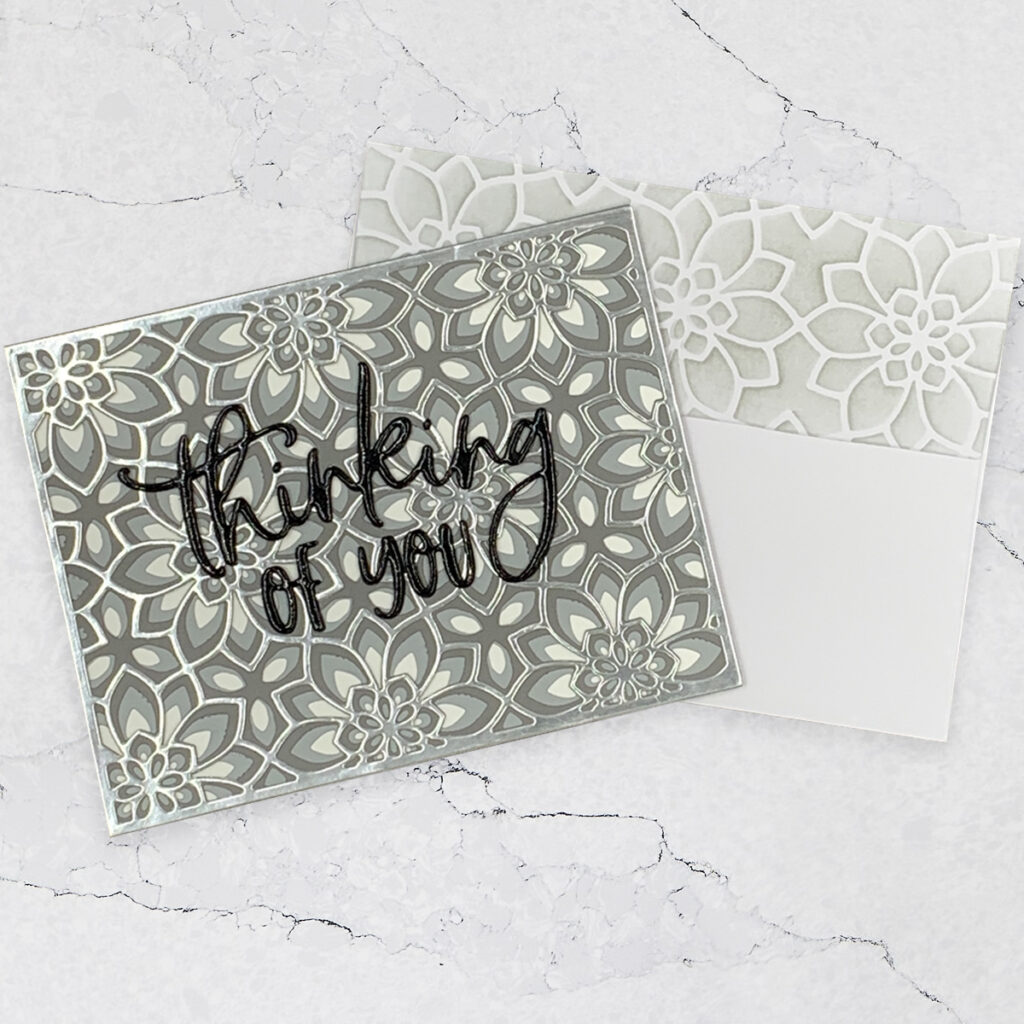
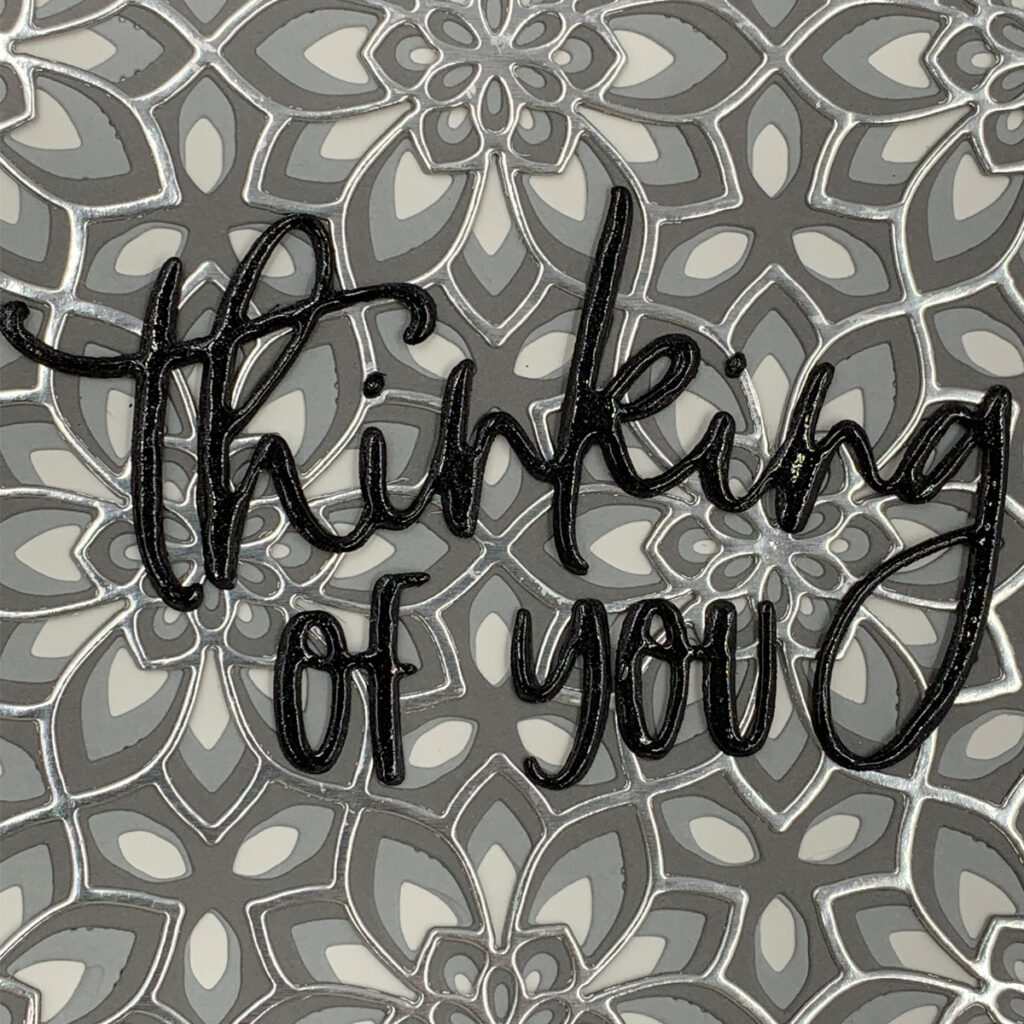
For this grey card, I not only used all of the three layers stacked, but I also used the layer A as a stencil, to create a matching envelope!
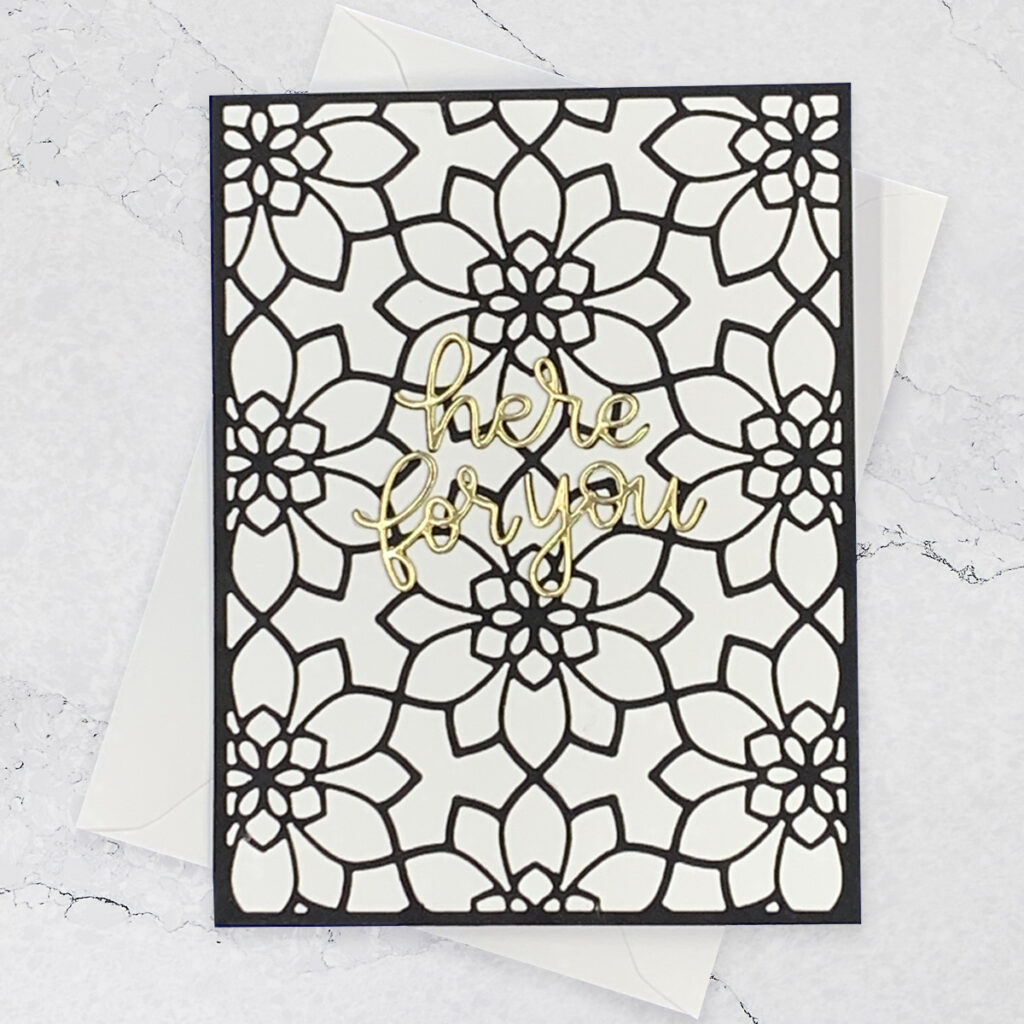
And finally, with this black and white card, I want to show that you don’t always have to use all of the three layers together. Here, I only used layer A, which is the most intricate plate. I think it looks very elegant, and the metallic gold sentiment is just perfect for this black and white card!

To adhere all of the layers perfectly straight, I like to use my Misti tool. To do that, I remove the black foam pad, and place all of the panels that I am adhering, inside of my Misti tool, on the corner. If you own a Misti tool, and have trouble adhering your panels straight, I suggest you give it a try!
Thank you so much for visiting and have a great day!
Supply
- Dies
Birch Press Designs, Viola Plate Layer Set [BPD] [SSS]
Honey Bee Stamps, Hugs [HBS] [SSS]
Honey Bee Stamps, Thinking Of You (Retiring Soon!) [HBS] [SSS]
Simon Says Stamp, I Adore You [SSS]
Simon Says Stamp, Here For You [SSS]
- Stamps
Honey Bee Stamps, Angel Policy (Retiring Soon!) [HBS] [SSS]
- Cardstock
Recollections, Ballerina [MCHLS]
Recollections, Silver Glitter Cardstock [MCHLS]
Recollections, Black Cardstock [MCHLS]
Tonic Studios, Ruby Red Mirror Cardstock [SSS]
Tim Holtz, metallic Kraft Cardstock [SSS]
- Miscellaneous
Gina K Designs, Strong Liquid Adhesive [SSS]
Misti Tool [SSS]
-
-
4 weeks
Tagged Spelbinders January 2026 Clubs