Arch Shaped Note Cards
Hello crafters! Today we will be creating some gorgeous note cards with press plates, stencils and die plates from the Yana’s Poppies Collections, by Yana Smakula! All of today’s note cards will have an arch shape and will perfectly fit A2 size envelopes!
Letterpress Technique
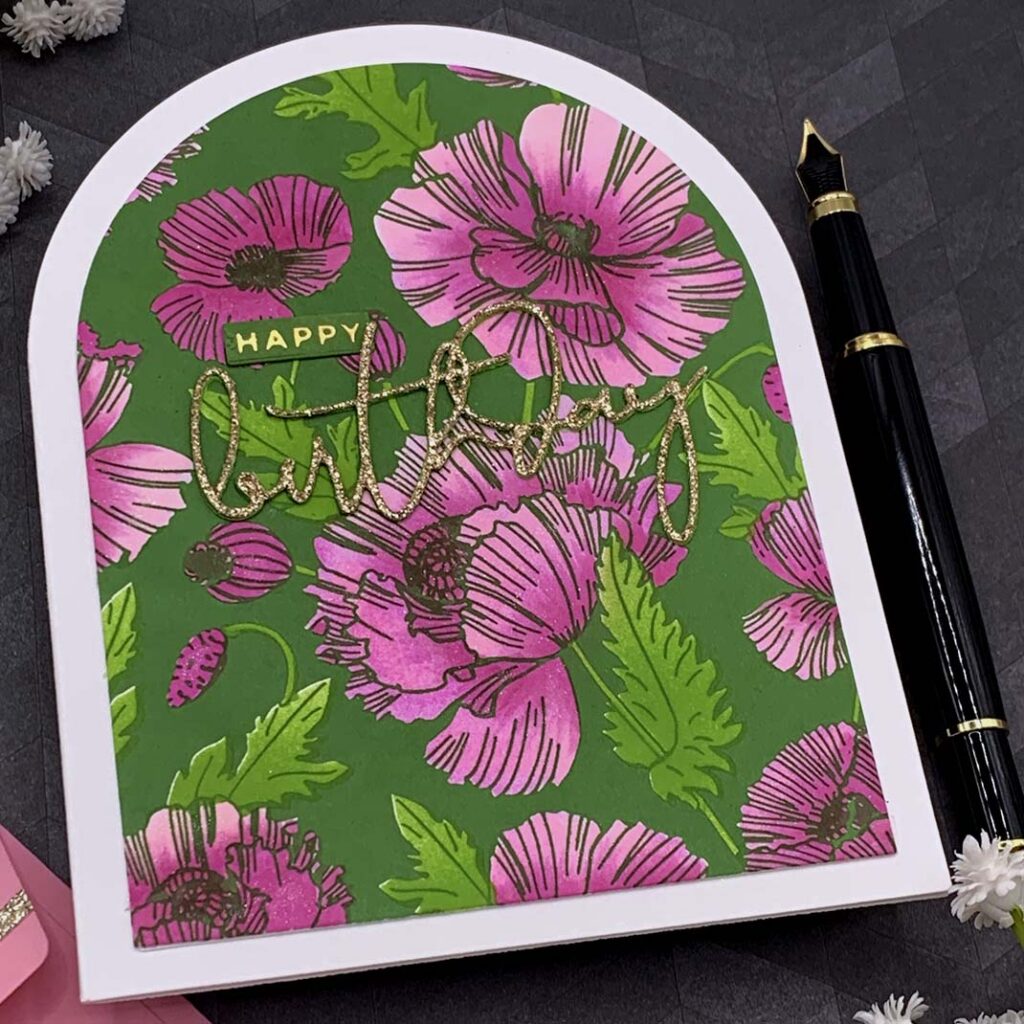
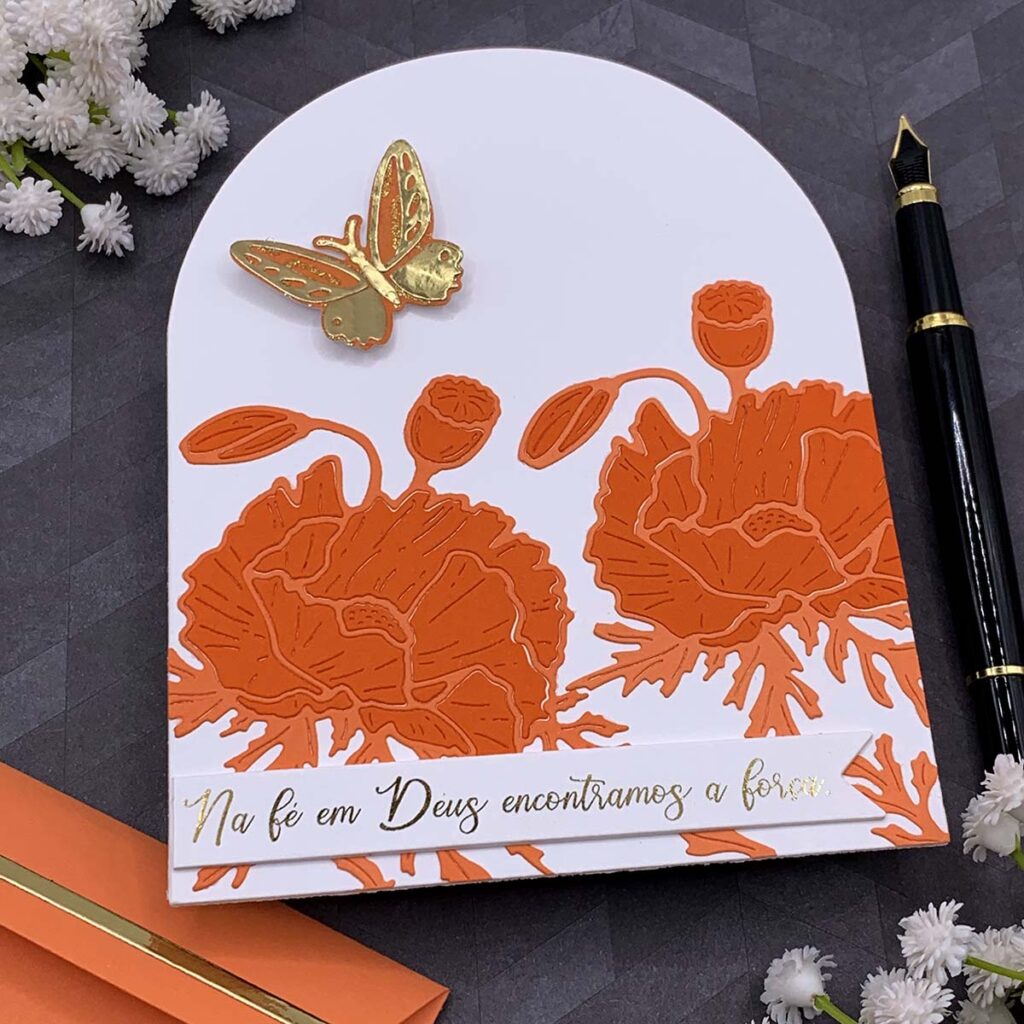
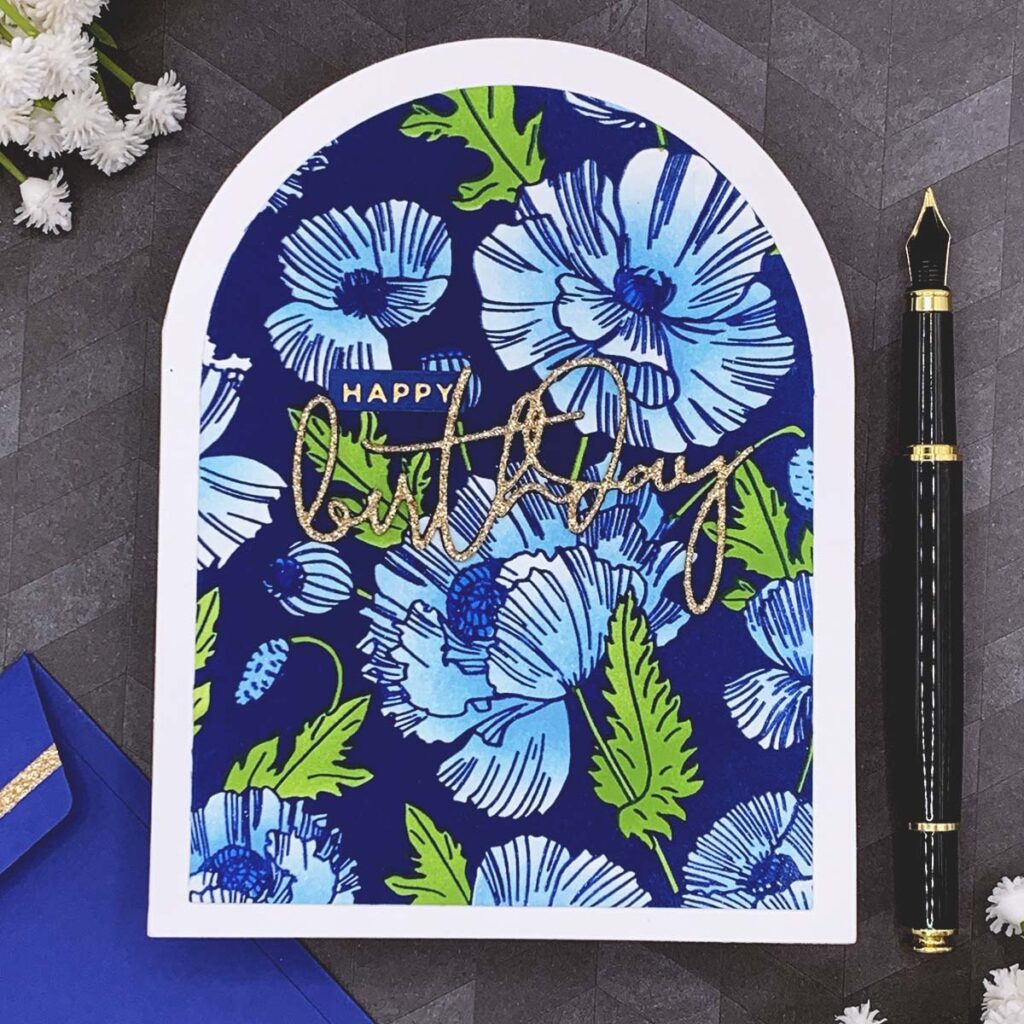
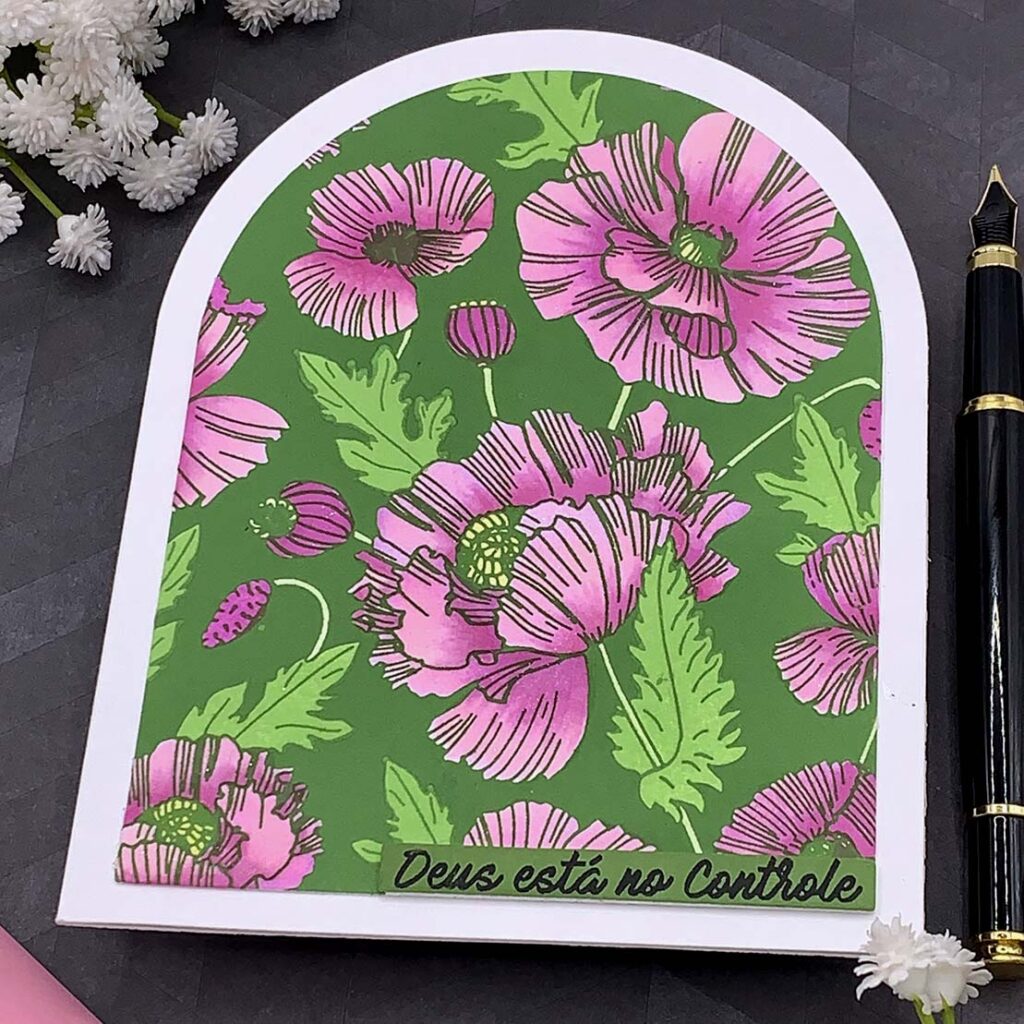
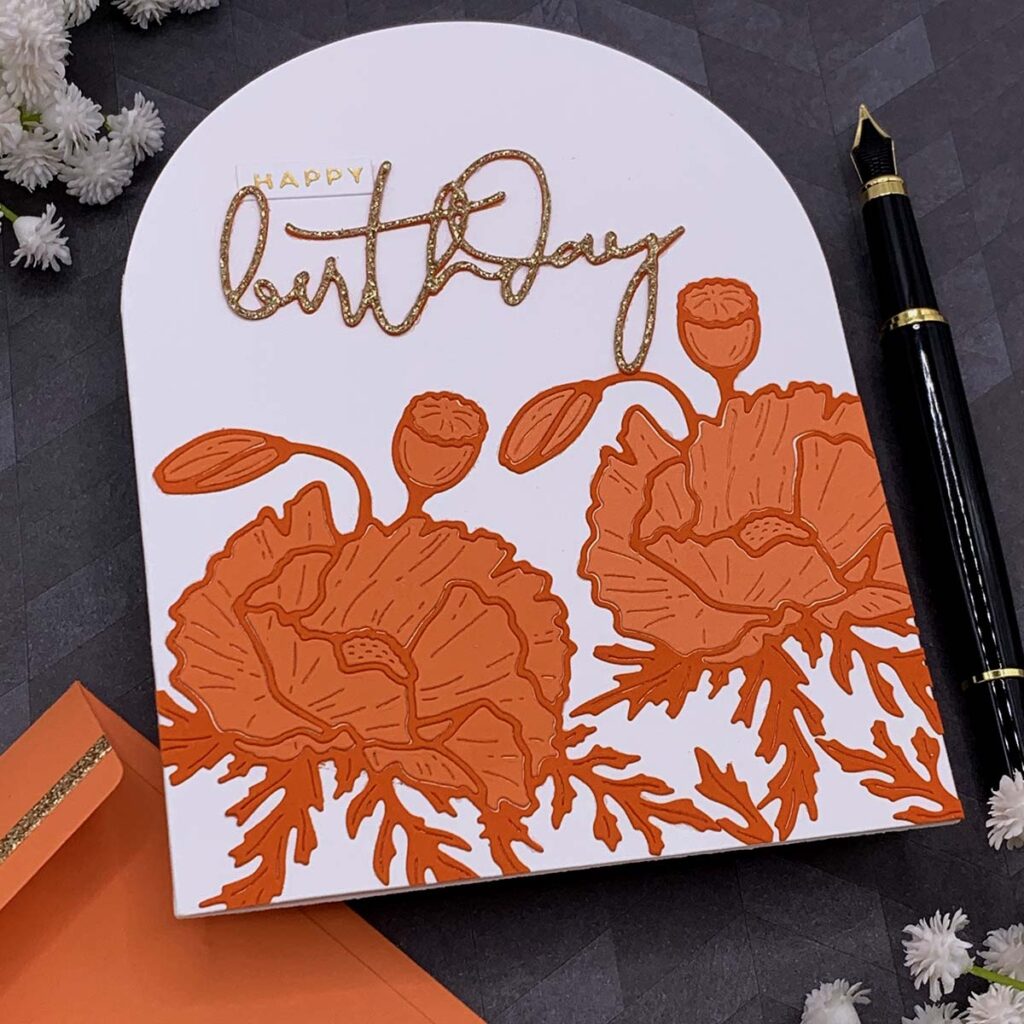
- To create an arch shaped note card use the largest plate included in the Spellbinders “Essential Arches” die set. Cut it out of an A2 size, side folding note card, making sure to offset the metal plate on the folded side in order to end up with two connected pieces that we can use as a card base.
- Create the background panel with Spellbinders “Poppy Background” press plate. You can use any color of ink you like. I used Simon Says Stamp Pawsitively Saturated ink pads. Make sure to use Spellbinders BetterPress cotton cardstock for better results!
- Use the coordinating stencils to add color to the poppy flowers and leaves. You can also color each flower with markers or coloring pencils if you prefer. I did both! First I used the stencils, then I went over a few sections with a darker shade of marker to add depth to some of the poppies.
- Cut out the pressed panel using the second largest plate included in the Spellbinders Spellbinders Poppy Background press plate. Adhere it to the front of the note card using strong liquid adhesive.
- For the sentiment, hot foil the word “Happy” using any small sentiment hot foil plate that you might already have. Then, cut out the word “Birthday” using a metal plate included in the Spellbinders “Yana’s Layered Script Sentiments” die set. To create the sentiment in Portuguese I simply typed and printed it out!
- To make a pocket shape envelope for each note card I used metal plates from the Stampendous “A2 Gift Card Holder and Envelope” die set.
Tips:
- Tip 01: stack about 3 “birthday” die cuts to make it stand out.
- Tip 02: go over the flowers with a shimmer pen for some sparkle!
Die Cutting Technique
- To create an arch shaped note card use the largest plate included in the Spellbinders “Essential Arches” die set. Cut it out of an A2 size, side folding note card, making sure to offset the metal plate on the folded side in order to end up with two connected pieces that we can use as a card base.
- Die cut two poppies for each note card, using metal plates included in the Spellbinders “Yana’s Poppy” die set. Cut it out of two different shades to do the die cut inlay technique!
- For the sentiment, hot foil the word “Happy” using any small sentiment hot foil plate that you might already have. Then, cut out the word “Birthday” using a metal plate included in the Spellbinders “Yana’s Layered Script Sentiments” die set. To create the sentiment in Portuguese I simply typed and printed it out using a laser jet printed and foiled it with a laminator and a piece of golden deco foil.
- To make a pocket shape envelope for each note card I used metal plates from the Stampendous “A2 Gift Card Holder and Envelope” die set.
I hope you felt inspired and some of this information was helpful to you! If you create something inspired by this post, make sure to tag me on instagram! Thank you for visiting and happy crafting!
SUPPLIES
I have listed below all of the products that I used to make today’s note cards. Compensated affiliate links may be used at no cost to you, and I only use and recommend products that I love! As always, thank you for your support!

-
-
4 weeks
Tagged Spelbinders January 2026 Clubs