Christmas In July With Spellbinders Clubs!
Hello crafters! Today I’m sharing the note cards that I made using some of Spellbinders July 2025 Spellbinders subscription clubs! This month’s clubs are all about the holidays and so much fun to play with!
Sending Winter Hugs
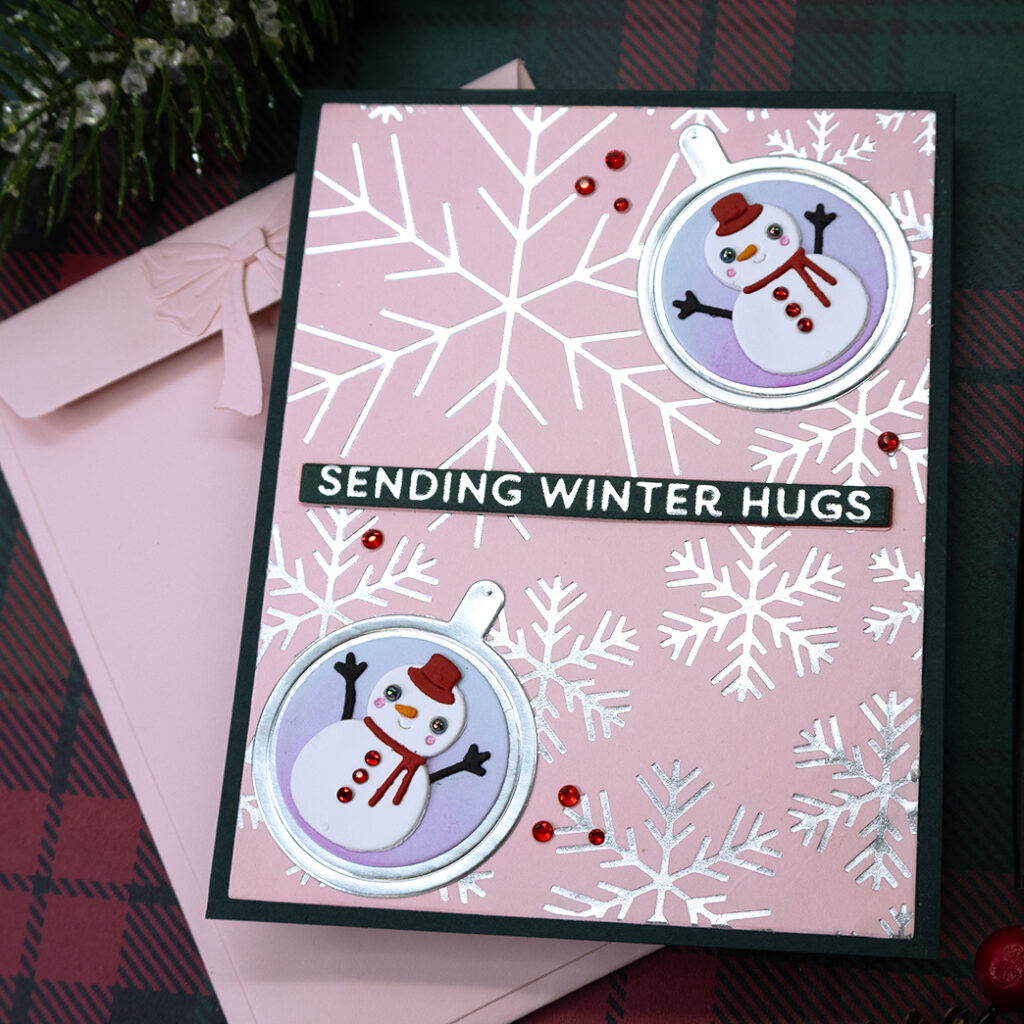
- Dry emboss a 5 ½” x 4 ¼” pink panel and a sentiment strip with silver foil and hot foil plates included in the Spellbinders “Artic Glimmer” set.
- Adhere foiled panel to the front of an A2 size top folding note card made from Spellbinders cardstock in the color “Forest”
- Create some Christmas ornaments with die cutting plates included in the Spellbinders “Mugs & Mittens” die set.
- Create a pocket shaped envelope with die cutting plates included in the Spellbinders “A2 Gift Card Holder and Envelope” die set
- Embellish your note card with red flat back rhinestones
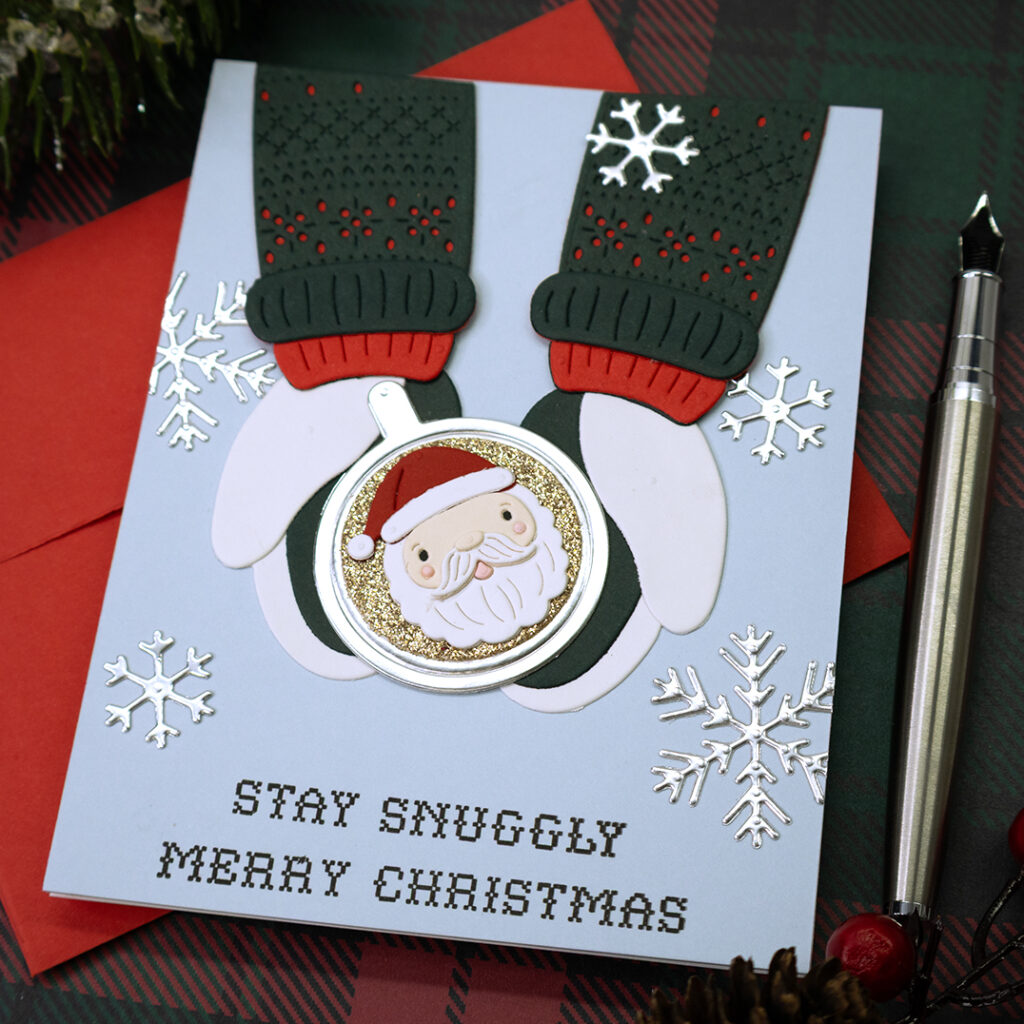
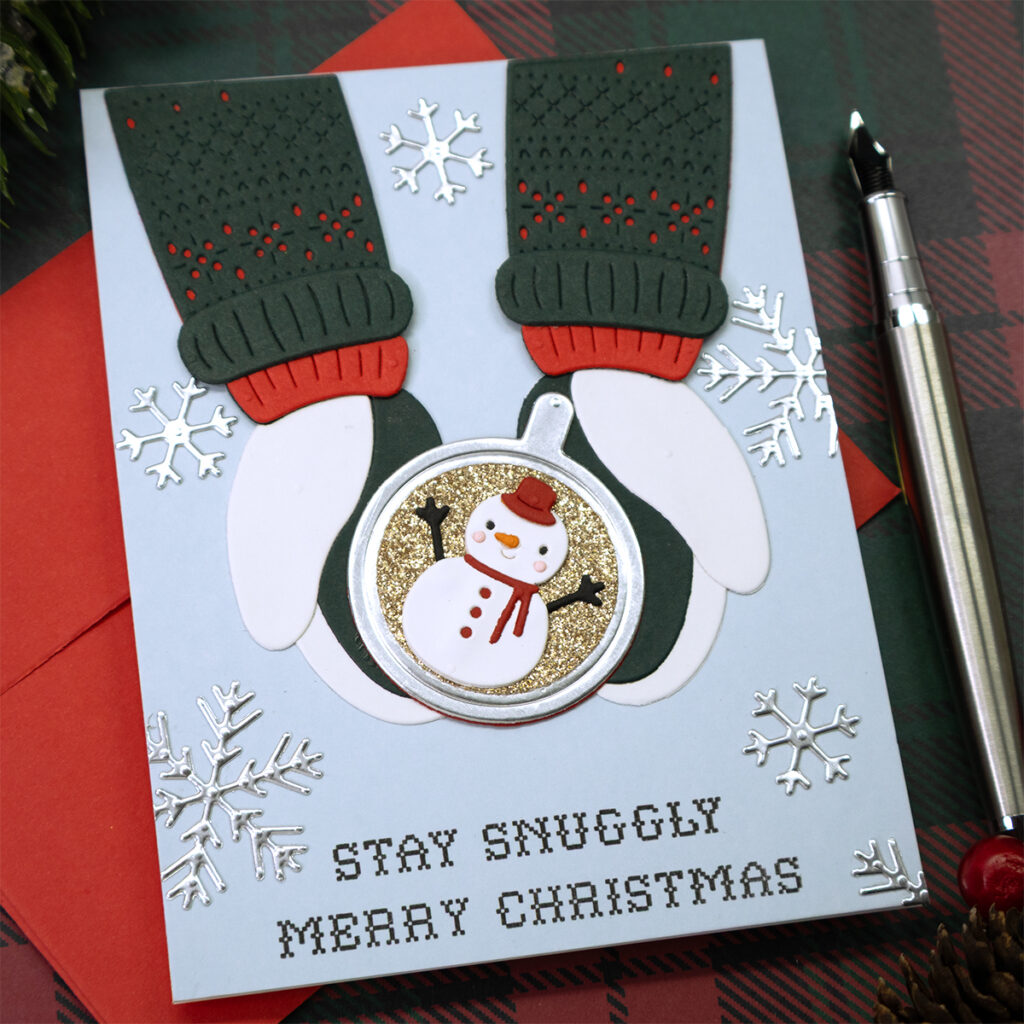
Stay Snuggly
- Stamp a couple of sentiments to the bottom of a 5 ½” x 4 ¼” panel cut from Spellbinders cardstock in the color “Glacier”. Use clear stamps included in the Spellbinders “Stay Snuggly” stamp set.
- Die cut the elements for the front panel using die cutting plates included in the Spellbinders “Mugs & Mittens” die set.
- Use strong liquid adhesive to glue the pieces together.
- Adhere the panel to the front of an A2 size note card and enjoy!
Sending Winter Hugs
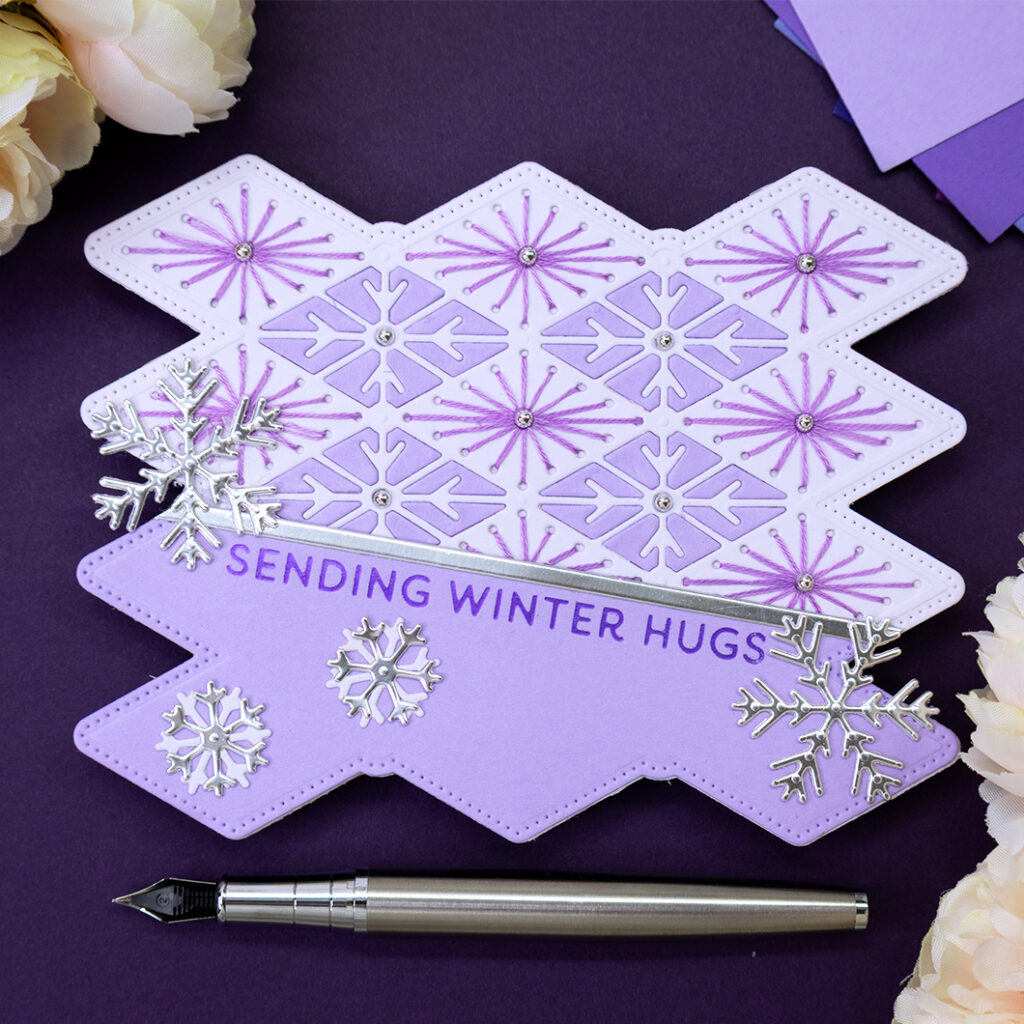
- Create a fun shaped note card with metal plates included in the Spellbinders “Frosted Stitch” stitching die set.
- Use DMC floss to stitch the front panel and use strong liquid adhesive to adhere it to the front of the fun shaped note card. (Only stitch the sections that will be visible!)
- Do the die cutting inlay technique onto the front panel. Cut out the pieces for this technique from a different shade of cardstock. Only do this technique over the section that will be visible.
- Die cut a solid panel using the largest plate included in the Spellbinders “Frosted Stitch” stitch die set. Then cut this solid panel in half on a diagonal.
- Hot foil the sentiment “Sending Winter Hugs” onto this solid panel using a hot foil plate included in the Spellbinders “Artic Glimmer” set.
- Adhere the bottom half of the solid panel over the stitched panel.
- For some added interest add flat back silver beads to the center of each stitched section, and a few die cut snowflakes.
- Create a pocket shaped envelope with die cutting plates included in the Spellbinders “A2 Gift Card Holder and Envelope” die set.
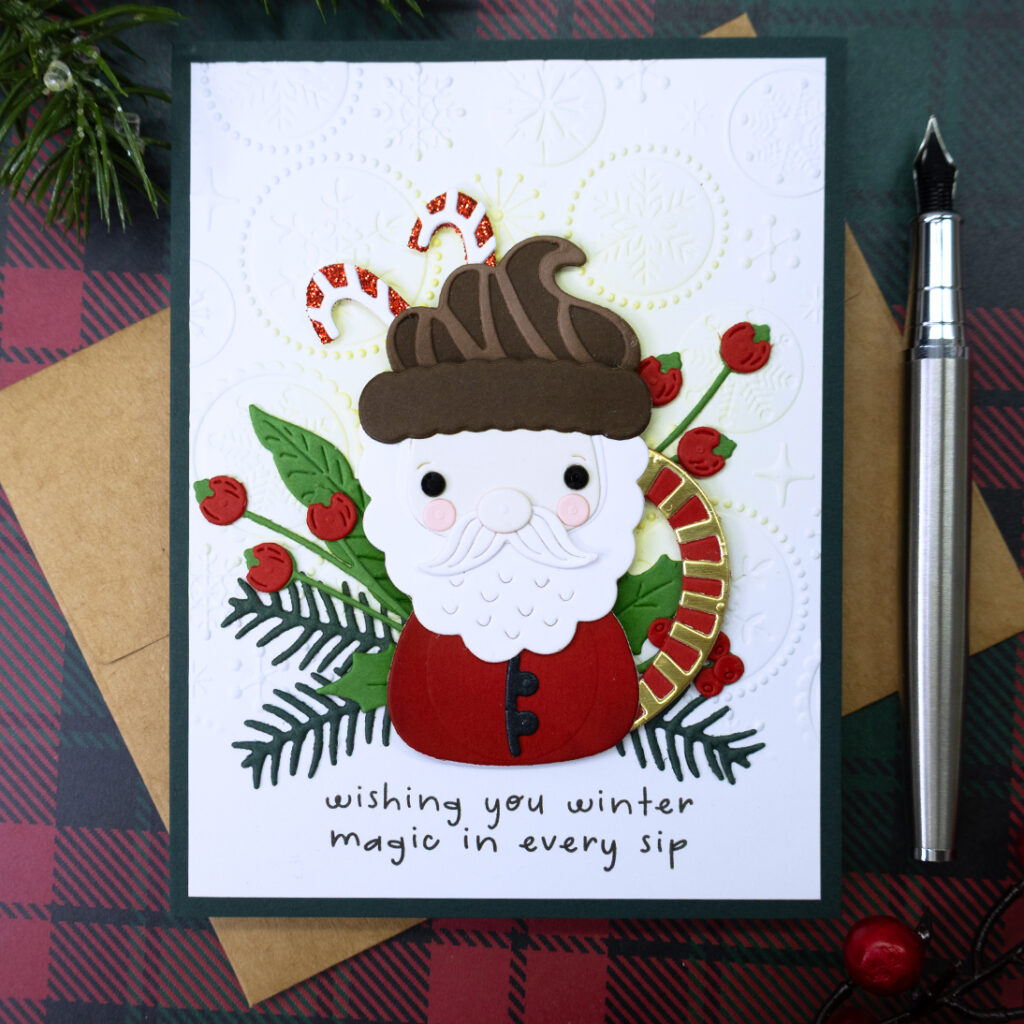
Cups of Cheer
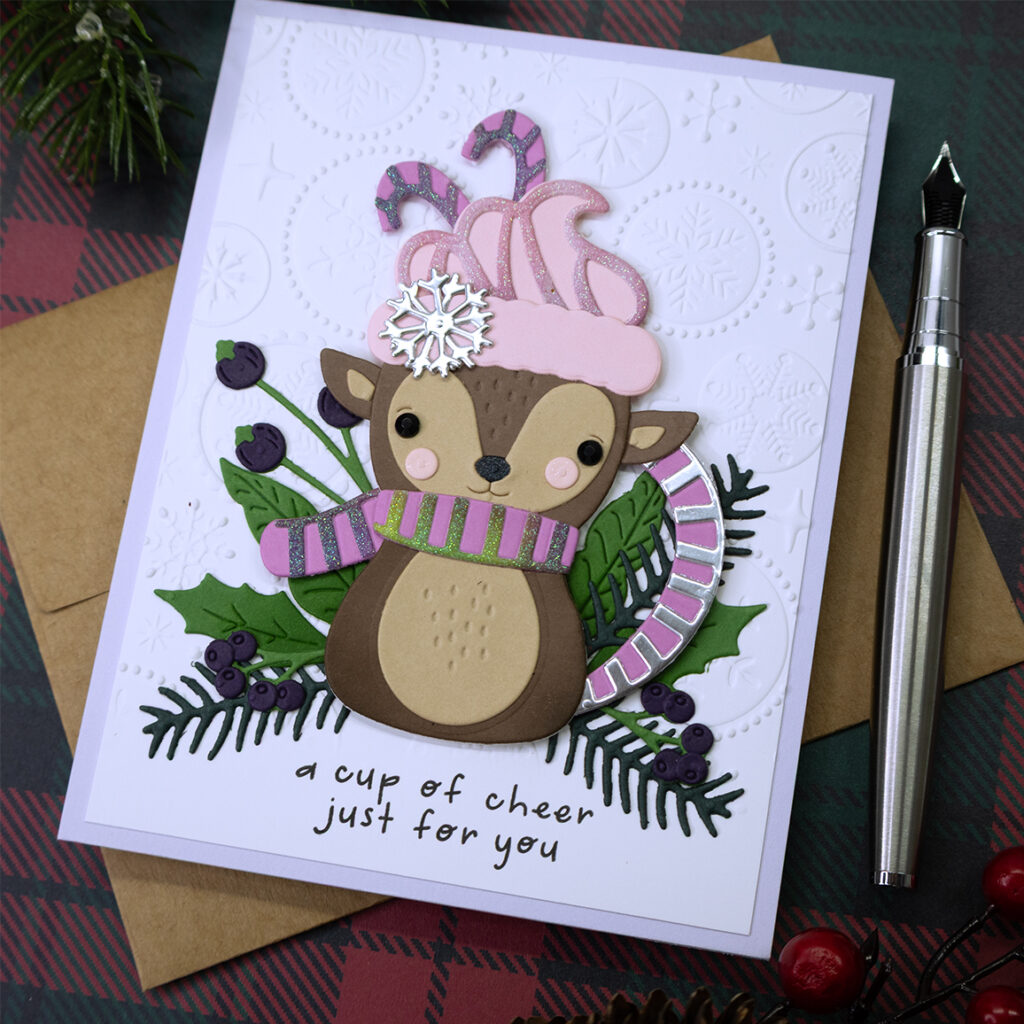
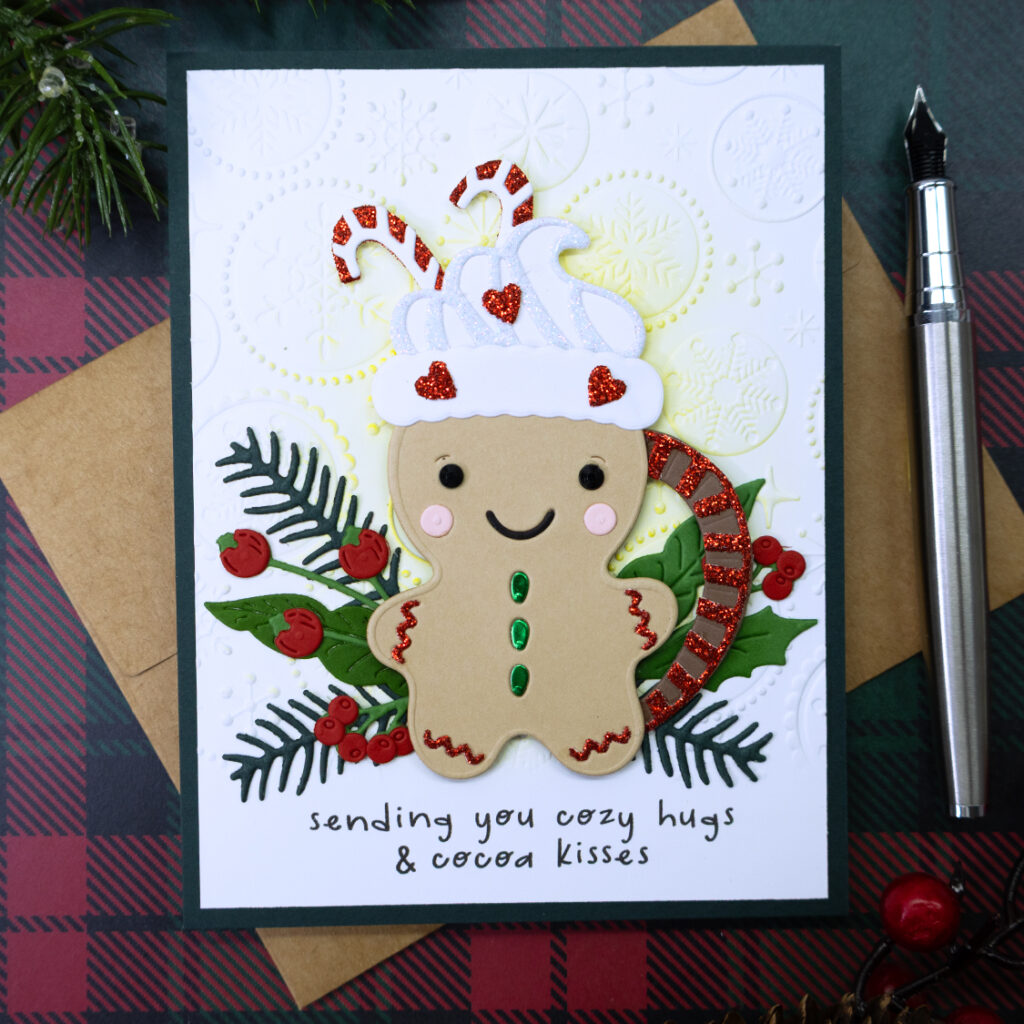
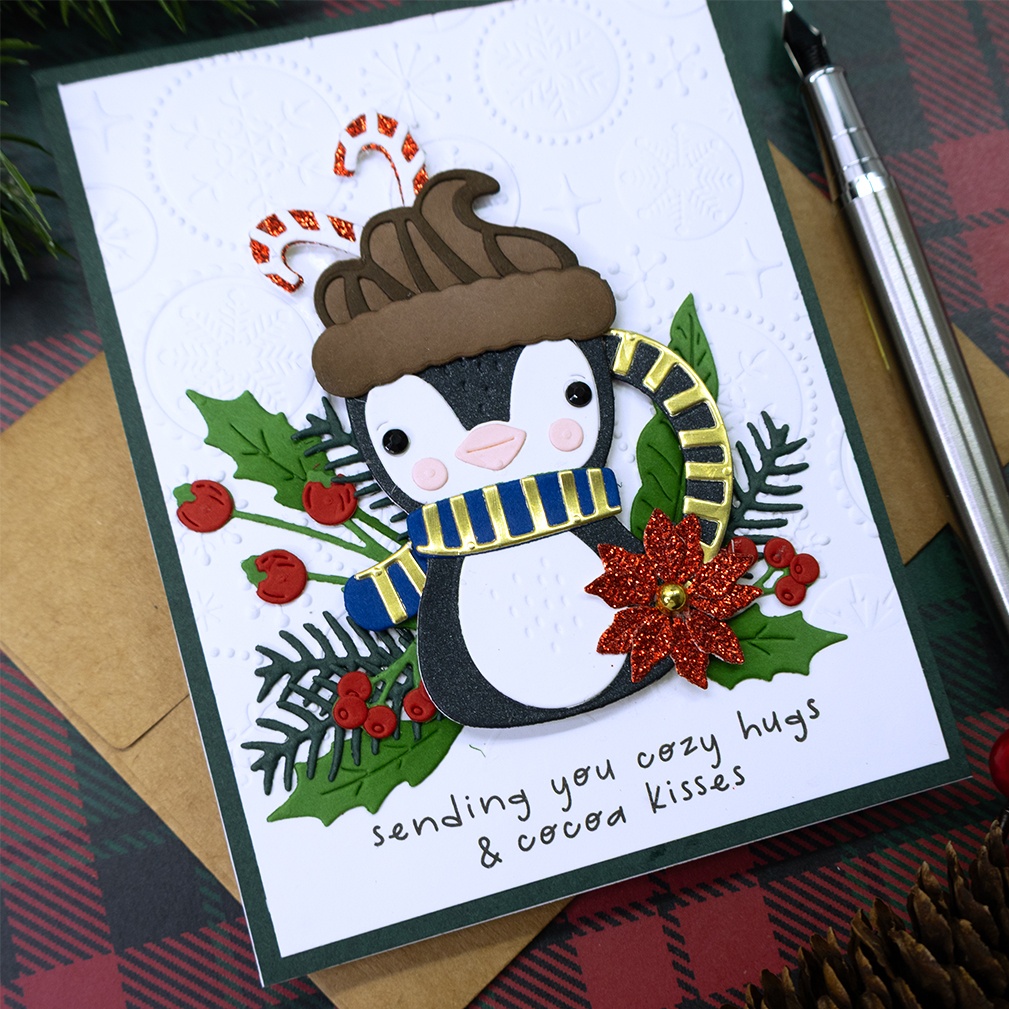
- Add texture to a white 5 ½” x 4 ¼” panel with the Spellbinders “Starry Snowfall” 3D embossing folder. Adhere it to the front of an A2 size note card. Make sure to leave a section at the bottom of the white panel without any texture so you can stamp a sentiment later .
- Use the Spellbinders “Stay Snuggly” stamp set and black ink to stamp a sentiment onto the font panel.
- Die cut the leaves, springs and berries with metal plates included in the Spellbinders “Skating Into The Holidays” die set.
- Die cut the mugs with die cutting plates included in the Spellbinders “Cocoa Greetings” die set.
- Use the bonus item included in the Spellbinders July 2025 Deluxe caboodle club to create a gingerbread cookie mug and enjoy!
I hope you felt inspired and some of this information was helpful to you! If you create something inspired by this post, make sure to tag me on instagram! Thank you for visiting and happy crafting!
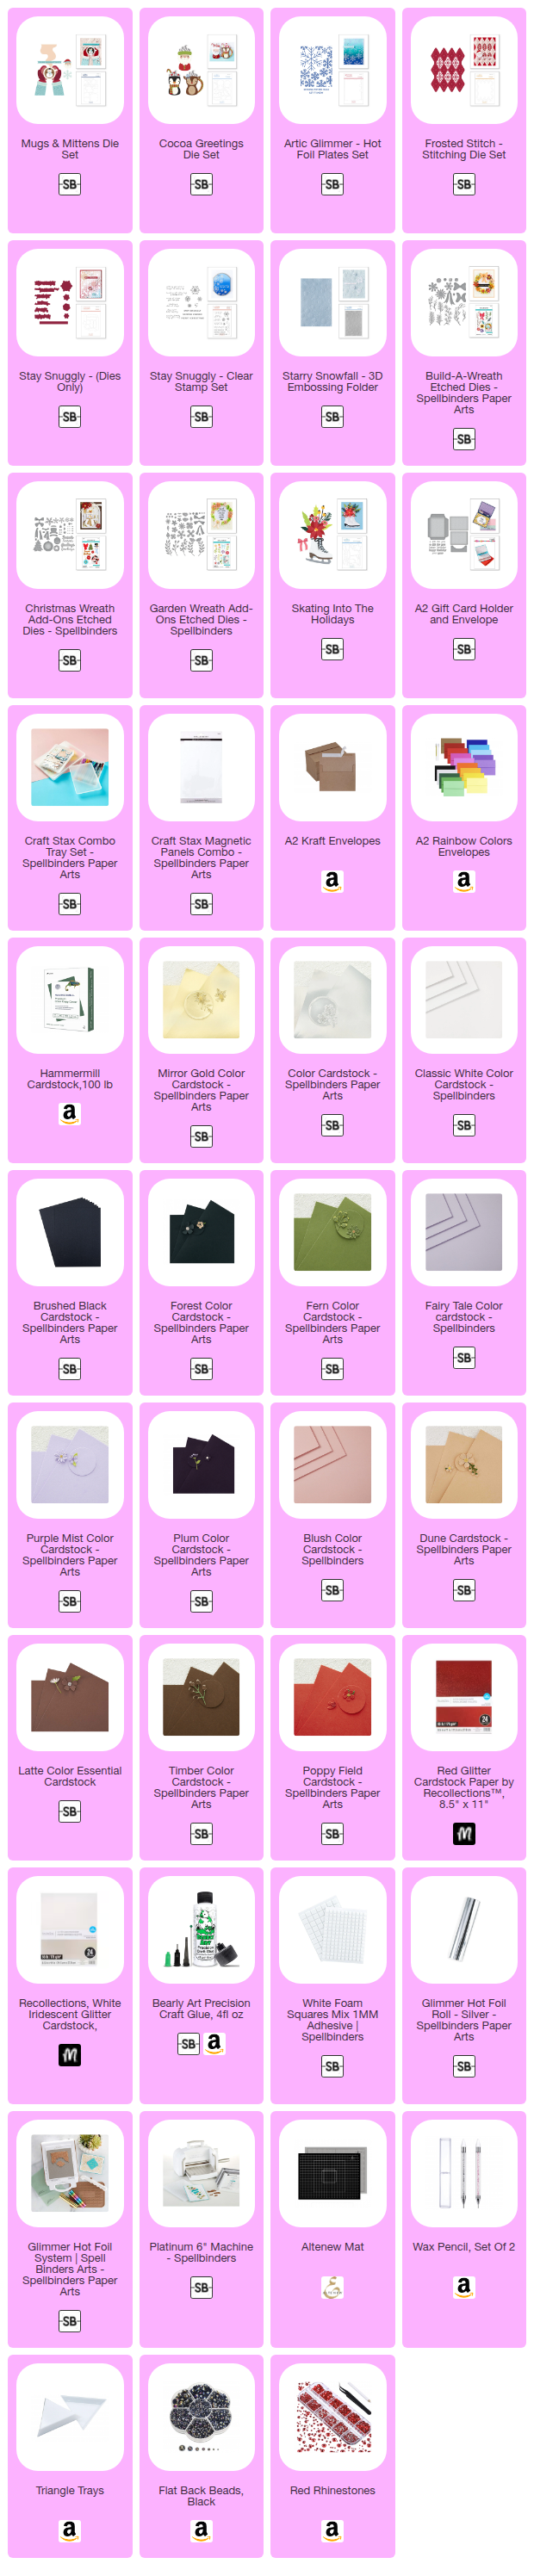
SUPPLIES
I have listed below all of the products that I used to make today’s note cards. Compensated affiliate links may be used at no cost to you, and I only use and recommend products that I love! As always, thank you for your support! (If the visual supply list is not shown below, you can CLICK HERE to access it!)
-
-
8 months
Tagged Spellbinders October 2025 Clubs