Distress Oxide Inks
Swatches and Storage Solution!


Hello crafters! A few weeks ago, I found myself wasting my precious time trying to figure out the color of Distress Oxide Ink I had used on a note card that I had created a while ago, so I could make another one. That was when I thought to myself: “Well, if I had already created my Distress Oxide inks swatches, I wouldn’t be wasting my time right now, would I?”
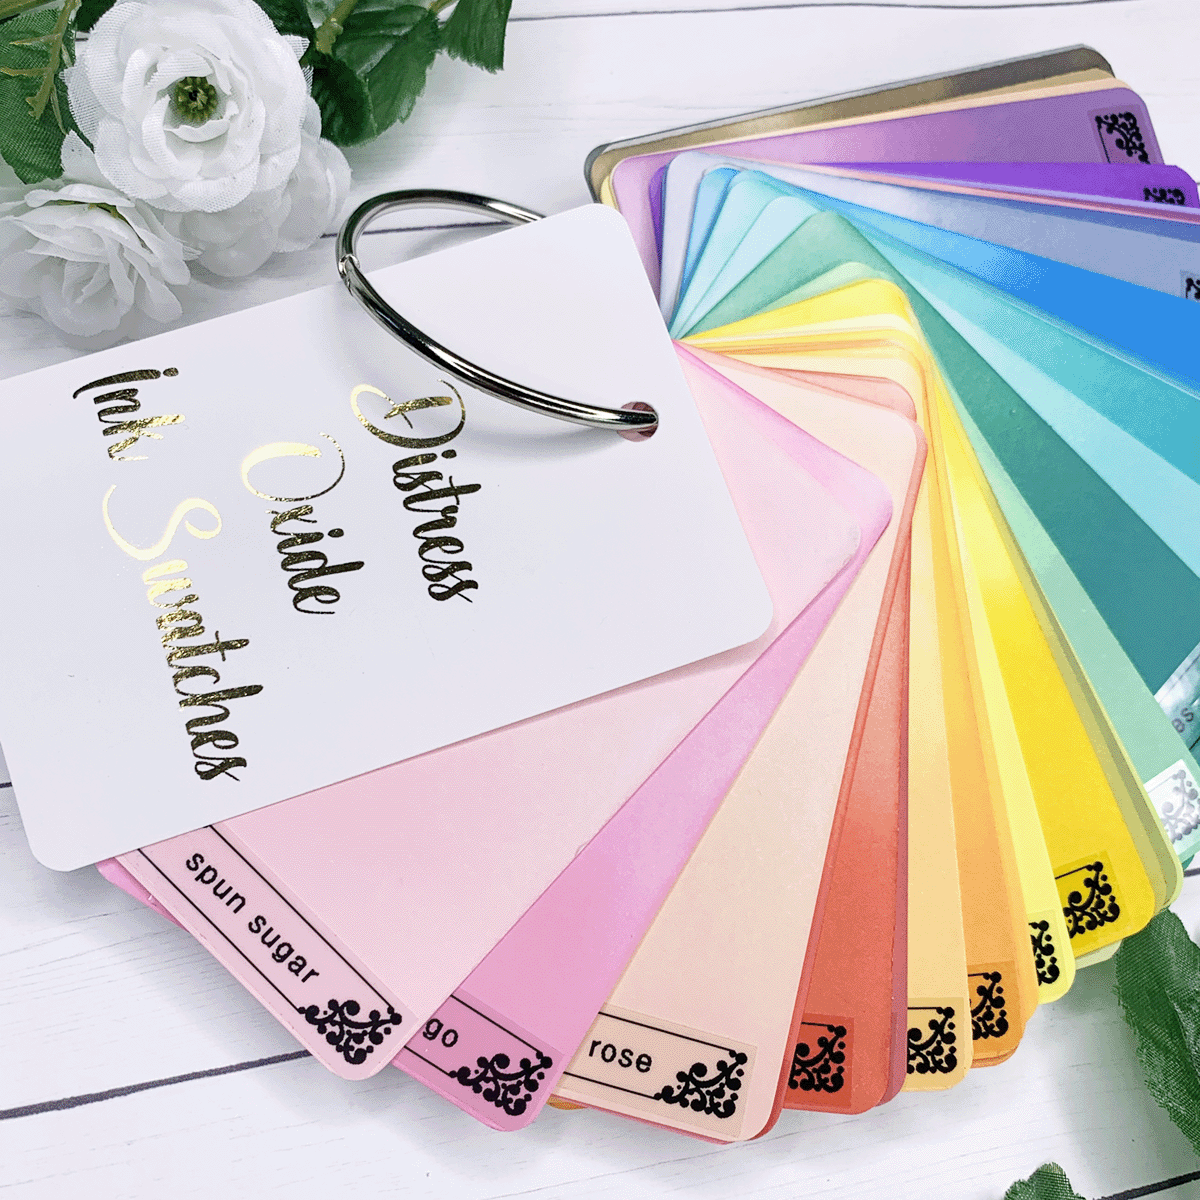
So, after I figured that out (by quickly swatching all of my blues and greens on a piece of scrap paper) the very next day, I decided to finally make the time to create swatches of my Distress Oxide inks, and you can click here to watch the entire process. Swatches of the inks, markers, paints, and even the cardstock that we own can be a great tool! They allow us to easily know what we have and help us figure out the colors that best match our projects! Swatches of inks and paints can be particularly helpful because the color on the packaging is not the true color of the product. So, even though creating swatches of the products that you have will take some time (not a lot though!), it will definitely be worth it!
Because I have a small craft room, I keep my ink pads and ink blending tools on a desk organizer that I actually attached to my wall! I have one ink blending tool for each color because since I used Distress Oxide inks very often, it keeps me from having to clean them up every time I need to switch colors. However, if you are just starting to get to know Distress Oxide inks, and don’t want to buy one ink blending tool for each color (yet!), you can still have the luxury of not having to clean them up by simply buying a couple of blending tools and one foam pad for each color that you own. The foam pad on the ink blending tool comes off and you can switch them every time you switch ink color! That is how I started! Replacement foams are inexpensive and there are actually two types. The original one, that in my opinion is for the experts in blending (or very light handed crafters!), and the domed foam that I like to use because I think it makes it easier to get a smoother result.
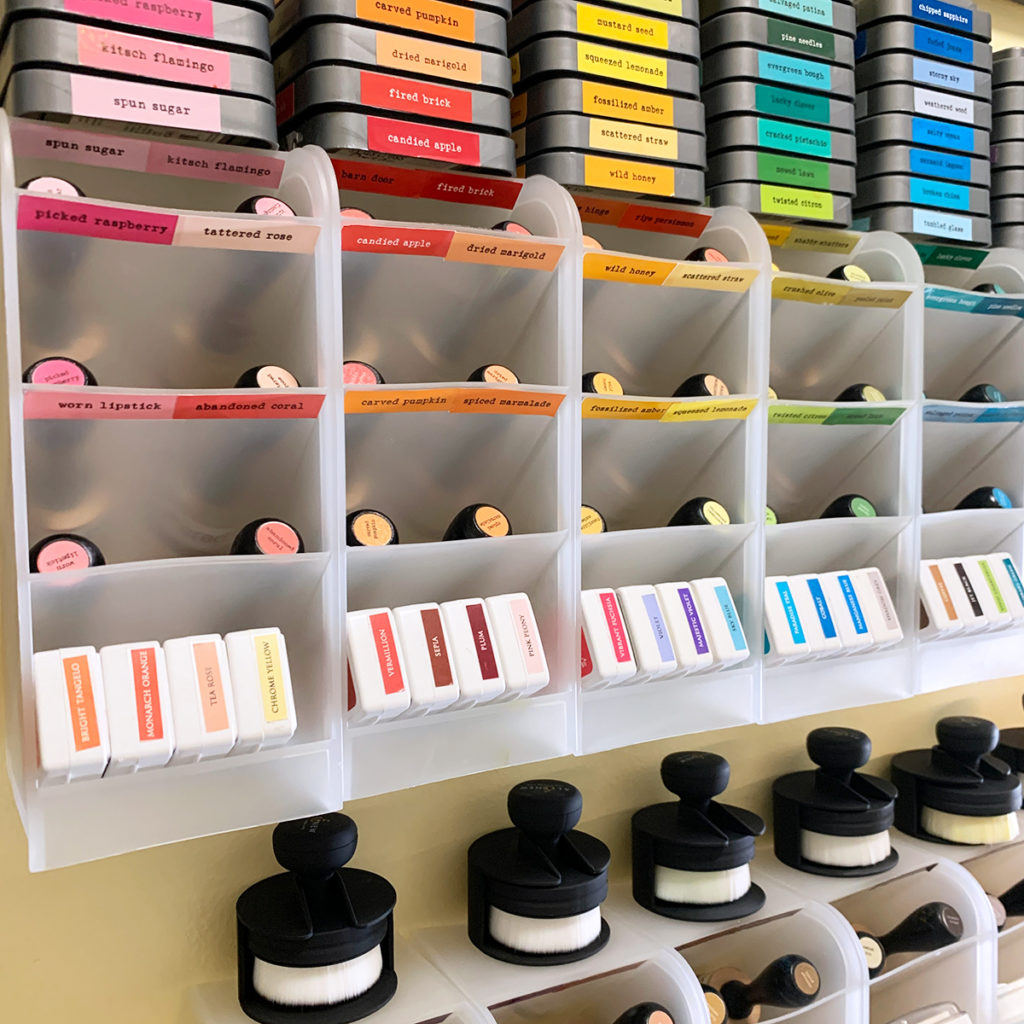

To label all of my ink pads I downloaded a label sheet that is available at rangerink.com. There we can find free download label sheets for all Ranger products, and I love it! There is also a .75” round label sheet that is intended for labeling the caps of distress stains and paint bottles, but I use it to label my ink blending tools!
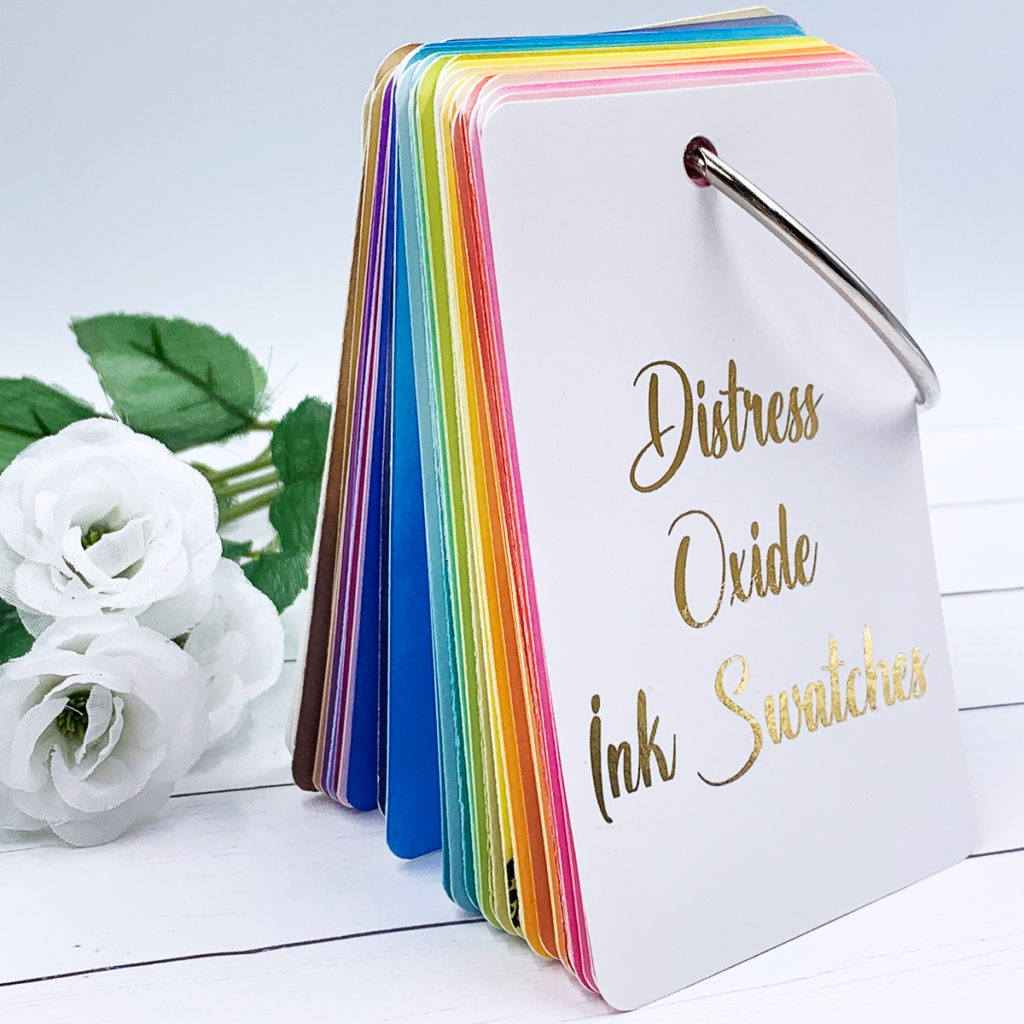
To create my swatches I used Neenah heavyweight white cardstock. I cut each page into 8 pieces of 2 ¾” x 4 ¼”, and I rounded the corners to make it perfect! For each color swatch, I started with a very dark shade at the button of the cardstock and went lighter towards the top. To label each swatch, I used my Brother label maker. Make sure to check the video below for tips on how to use this label maker in a more effective way! After I finished watching all of my ink pads, I perforated each one with my Crop-A-Dile Multi-Punch tool and placed it on a 2” binder ring. I keep my swatches hanging over my desk and I have been crafting happily ever after!

I hope you found this helpful, and thank you so much for visiting my blog today! At the end of this post there is a list of all products mentioned, along with links for the free printable labels from Ranger. Have a wonderful day and see you next time!

SUPPLIES
Free Printable Labels:
- Distress Oxide Ink – Mini Ink Pad Labels
- Distress Oxide Inks Labels
- Distress Oxide Inks- Round – .75” Circle Punch Labels
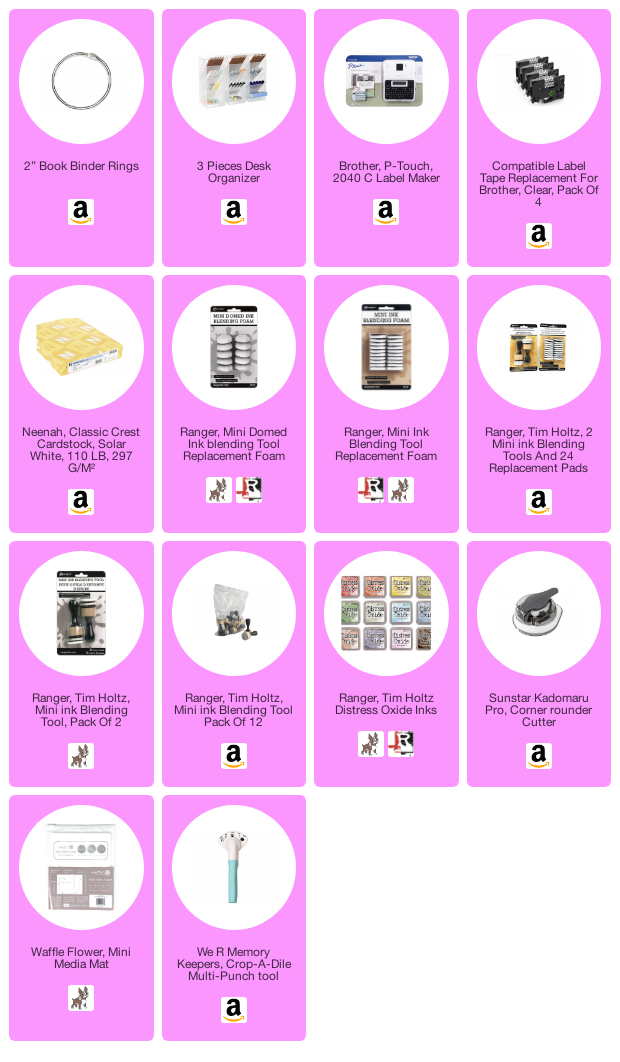
I have listed below all of the products that I used to make today’s note cards (if they are still available). Compensated affiliate links may be used at no cost to you. All products were personally purchased, and I only recommend products that I love! As always, thank you for your support!
-
-
3 months
Tagged craft room tour